Isolate clusters with Netris and NVIDIA BCM
One deployment model for vCluster is through private nodes. It allows for stronger isolation between the tenant clusters, since the Pods in a tenant cluster don't share the same Nodes.
Unlike cloud providers that offer stable network abstractions for automation, bare metal infrastructure lacks these built-in capabilities, making network configuration and management significantly more complex. This guide shows how vCluster with Netris delivers an equally seamless integration for bare metal environments. It enables you to isolate tenant clusters spanning mixed bare metal and VM private nodes that share the same underlying hardware with an exclusive network.
Netris server clusters provide network abstractions that can be configured in different ways depending on your hardware setup—including access ports, trunk ports, or other network configurations.

The goal of this guide is to have a tenant cluster on an isolated network:
- Tenant cluster managed by vCluster platform
- Control plane is reachable on the network behind a stable address
- BCM server provisioned and joined as a private node
- KubeVirt VM provisioned and joined as a private node
- Nodes share the same network and can freely communicate
- Hosts on other networks cannot reach the Nodes or workloads (unless explicitly peered)
Like in traditional Kubernetes clusters, Nodes share the same network domain. Instead of control plane nodes, the vCluster control plane runs as (multihomed) Pods in the control plane cluster. This is transparent to the tenant cluster; however, the control plane cluster remains inaccessible.
This can be repeated for any number of clusters. The VPCs of each tenant cluster may also be peered to access shared services across clusters.
Netris
Netris provides software for managing and automating the switch fabric in a datacenter.
We use the Netris controller to manage the architecture logically (by servers being members in server clusters) while the Netris agent will implement it on the physical switches.
In this guide, we use VLAN trunk ports to attach the control plane and VMs to the exclusive network, while bare metal servers connect via access ports.
Prerequisites
We assume the following:
- Hardware deployed
- Netris controller & agent installed & configured
- Networks configured in Netris (VPC and Server cluster) and BCM (See below)
- Default network with BCM head node
- Control plane cluster network
- vCluster tenant network
- Netris controller API is reachable from the control plane cluster network
- BCM head node (API) is reachable from the control plane cluster network
- Control plane cluster set up (See below)
- BCM head node must be able to run commands on servers with plain
sshwhen they are on a different BCM network - At least one unused server in BCM is available
Prepare networks
We must prepare the networks for the control plane cluster and a vCluster tenant in Netris & BCM.
Netris server clusters
-
Create ServerClusterTemplates
Create a template for the control plane cluster nodes:
serverClusterTemplate.json[{"ipv4Gateway": "192.168.55.254/21","ipv4DhcpEnabled": true,"postfix": "nodes","serverNics": ["eth9","eth10"],"type": "l2vpn","vlan": "untagged","vlanID": "auto"}]Create another one for the vCluster tenant network with a non-overlapping CIDR, we choose
192.168.67.254/21. -
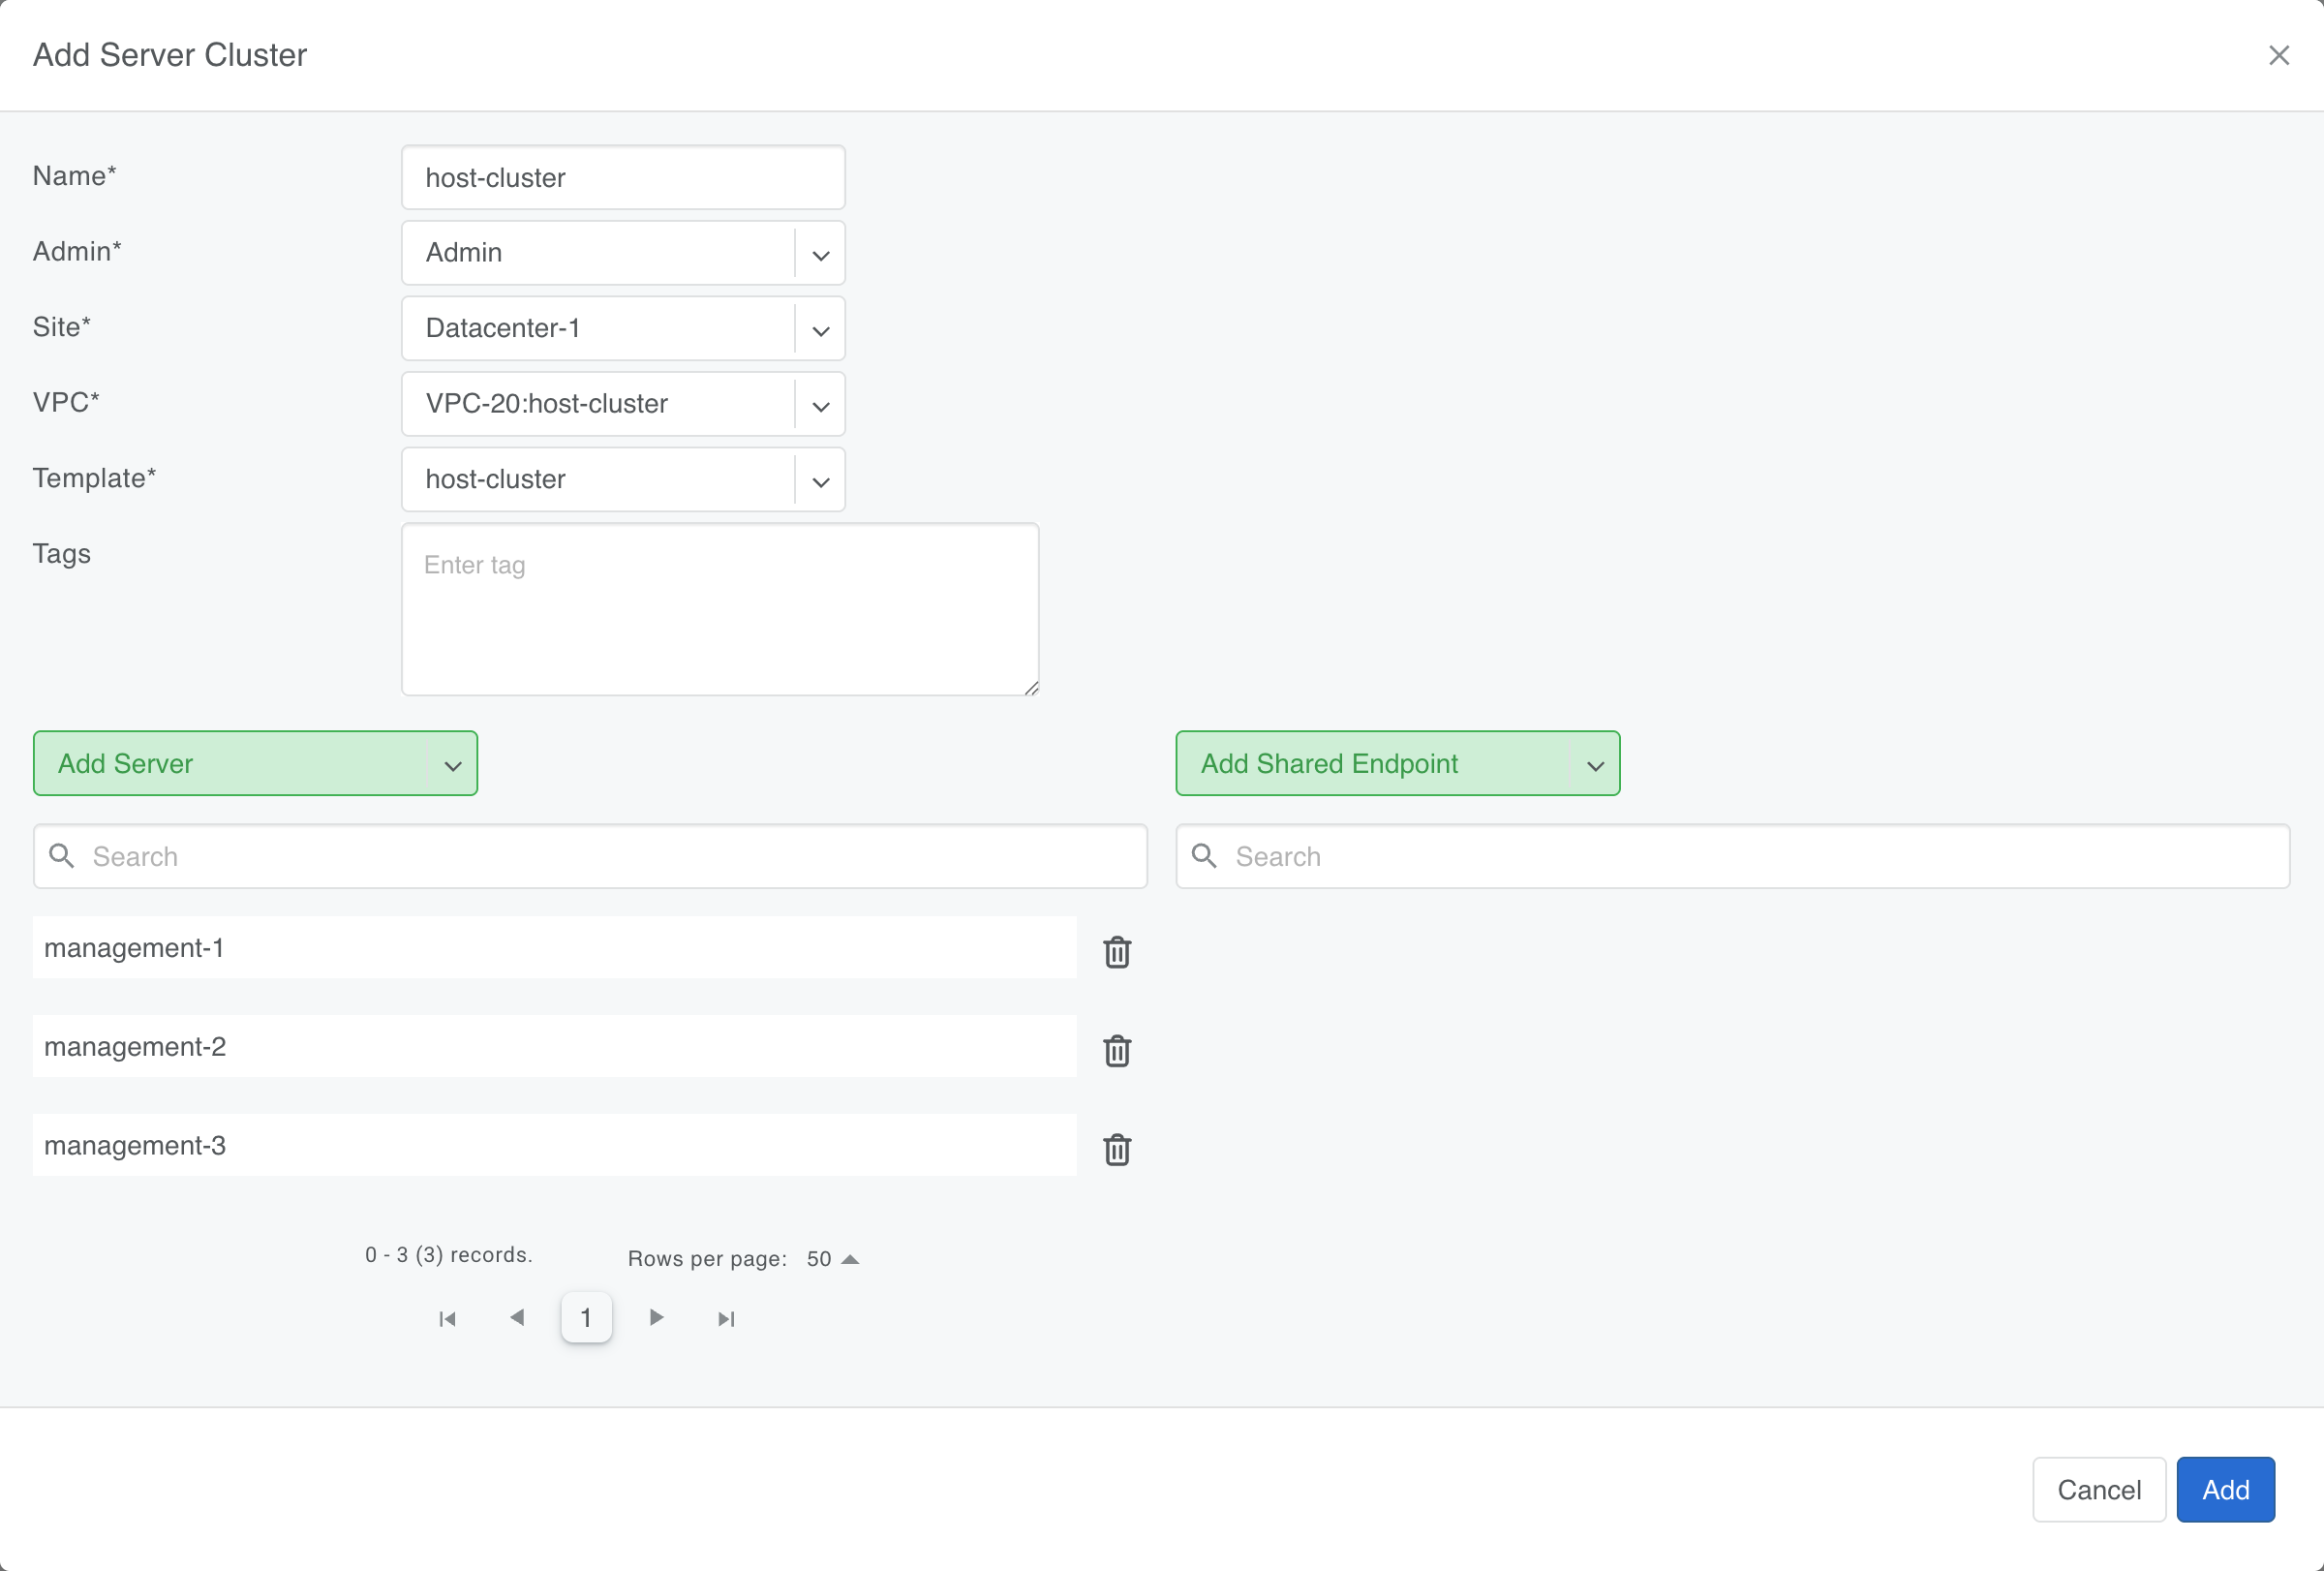
Create ServerClusters
Create a ServerCluster for each of the networks using the respective templates.
For the control plane cluster, add the shared servers as endpoints.
This configures the connected ports as access ports within the server cluster V-net, and it's not necessary to make any adjustments in the host OS.
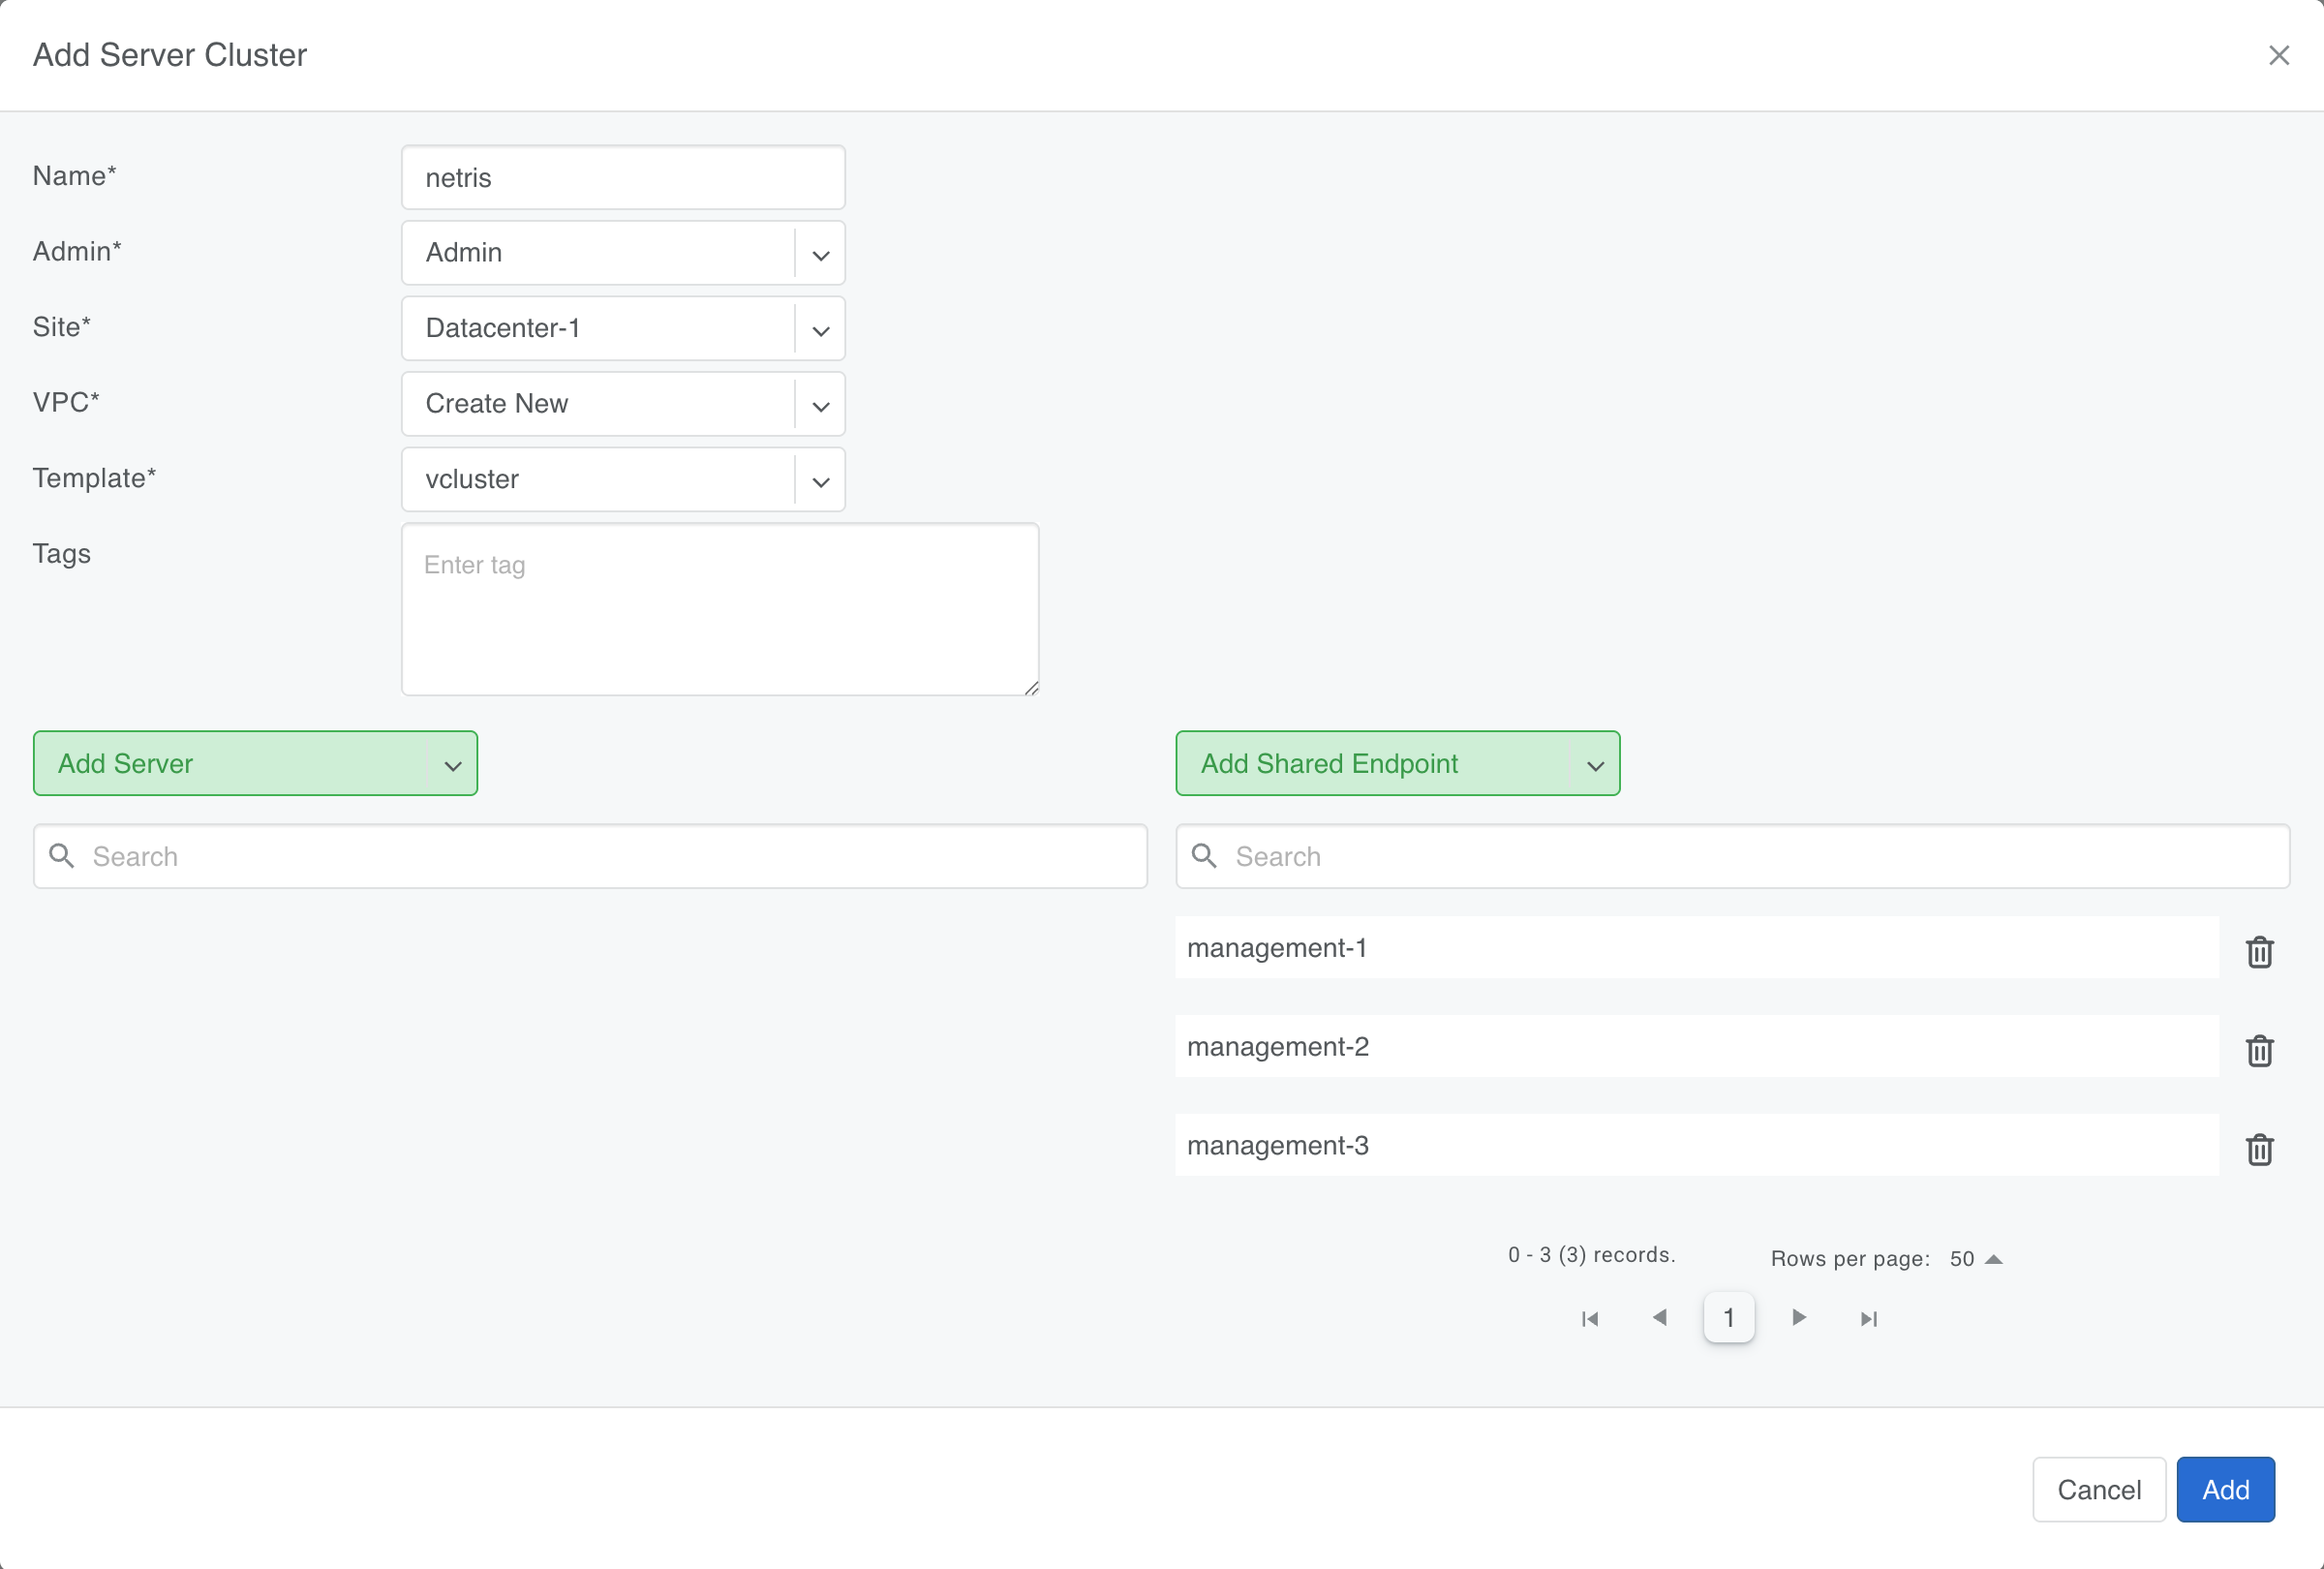
The one for the tenant network doesn't have any endpoints with untagged ports until later. However, we add the control plane cluster servers as shared endpoints.
This configures the ports on the shared servers as trunk ports (additionally) carrying tagged VLAN traffic. These frames then ingress on a vlan interface that is a port on the bridge for the tenant we'll configure later.
-
Look up the tenant network V-net's VLAN id
Netris creates a "V-net" and assigns it a VLAN id. We need the VLAN id (here it's
3) later when we create the bridge.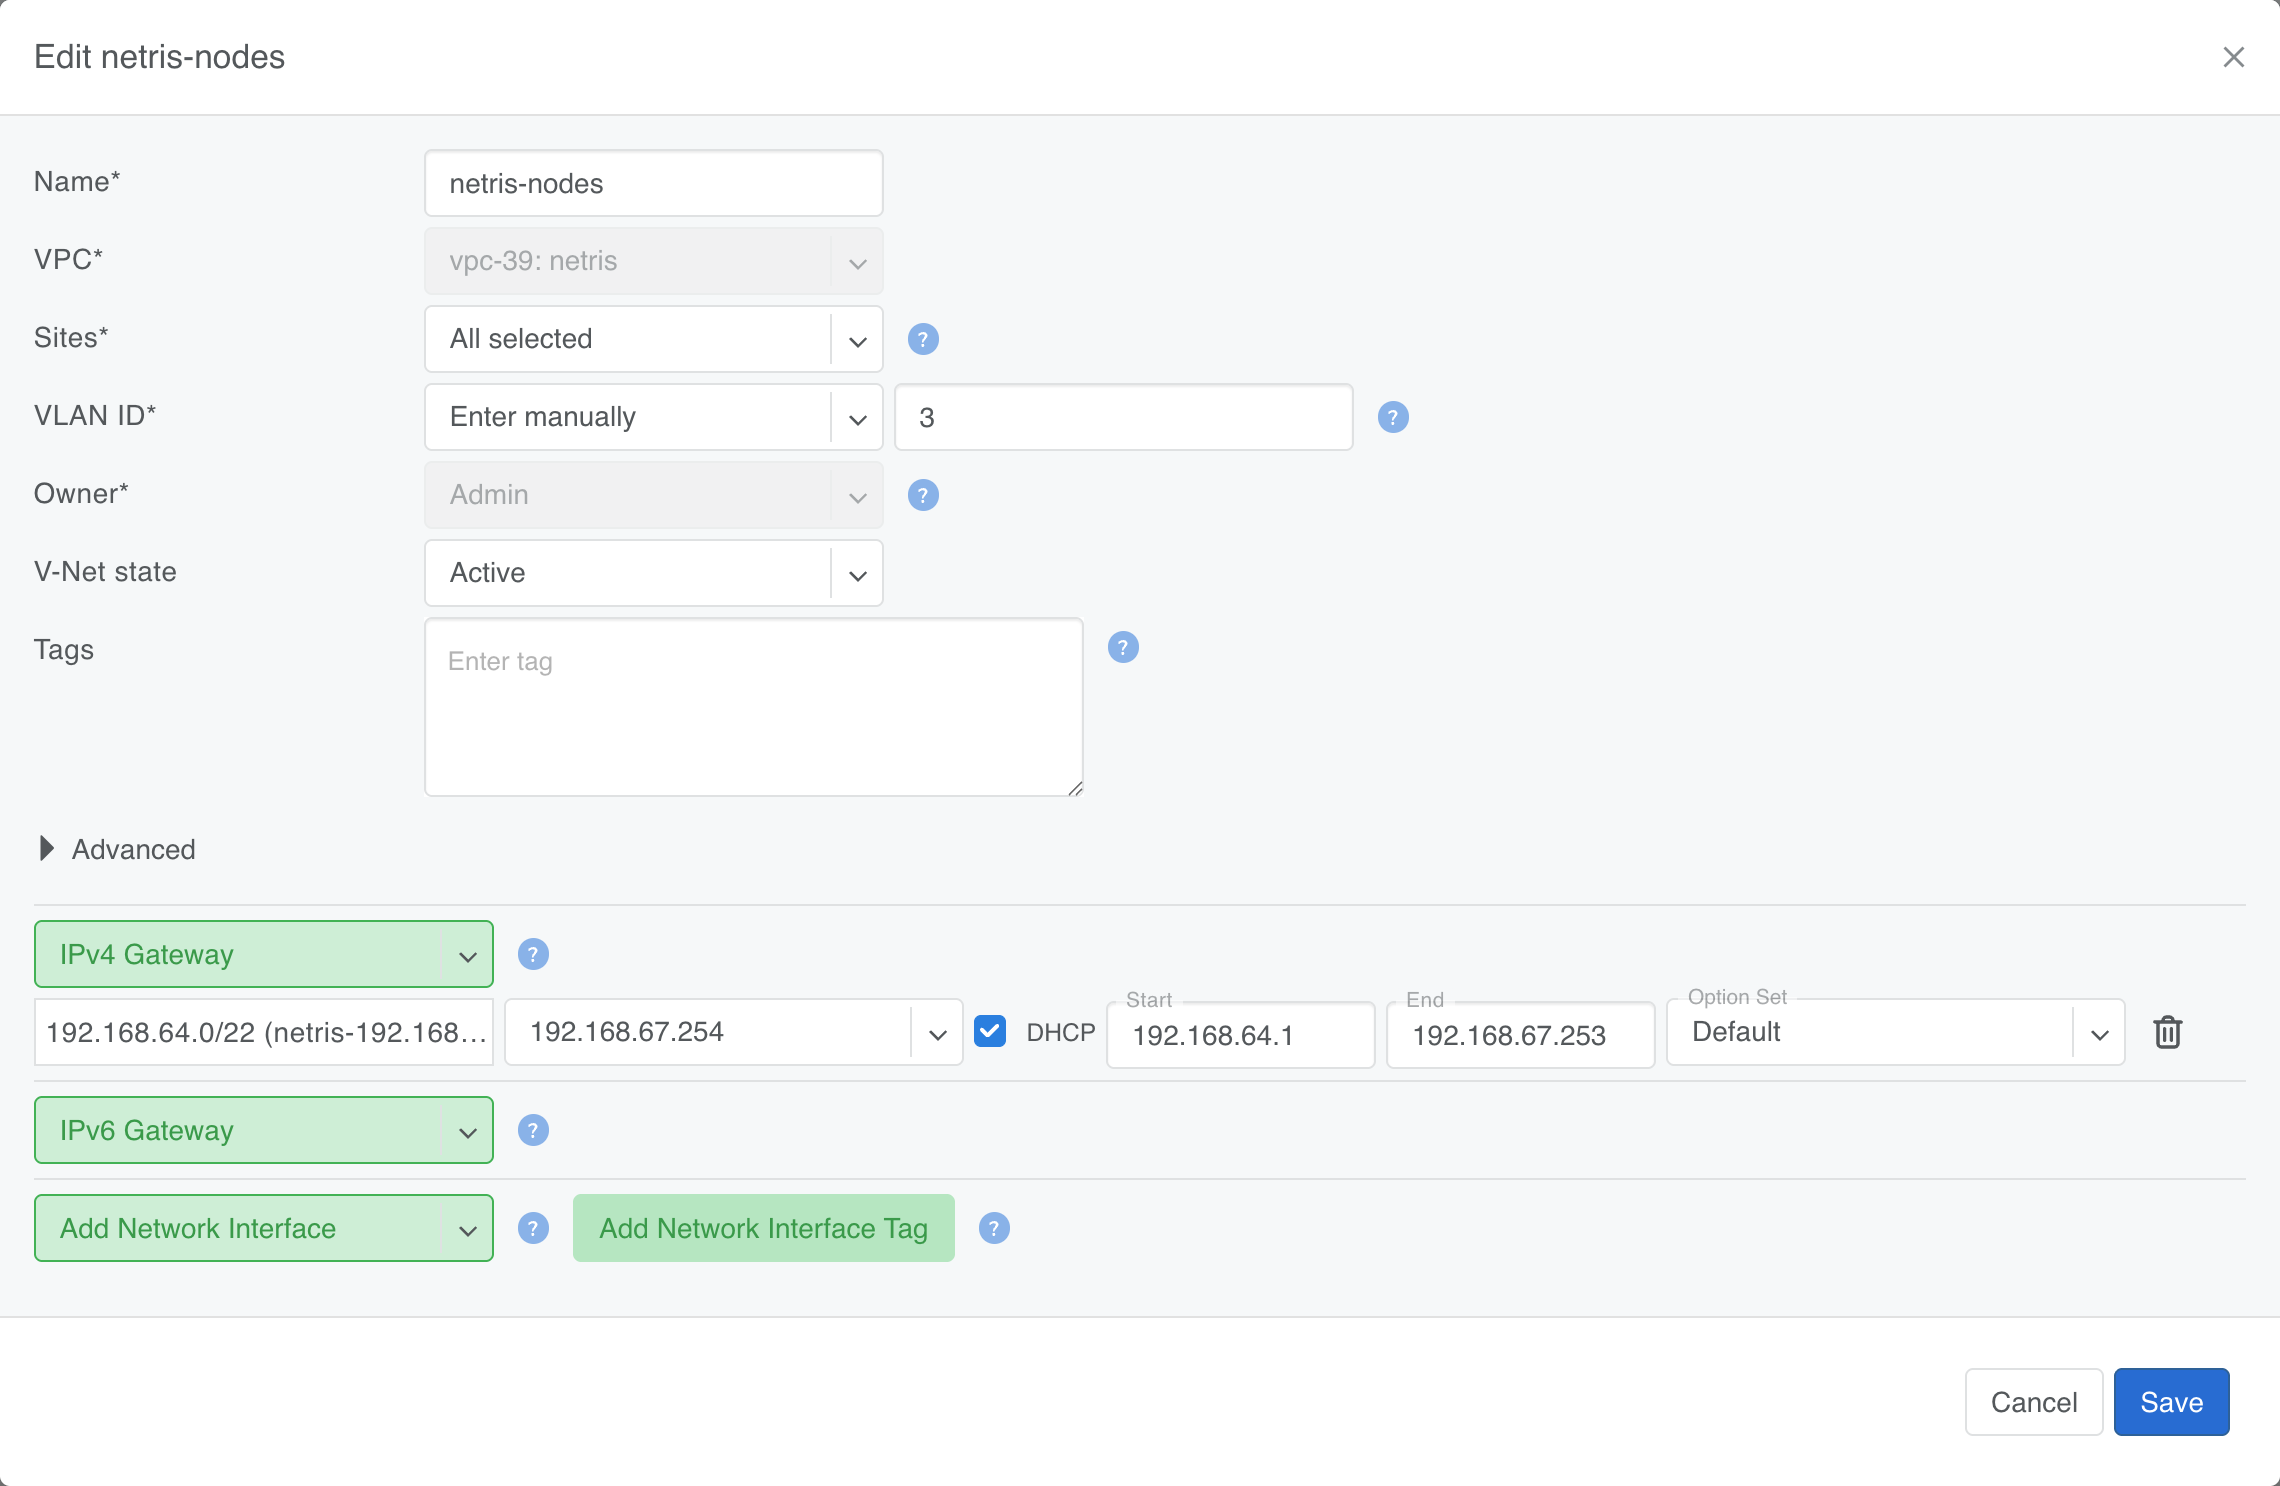
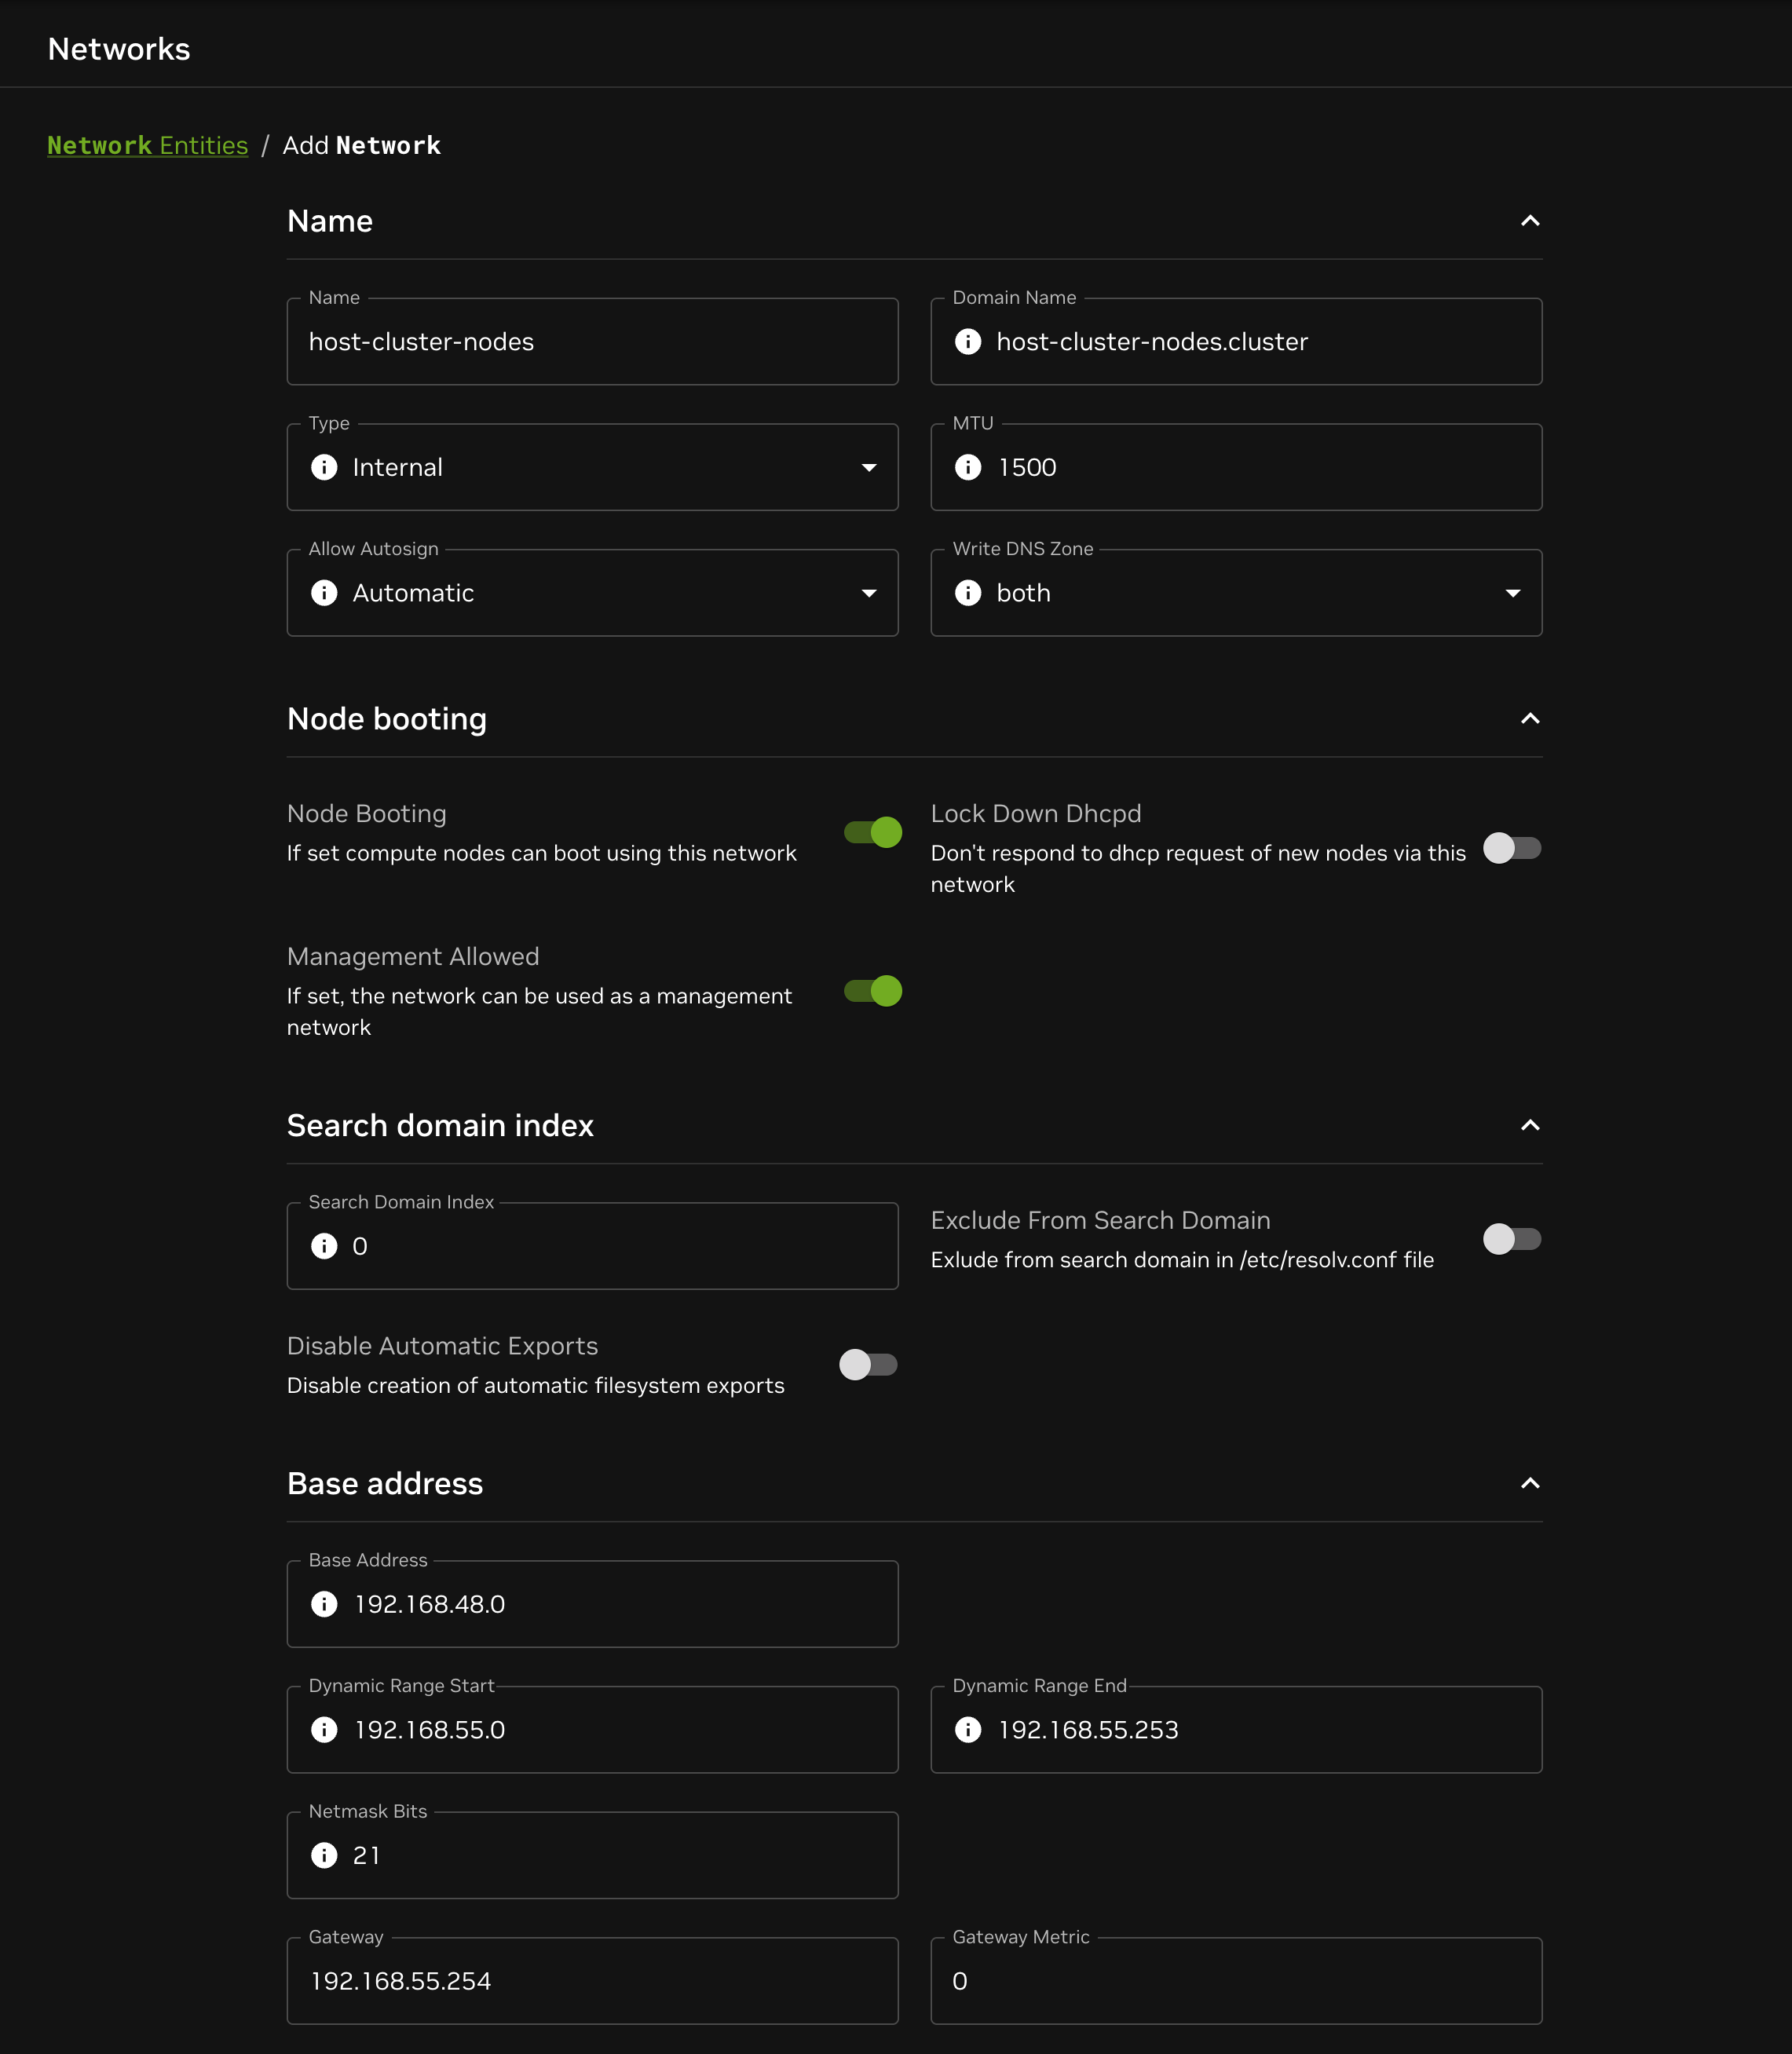
BCM networks
Create networks in BCM analogous to the server clusters in Netris:
Prepare control plane cluster
It is advisable to install Kubernetes after first configuring the network.
Install Kubernetes
Most Kubernetes distributions should work without any modifications.
There must be a default StorageClass available.
Install compatible CNI plugin
Since the control plane cluster Nodes handle VLAN traffic, some CNI plugin configurations are not compatible.
We have tested the following plugins:
- Flannel
- Calico in VXLAN mode (eBPF mode seems to drop VLAN tagged frames)
- Cilium
- Must set
cni.exclusive: false - Must set
bpf.vlanBypass: '{0}'
- Must set
Create bridge for tenant network on control plane cluster nodes
We create an unfiltered bridge on all control plane cluster nodes that is an extension of the Netris fabric for the tenant server cluster.
The bridge has a vlan interface with the VLAN id that we looked up earlier as one of its ports.
VLAN_ID=3
INTERFACE=bond0
ip l add link $INTERFACE name $INTERFACE.$VLAN_ID type vlan id $VLAN_ID
ip l set up $INTERFACE.$VLAN_ID
ip l add name br-$VLAN_ID type bridge
ip l set up br-$VLAN_ID
ip l set name $INTERFACE.$VLAN_ID master br-$VLAN_ID
Create NetworkAttachmentDefinition
Create a NetworkAttachmentDefinition that uses the bridge we just created:
apiVersion: k8s.cni.cncf.io/v1
kind: NetworkAttachmentDefinition
metadata:
  name: vcluster-netris-vms
  namespace: vcluster-platform
spec:
  config: |
    {
      "cniVersion": "1.0.0",
      "type": "bridge",
      "bridge": "br-3",
      "promiscMode": true
    }
Install tooling
The following tools are required in the control plane cluster to manage interfaces that allow adding Pods and VMs to the tenant cluster network.
Multus
See install instructions in Multus CNI.
Multus adds additional interfaces to the vCluster control plane Pods and KubeVirt VMs to attach them to the tenant cluster VLAN.
KubeVirt
See install instructions in KubeVirt.
KubeVirt works together with Multus and manages the VMs in the control plane cluster.
The example below also uses the containerized data importer to create a large enough disk to install and run Kubernetes on top of Ubuntu 24.04.
Start vCluster platform
Running vCluster platform and registering grants you 2 weeks of full access to all platform features, including private nodes which is required for this setup.
vcluster platform start
Provide your email address and complete the onboarding process in the browser.
Deploy vCluster
The following steps can be repeated for additional vCluster deployments.
Deploy vCluster control plane
-
Create Netris credentials secret
First, create a secret with your Netris credentials:
apiVersion: v1kind: Secretmetadata:name: netris-credentialsnamespace: vcluster-platformstringData:url: "https://netris.example.com/api"username: "admin"password: "password" -
Create vCluster with Netris integration
Use the following configuration to enable the Netris integration with automatic kube-vip setup:
vcluster.yamlintegrations:netris:enabled: trueconnector: netris-credentialskubeVip:serverCluster: netris-nodesbridge: br-3ipRange: "192.168.67.253-192.168.67.253" # fixed ip for this guidecontrolPlane:statefulSet:highAvailability:replicas: 3backingStore:etcd:embedded:enabled: truecoredns:enabled: trueprivateNodes:enabled: trueConnect to the host Kubernetes cluster and run:
vcluster platform create vcluster -n vcluster-netris netris --values vcluster.yaml
The control plane is accessible on the exclusive network at a fixed IP by means of kube-vip and the automatic configuration with information from Netris. For more details on kube-vip configuration, see Kube-vip.
Join bare metal server
Configure BCM node provider
-
Create BCM credentials secret
apiVersion: v1kind: Secretmetadata:name: bcm-credentialsnamespace: vcluster-platformstringData:username: "your-bcm-username"password: "your-bcm-password" -
Create BCM Node Provider
apiVersion: management.loft.sh/v1kind: NodeProvidermetadata:name: bcm-netrisspec:bcm:secretRef:name: bcm-credentialsnamespace: vcluster-platformendpoint: "https://your-bcm-endpoint.com"nodeTypes:- name: dgx-nodenodes:- dgx-01properties:bcm.vcluster.com/network-interface: bond0 -
Update vCluster configuration
Add the BCM node provider to your vCluster configuration using auto-nodes:
vcluster.yamlprivateNodes:enabled: trueautoNodes:- provider: bcm-netrisstatic:- name: dgx-poolquantity: 1nodeTypeSelector:- property: vcluster.com/node-typevalue: dgx-nodeproperties:netris.vcluster.com/server-cluster: netris-nodes -
Verify node provisioning
The BCM node provider will automatically provision the bare metal server as a node in the tenant cluster. You can monitor the node claim status.
Run in the control plane cluster:
kubectl get nodeclaims -ANAMESPACE NAME STATUS VCLUSTER TYPE CREATED ATp-default netris-8gnqh Available netris bcm-netris.dgx-node 2025-10-27T19:39:45ZOnce the node joins the cluster, the claim transitions from
PendingtoAvailableand the node will appear in the tenant cluster:kubectl get nodesNAME STATUS ROLES AGE VERSIONdgx-01 Ready <none> 68s v1.34.1
Join VM running in control plane cluster infrastructure
Configure KubeVirt node provider
-
Create KubeVirt Node Provider
apiVersion: management.loft.sh/v1kind: NodeProvidermetadata:name: kubevirt-netrisspec:properties:kubevirt.vcluster.com/network-interface: enp1s0kubeVirt:clusterRef:cluster: loft-clusternamespace: vcluster-platformvirtualMachineTemplate:spec:dataVolumeTemplates:- metadata:name: containerdiskspec:source:registry:url: docker://quay.io/containerdisks/ubuntu:24.04pvc:accessModes:- ReadWriteOnceresources:requests:storage: 20Gitemplate:spec:domain:devices:disks:- name: containerdiskdisk:bus: virtiovolumes:- name: containerdiskdataVolume:name: containerdisknodeTypes:- name: netris-vmmaxCapacity: 5resources:cpu: "2"memory: "4Gi" -
Update vCluster configuration
Add both node providers to your vCluster configuration using auto-nodes:
vcluster.yamlprivateNodes:enabled: trueautoNodes:- provider: bcm-netrisstatic:- name: dgx-poolquantity: 1- provider: kubevirt-netrisstatic:- name: vm-poolquantity: 1properties:netris.vcluster.com/server-cluster: netriskubevirt.vcluster.com/network-attachment-definition: vcluster-platform/vcluster-netris-vms -
Verify VM provisioning
The KubeVirt node provider will automatically create VMs that join the tenant cluster. You can monitor the node claims.
Run in the control plane cluster:
kubectl get nodeclaims -ANAMESPACE NAME STATUS VCLUSTER TYPE CREATED ATp-default netris-swwnh Available netris bcm-netris.dgx-node 2025-10-27T19:48:06Zp-default netris-8gnqh Available netris kubevirt-netris.netris-vm 2025-10-27T19:39:45ZOnce the VM joins the cluster, the node claim transitions from
PendingtoAvailableand the VM will appear in the tenant cluster:kubectl get nodesNAME STATUS ROLES AGE VERSIONdgx-01 Ready <none> 5m11s v1.34.1netris-8gnqh Ready <none> 20s v1.34.1