Bootstrapping Kubernetes from Scratch with vCluster Standalone: An End-to-End Walkthrough

Oct 23, 2025
|
5
min Read

vCluster Standalone turns your VM or bare-metal host into a full Kubernetes control plane, with worker nodes you can join -> no upstream host cluster needed.
In this post, we’ll explore:
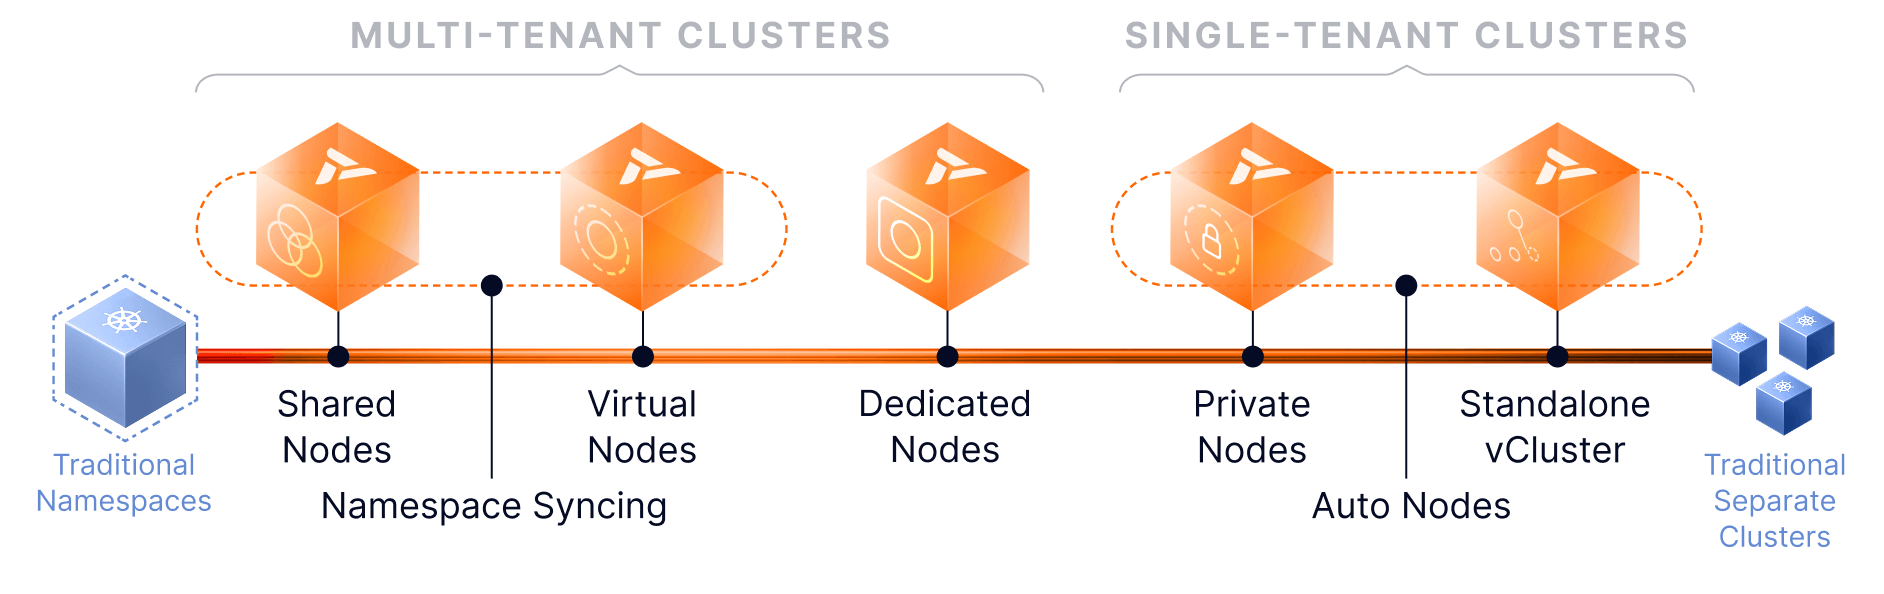
vCluster support for Kubernetes multitenancy has greatly expanded in recent releases enabling multiple options including Private Nodes and Auto Nodes, creating a “tenancy spectrum”. However, one recurring bootstrap requirement remained:
vCluster traditionally runs on top of an existing Kubernetes cluster (called the host cluster) in EKS, AKS, GKE, OpenShift, Baremetal, etc. The Kubernetes host cluster manages the control plane and shared worker nodes, or allows private nodes to be joined to the host. This adds extra operational complexity and dependency on other vendors to provision and maintain the host Kubernetes cluster.
With the release of vCluster Standalone (v0.29+), the host cluster is no longer required, enabling additional use cases:
In effect, vCluster Standalone collapses the host-cluster + virtual-cluster layers into one bootstrap layer.
Note: Standalone uses the Private Nodes model (i.e. joined worker nodes), not the “Shared Nodes” model.
Standalone becomes a compelling option when running a bare-metal Kubernetes setup and using the vCluster Auto Nodes feature (built on Karpenter) to automatically scale your nodes, independent of any hosting vendor. This setup enables true multi-tenancy through various models, allowing you to build a production-ready environment for both CPU and GPU workloads.
To understand how the commands tie together, it's good to know the architecture.
Because vCluster Standalone uses private nodes, there’s no syncing with a host cluster — workloads run natively on the joined nodes as if they were part of the same cluster. You can also enable vCluster Auto Nodes (built on Karpenter) to have autoscaling for automatic joining and removal of nodes in your cluster.
Before we dive into commands, here are assumptions:
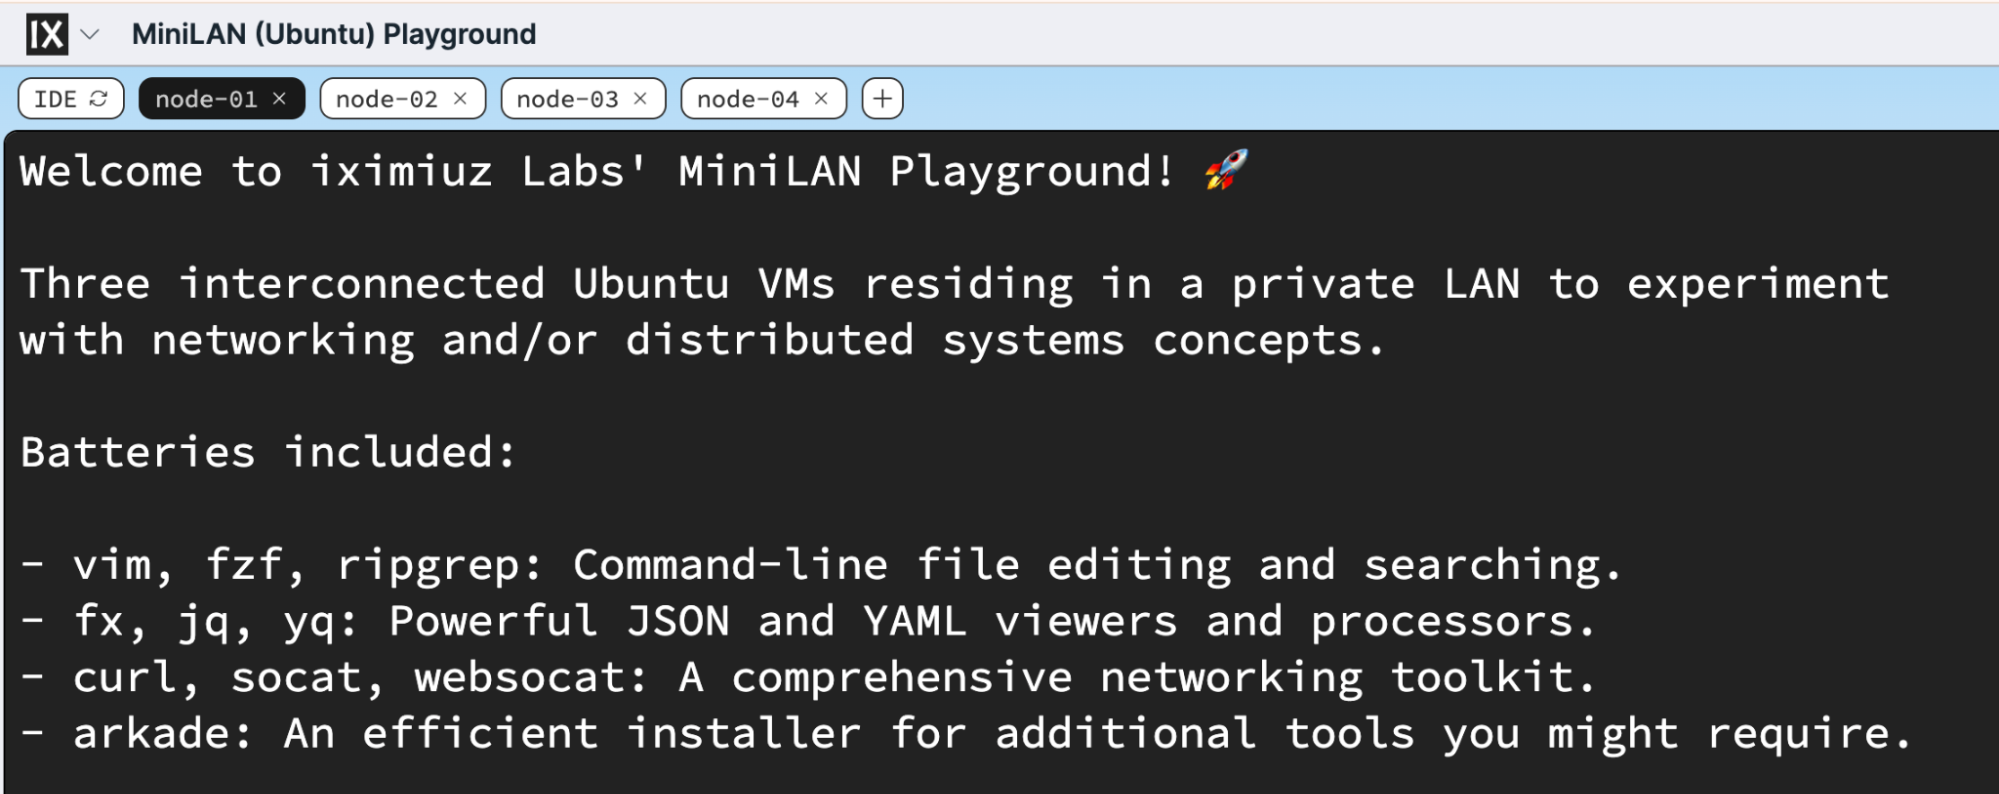
This demo is on Iximiuz Labs miniLan playground where you get four Ubuntu VMs connected into a single network.
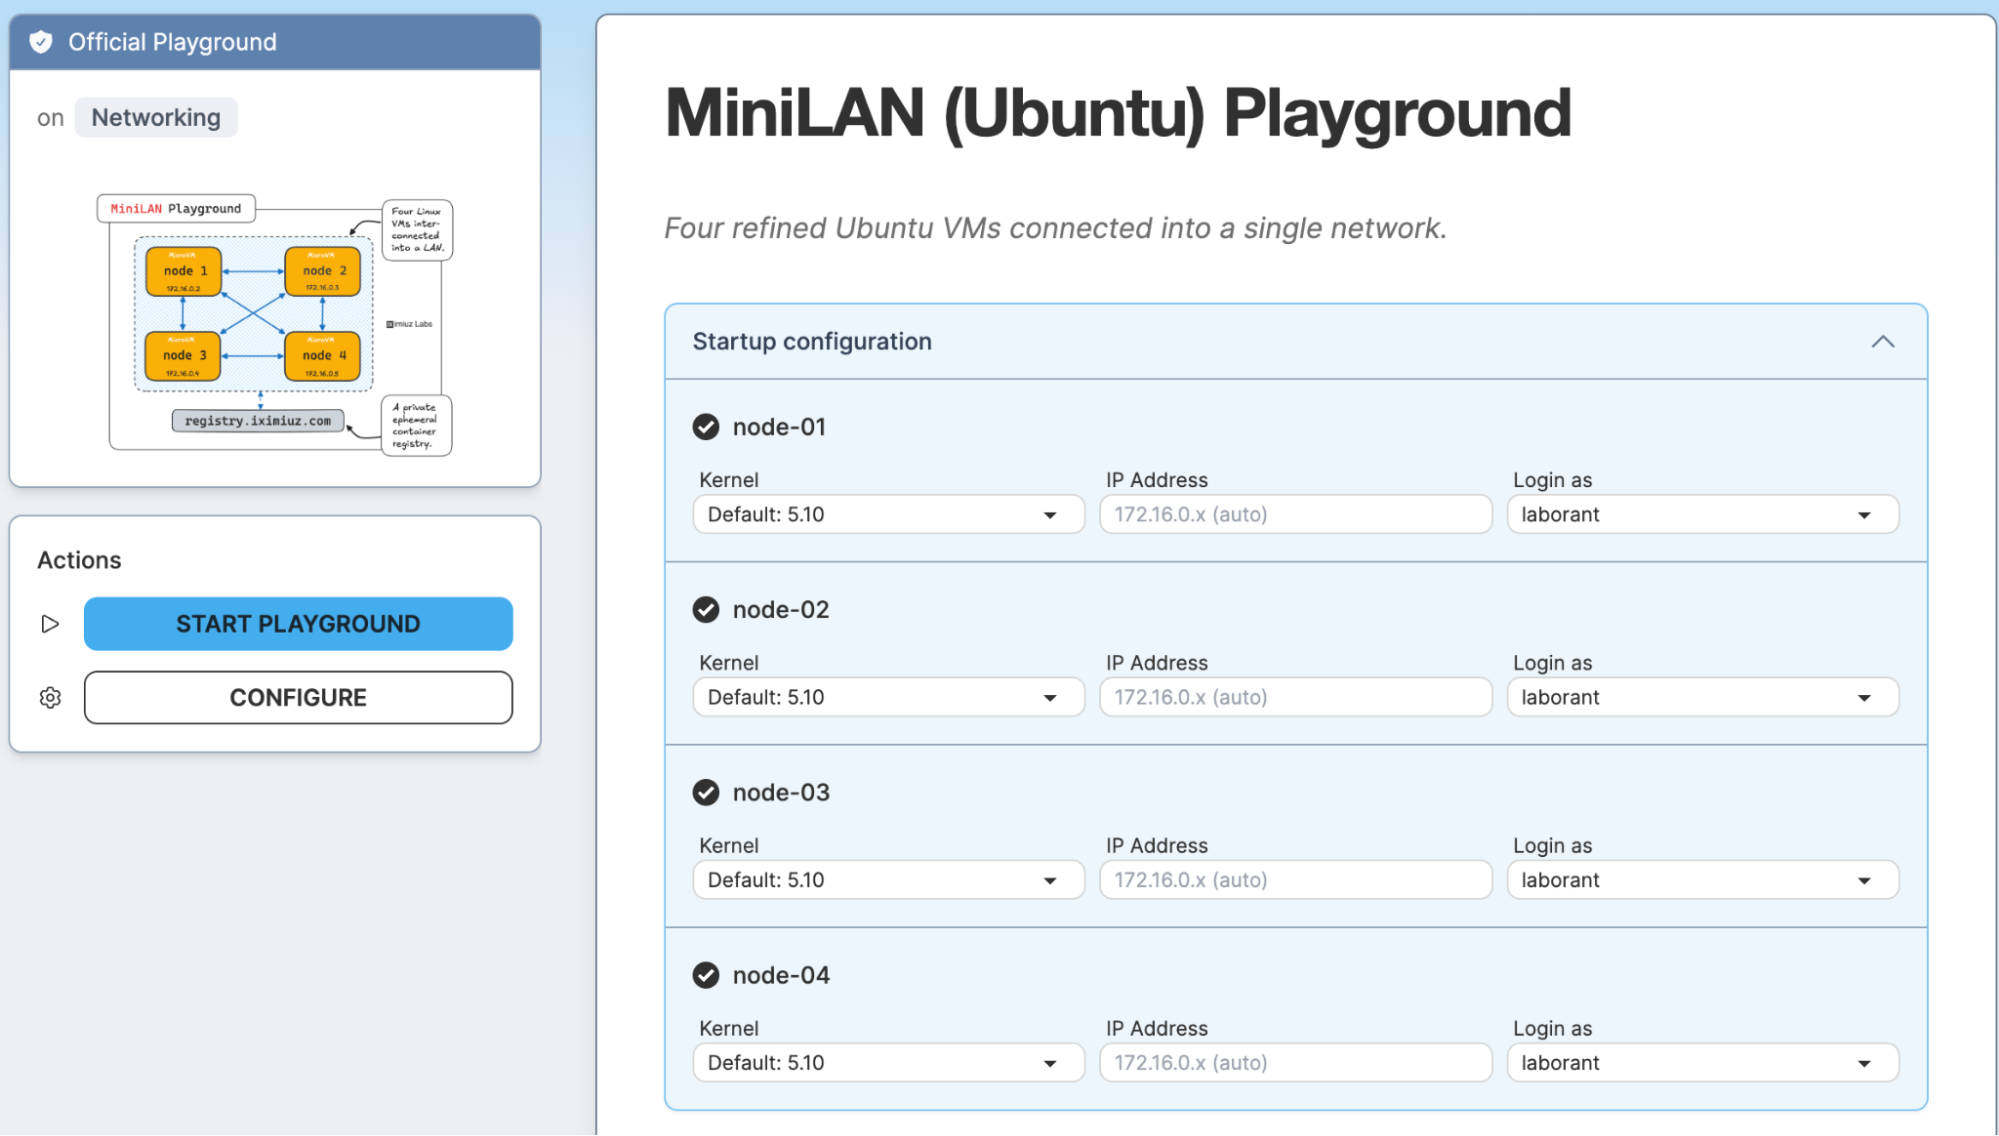
Once you start the miniLAN playground you will get access to 4 Ubuntu nodes where they are connected so that we can experiment and create a 4 node cluster.
This ensures the cluster is created with private node support and join capability.
Run the command below in order to create vCluster Standalone, you can also pass on the config file to enable Auto Nodes feature.
curl -sfL https://github.com/loft-sh/vcluster/releases/download/v0.29.1/install-standalone.sh | \
  sh -s -- --vcluster-name standalone --config vcluster.yaml
After installation, the script:
kubectl config to your machinecurl -sfL https://github.com/loft-sh/vcluster/releases/download/v0.29.1/install-standalone.sh | \
sh -s -- --vcluster-name standalone
🔄 Downloading vcluster binary...
vcluster CLI installed in /var/lib/vcluster/bin/vcluster-cli
🔄 Setting up persistent logging...
✅ systemd-journald restarted.
🔄 Creating vCluster systemd service...
🔄 Creating systemd service file /etc/systemd/system/vcluster.service
✅ vcluster.service created.
🔄 Starting vcluster.service...
Created symlink /etc/systemd/system/multi-user.target.wants/vcluster.service → /etc/systemd/system/vcluster.service.
✅ Successfully started vcluster.service
🔄 vCluster is initializing kubernetes control plane...
🔄 vCluster is initializing kubernetes control plane...
🔄 vCluster is initializing kubernetes control plane...
🔄 vCluster is initializing kubernetes control plane...
🔄 vCluster is initializing kubernetes control plane...
🔄 vCluster is initializing kubernetes control plane...
🔄 vCluster is initializing kubernetes control plane...
🔄 vCluster is initializing kubernetes control plane...
🔗 Linking vcluster kubeconfig for kubectl...
✅ vCluster is ready. Use 'kubectl get pods' to access the vCluster.
To check vCluster logs, use 'journalctl -u vcluster.service --no-pager'
(If you don’t pass --config, it uses defaults; but in order for the nodes to automatically join you should enable Auto Nodes along with the Private Nodes feature. In order to know more on Auto Nodes, you can read the end to end blog here and how it works.
Below is the config that you can pass with the command using the --config flag
controlPlane:
  # Enable standalone
  standalone:
    enabled: true
      # Optional: Control Plane node will also be considered a worker node
      joinNode:
        enabled: true
# Required for adding additional worker nodes
privateNodes:
  enabled: true
Verify:
kubectl get nodes
You’ll see one node (the control-plane node):
NAME      STATUS   ROLES                  AGE   VERSION
node-01   Ready    control-plane,master   40m   v1.33.4
Use the vCluster CLI (installed by the script) to generate a node token:
NOTE: lthe vcluster binary is installed by default at
/var/lib/vcluster/bin/vcluster-cli
So you can move that to /usr/local/bin
mv /var/lib/vcluster/bin/vcluster-cli /usr/local/bin/vcluster
Now you can create the join token using below command:
vcluster token create --expires=1h
This outputs something like:
curl -fsSLk "https://172.16.0.2:8443/node/join?token=2jdyog.4ik0o4c3gosqjk4x" | sh -
Save that join command.
On VM node-02 (and any additional worker nodes), run the printed join command. E.g.:
curl -fsSLk "https://172.16.0.2:8443/node/join?token=2jdyog.4ik0o4c3gosqjk4x" | sh -
Output:
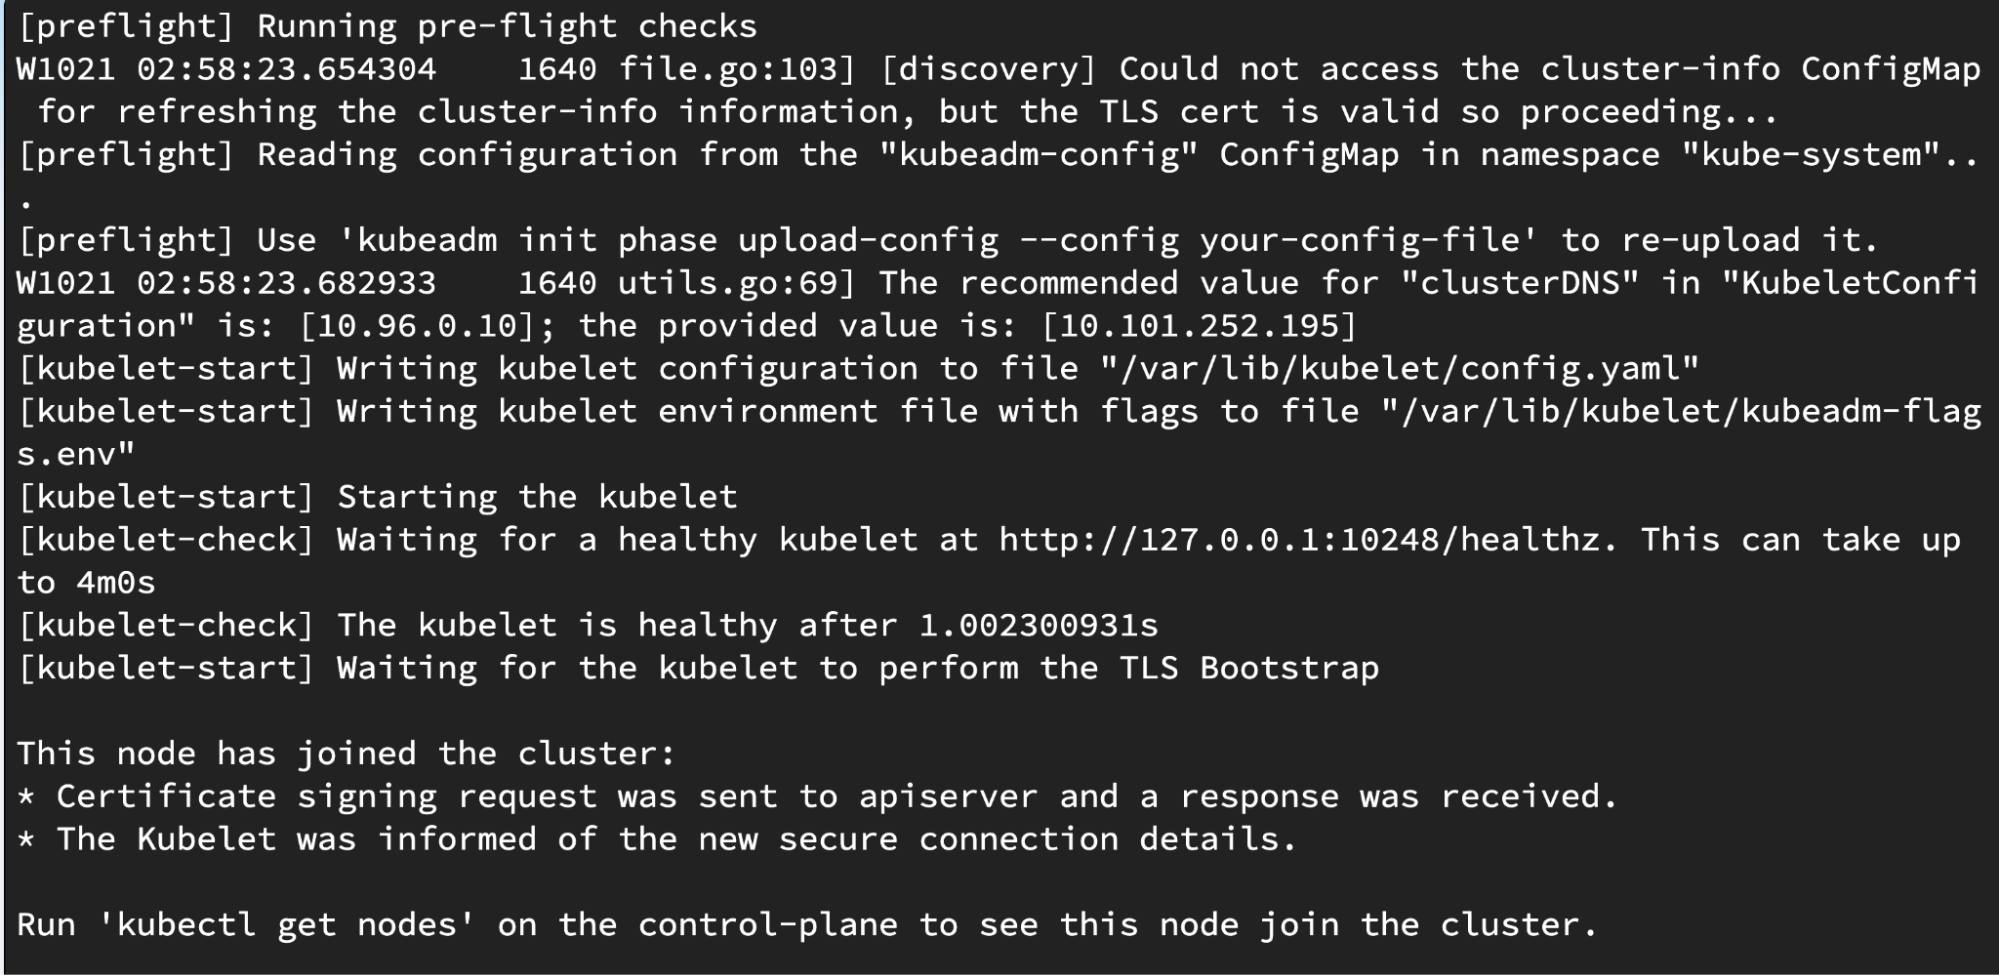
This script will:
Back on VM node-01 (or your kubectl context):
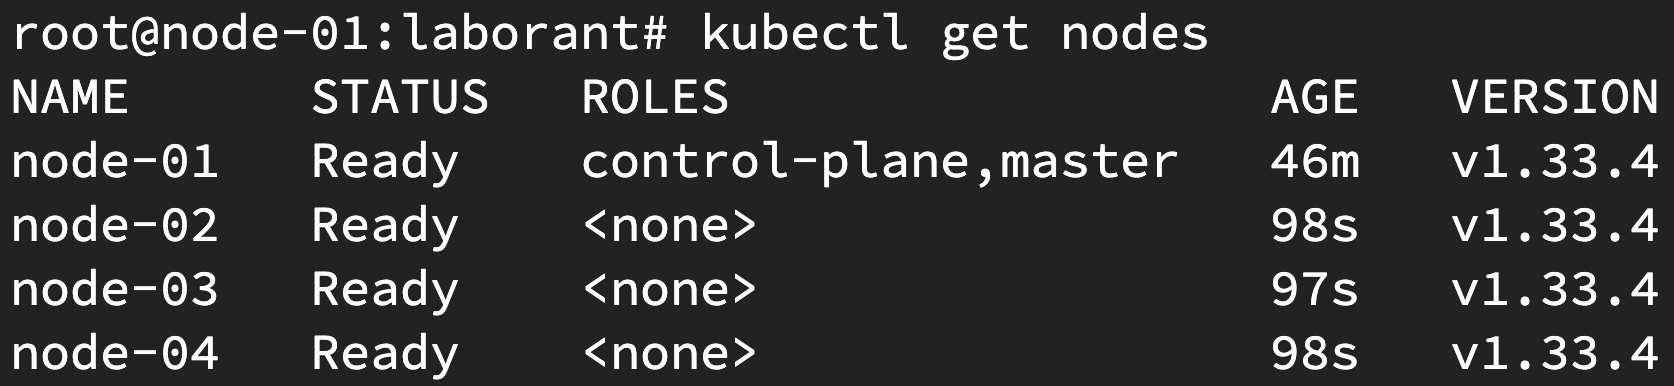
kubectl get nodes
You should see all nodes where you ran the join command:
Now create virtual clusters just like you used to do on any other host cluster.
Command:
vcluster create demo
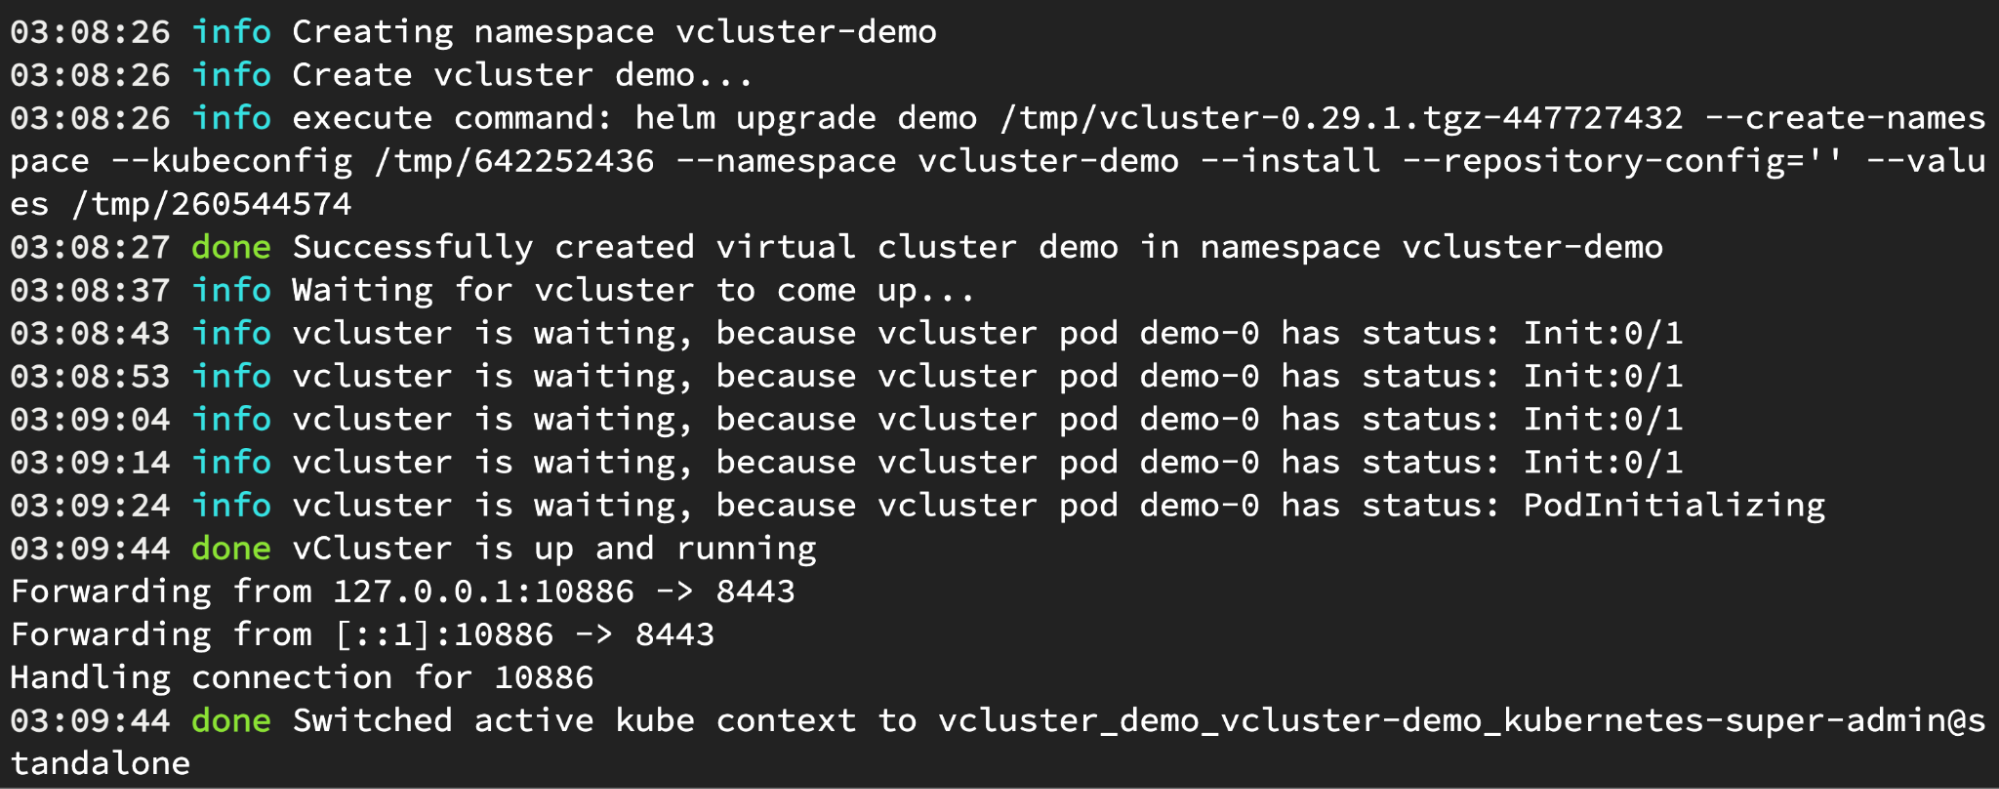
Once you open another tab of this node, you will be able to communicate with the virtual cluster.
root@node-01:laborant# kubectl get po -A
NAMESPACE     NAME                       READY   STATUS    RESTARTS   AGE
kube-system   coredns-744d9bd8bf-pm5tj   1/1     Running   0          3m5s
vCluster Standalone is a powerful new offering that expands the options for virtual cluster support across an array of multitenancy options: instead of needing a Kubernetes host cluster to run virtual clusters, the first cluster itself is the host cluster for vCluster. By enabling Private Modes and Auto Nodes, you can setup a control plane and flexibly attach worker nodes. So let us know what you feel about this release on our community slack.
Also if you are a visual learner then you can watch the video here.
Deploy your first virtual cluster today.
