Exploring Kubernetes on vCluster: Deploying a GitOps Stack

Sep 3, 2026
|
22
min Read

When you are building applications on Kubernetes, GitOps has become a thing, or make that should be a thing, a big thing for that matter.
GitOps is a way to manage IT infrastructure and software using Git as the single source of truth. Instead of running manual scripts to update servers, you store all system configurations in code. Automated agents watch this code and update live environments to match.
The core principles
In our example below, we are a developer working locally on our laptop (although everything we are building below can be deployed exactly as defined onto a larger team shared deployment also), committing changes into the project GitHub repo.
We will be configuring a GitOps pipeline using GitHub Actions to "build" our Docker container, after which we will push the new container image into our hub.docker.com account.
IMPORTANT:
As part of this "build" process GitHub Actions also updates our k8s/deployment.yml file with the image tag assigned to the image when it was built and pushed into our container registry hosted in hub.docker.com. The update is done by replacing the "placeholder" variable next to the image: tag (line 21). This is an important concept to remember as we lay out the process and actions.
We will start by pre-configuring our Kubernetes cluster with Argo CD and define a "project", which we will in turn tell to monitor our GitHub project, specifically the above mentioned k8s/deployment.yml file.
Once it picks up that the file has been changed, Argo CD executes the steps as per our argocd-app.yml file, which deploys/redeploys our project as defined in k8s/deployment.yml onto our target Kubernetes cluster hosted on the vCluster stack.
Note: Argo CD together with GitHub Actions can also be configured to "push" the changes onto a target cluster. For myself, working in the financial industry (we don't trust easily), and as we are using GitHub Actions, which reside outside our network, the pull is a more secure pattern.
A "push" based pattern could very likely be preferred for applications deployed in say AWS, where the ECR (Elastic Container Registry) and EKS (Elastic Kubernetes Service) is all hosted in a secured account.
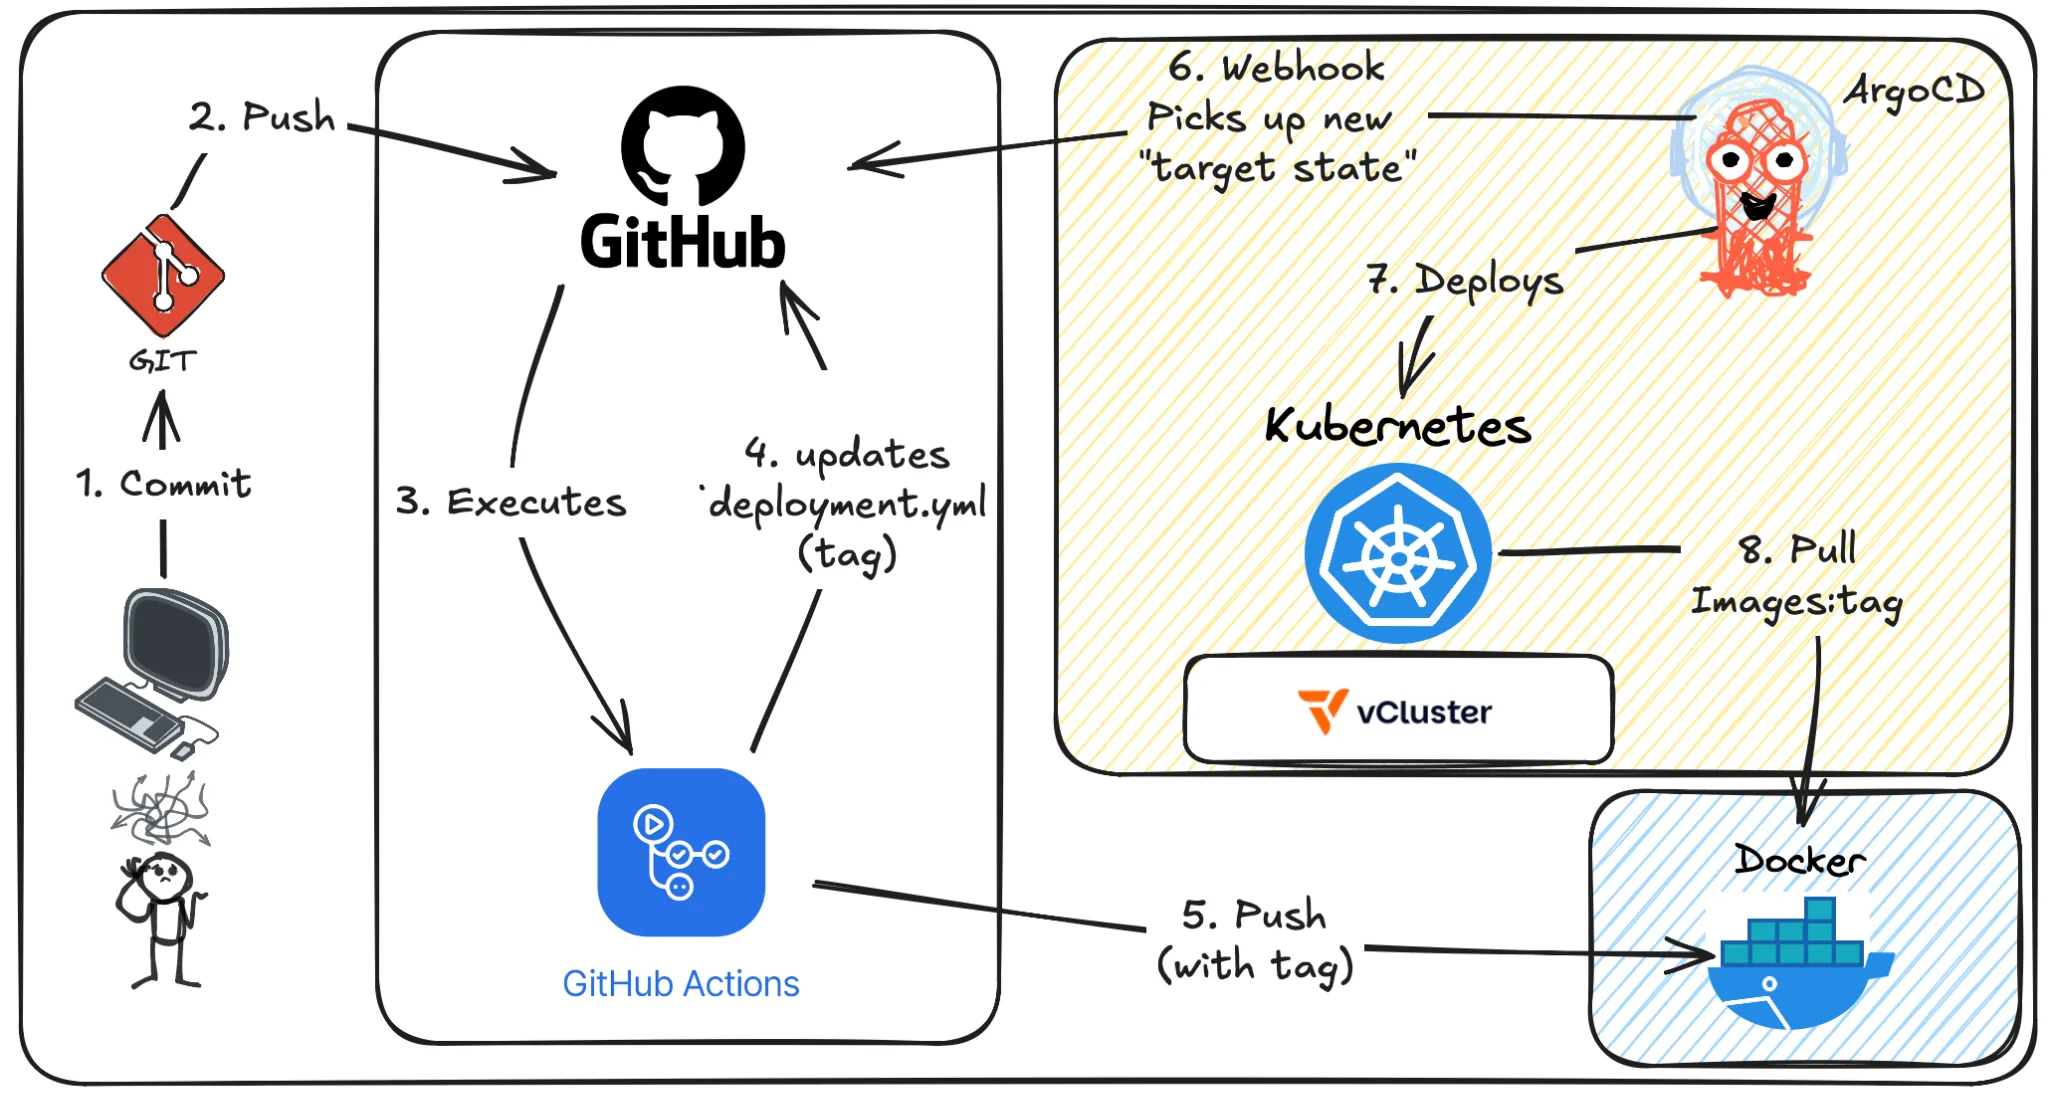
What do we have here, as far as the developer is concerned?
No cloud account required. No VMs. Just Docker and a few commands, and we have a fully functional Kubernetes development environment with an automated CI/CD deployment pipeline using Argo CD, GitHub and a Docker repository.
In our previous editions we built a complete monitoring stack for our environment, also commonly referred to as the metrics collection component of an observability stack (Part 1), but observability is the combination of metrics and logs, so in Part 2 we added log analytics based on Elasticsearch.
We are expanding our development environment in this blog, maturing our all-in-one local development environment so as to maximize developer productivity by providing them with an environment representing expected production as closely as possible.
All source code for this blog is available at georgelza/gitops-pipeline.
vCluster with the Docker driver gives you a multi-node Kubernetes cluster running entirely in Docker containers. For this project, that means a control plane and three worker nodes, enough capacity to run the full observability stack alongside demo workloads, all created with a single command:
vcluster create my-pipeline -f vcluster.yaml
The vcluster.yaml configures a 3-worker-node cluster:
controlPlane:
  distro:
    k8s:
      version: "v1.36.0"
experimental:
  docker:
    nodes:
      - name: "worker-1"
      - name: "worker-2"
      - name: "worker-3"
That's it. In under a minute, you have a fully functional Kubernetes cluster with multiple nodes, ready to host real workloads. When you are done for the day, vcluster pause my-pipeline frees up resources. vcluster resume my-pipeline picks up right where you left off.
Here's the full stack:
| Component | What it does |
|---|---|
| Argo CD | A declarative, GitOps continuous delivery tool for Kubernetes. |
| GitHub repo | A GitHub repository (commonly shortened to "repo") is essentially a digital project folder hosted on GitHub that stores your code, assets, and documentation. |
| GitHub runner | The execution engine or compute instance that runs the jobs defined in your GitHub Actions automation and CI/CD pipelines. Think of it as a virtual or physical server that wakes up when triggered, clones your code, installs your required packages, and runs tasks like automated testing or deployment. |
| Container repo | A Docker repository is a collection of related Docker container images organized by "tags" that represent different versions of the same application. It works like a GitHub repository, but instead of hosting raw source code, it stores pre-packaged, ready-to-run software builds. |
We will be using a very simple FastAPI web application based on Python (app.py).
import os
from fastapi import FastAPI

app = FastAPI(title="K8s-GitOps-Demo")

@app.get("/")
def read_root():
    return {
        "status": "healthy",
        "engine": "ArgoCD Pull Model",
        "message": "Hello from a secure GitOps workflow!"
    }

@app.get("/healthz")
def health_check():
    return {"status": "OK"}
The deployment follows a specific order since components depend on each other:
For the complete step-by-step walkthrough, see README.md and BUILD.md.
This project is part of a series building up a complete local Kubernetes development environment:
By the end of the series, you will have a local environment with application hosting, ingress routing, metrics collection, dashboarding, alerting, long-term metric storage, and log analytics, configured with an automated CI/CD pipeline rooted in GitHub Actions.
That's a genuinely useful development platform, and it all runs on your laptop.
The deployment has been divided into 2 sections. First, the core deployment, which is our Kubernetes cluster (including Argo CD), and secondly our GitOps pipeline rooted in GitHub, provided with the various required YAML files as part of our project repo.
So let's get started.
(Note: you can skip the core deployment if you still have it running from the previous blog. The GitOps stack fits nicely on what we previously built.)
git clone https://github.com/georgelza/gitops-pipeline.git
cd gitops-pipeline
First, a screenshot showing what we are starting with. The steps and screenshots below are basically our output from the steps as per BUILD.md.
docker ps

sudo vcluster create my-pipeline --values vcluster.yaml
vcluster.yaml
controlPlane:
  # Configure the backing store for vCluster's data
  backingStore:            # Enterprise feature, requires a license
    etcd:
      embedded:
        enabled: true      # Run etcd inside the vCluster pod
experimental:
  docker:
    nodes:
      - name: worker-1
        volumes:
          - "./data/vc:/data"
        env:
          - "NODE_ROLE=worker"
      - name: worker-2
        volumes:
          - "./data/vc:/data"
        env:
          - "NODE_ROLE=worker"
      - name: worker-3
        volumes:
          - "./data/vc:/data"
        env:
          - "NODE_ROLE=worker"
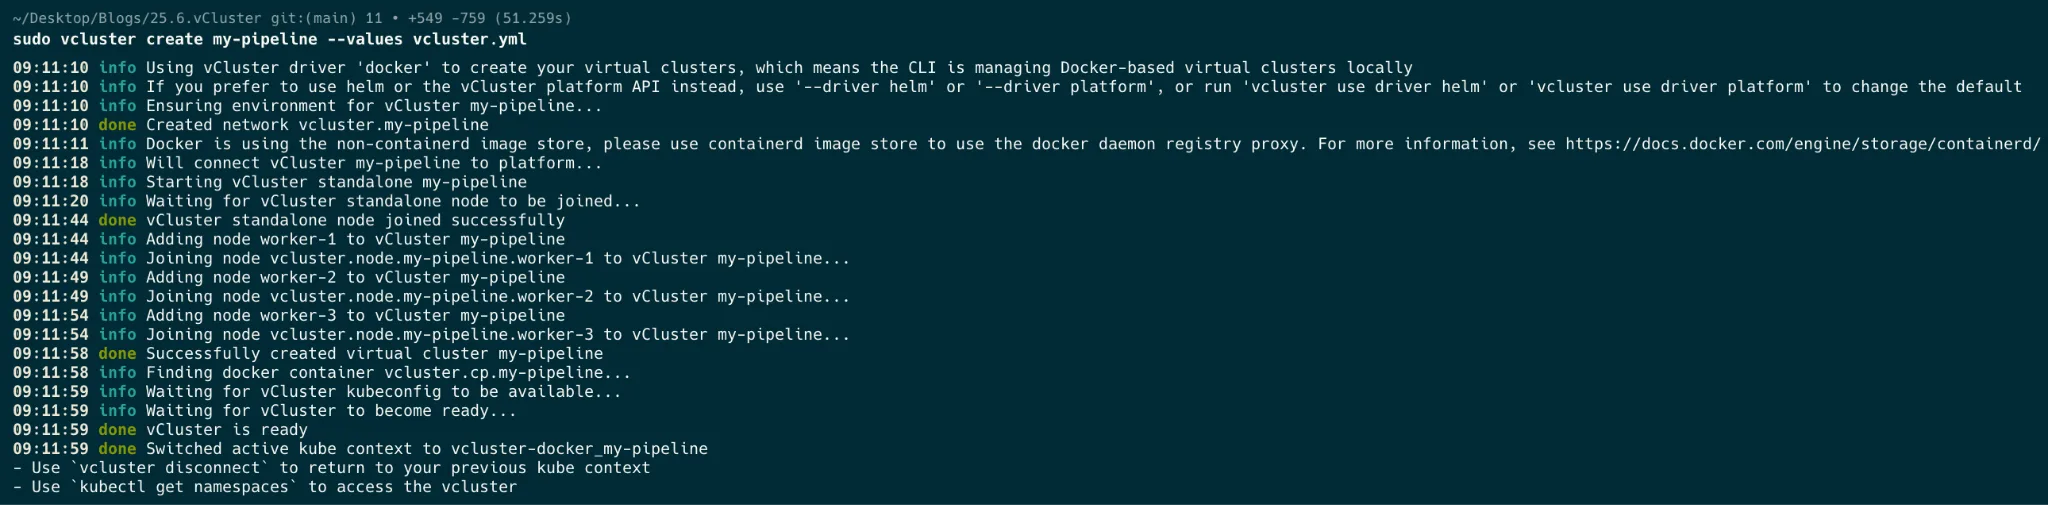
Now a docker ps after we have created our cluster.
docker ps

kubectl get nodes
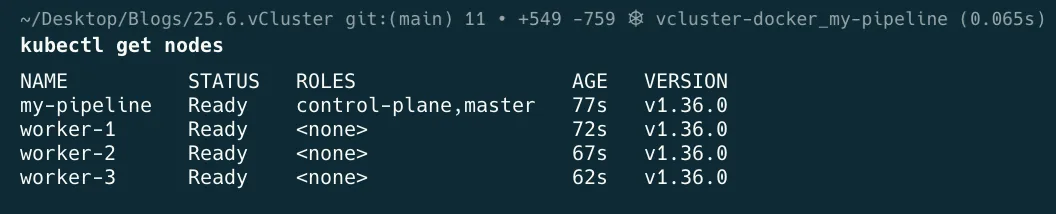
Let's label our nodes correctly.
kubectl label node worker-1 worker-2 worker-3 node-role.kubernetes.io/worker=worker

kubectl get nodes

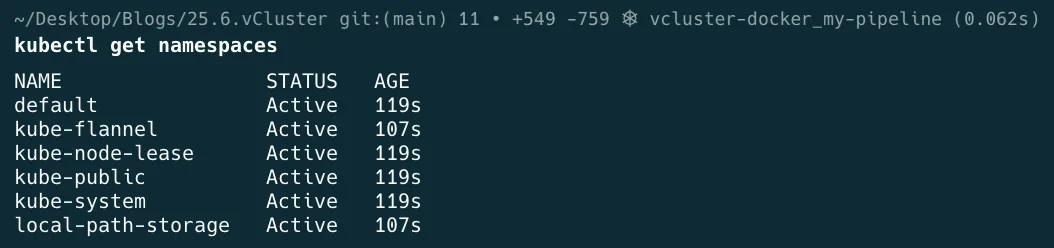
kubectl get namespaces
Our base/default namespaces:
Let's quickly create our 2 namespaces that will be utilised.
cat <<EOF | kubectl apply -f -
apiVersion: v1
kind: Namespace
metadata:
  name: app
EOF

cat <<EOF | kubectl apply -f -
apiVersion: v1
kind: Namespace
metadata:
  name: argocd
EOF
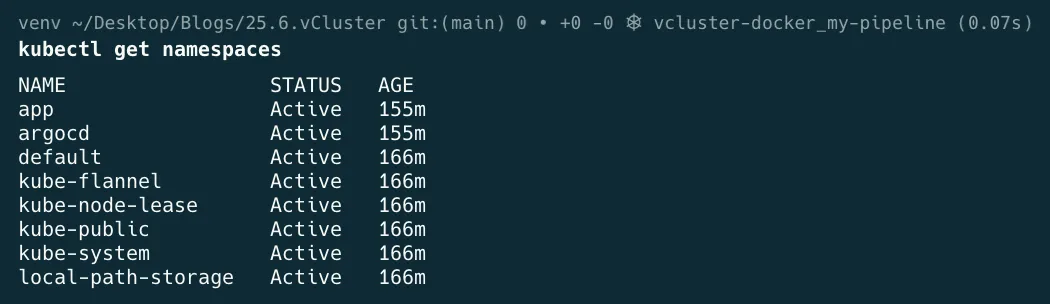
Next is our GitOps pipeline, which we will execute by following the steps as per GITOPS.md. The steps below are as per step 3 in the GITOPS.md document.
First we will deploy Argo CD.
# 1. Deploy stable ArgoCD infrastructure components
kubectl -n argocd create -f https://raw.githubusercontent.com/argoproj/argo-cd/stable/manifests/install.yaml
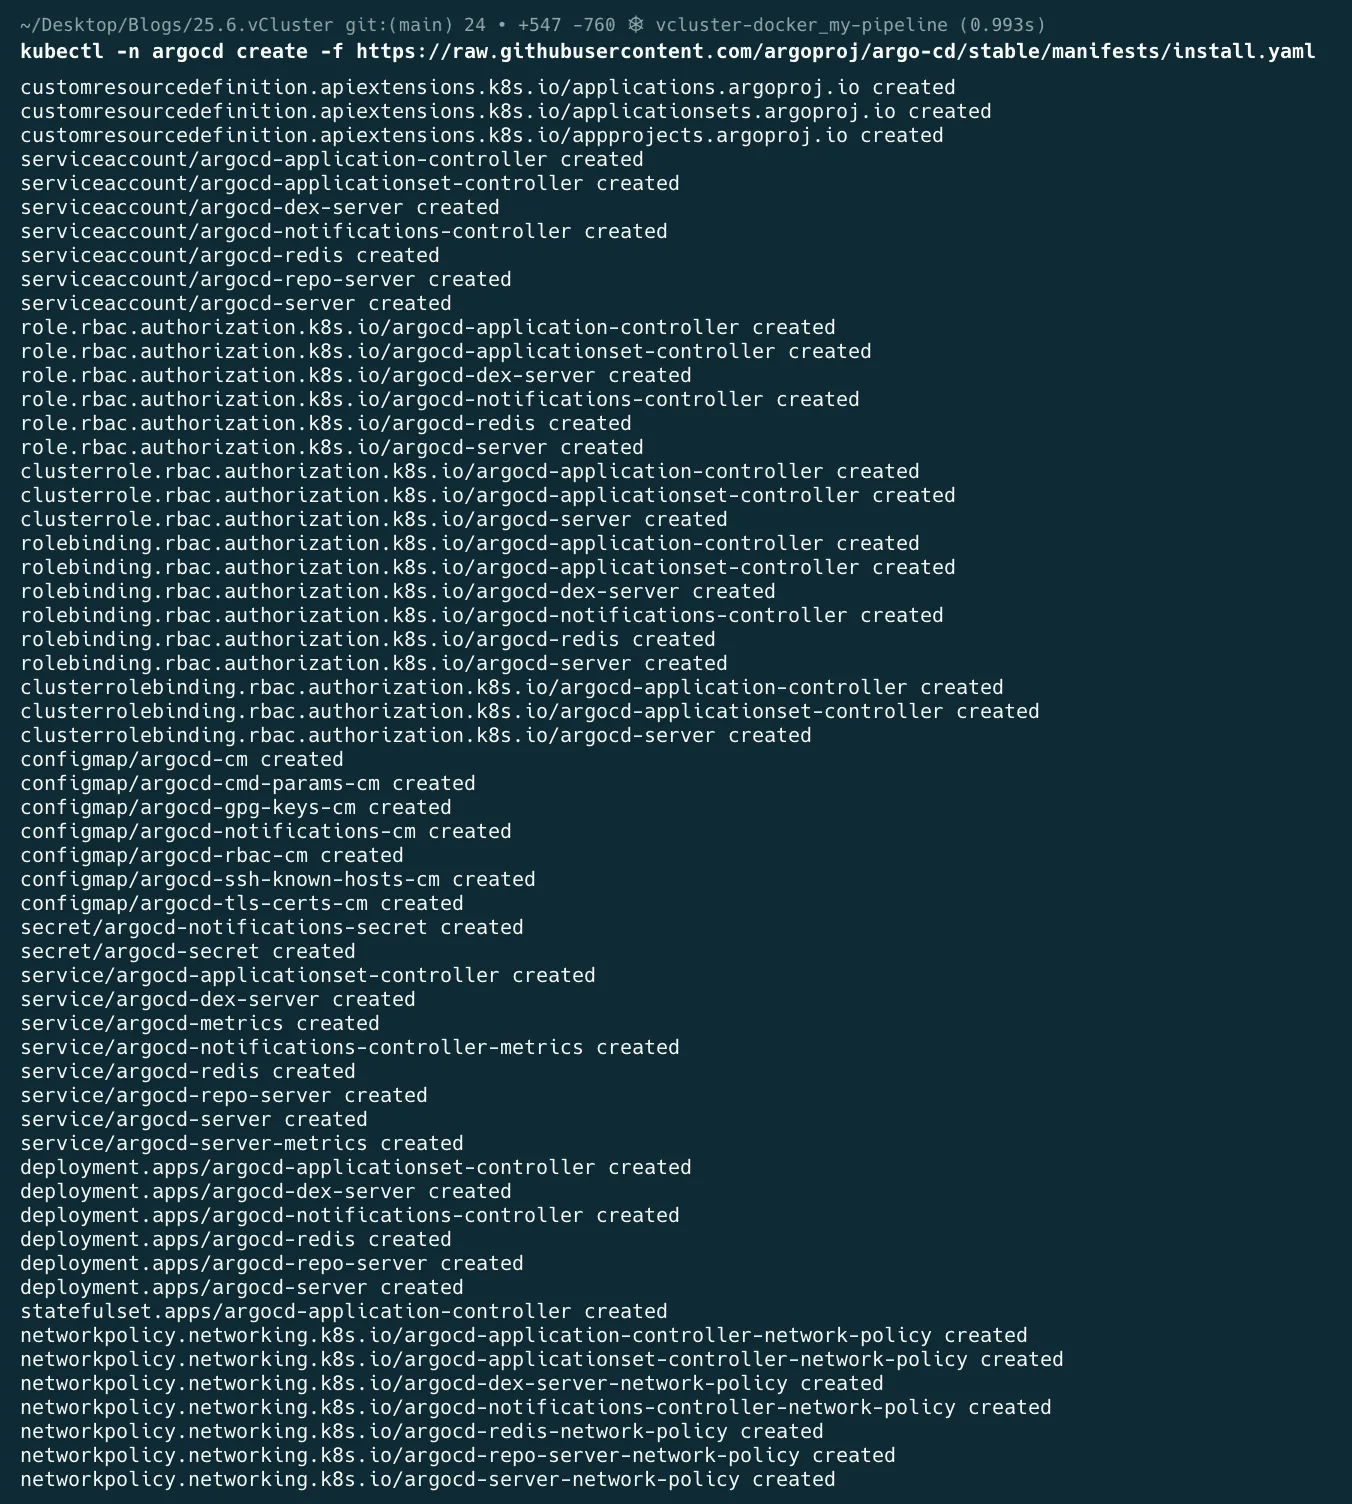
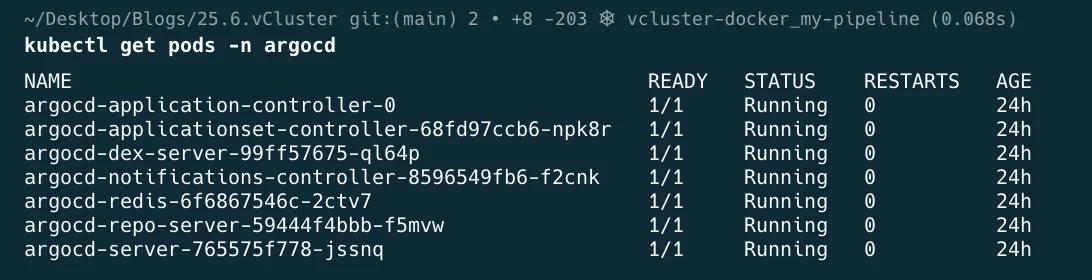
This will put kubectl into watch mode. Hit Ctrl-C once everything is running.
# 2. Block and watch until all operators show "Running"
kubectl get pods -n argocd -w
First we need to create a project in hub.docker.com. Once we have a project we create an access token, also referred to as a personal access token.
Once we have the above container project created and the access key (personal access token) created, we configure GitHub with Secrets and variables / Actions.
This grants GitHub the required read/write access to create a new container in the Docker project.
Think of GitHub as the builder that needs keys to enter your warehouse (Docker Hub). If you paste these keys directly into your code, anyone who looks at your repository can steal them. Instead, you put them into GitHub's secure vault called Actions secrets.
Here is exactly what you do, step by step, inside your web browser.
Step 0: Register/create a new repository. For our blog we're using gitops-pipeline.
Step 1: Open your repository's vault
Step 2: Navigate to Actions secrets
You are now in the secure vault workspace.
Step 3: Add your Docker Hub username
Step 4: Add your Docker Hub key (the token)
What did we just accomplish?
By doing this, you have securely wired the two platforms together without hardcoding sensitive details.
When you now push your code, the GitHub-hosted runner spins up and runs the automated blueprint file (.github/workflows/ci.yml). When it reaches these lines:
- name: Log in to Docker Hub
  uses: docker/login-action@v3
  with:
    username: ${{ secrets.DOCKERHUB_USERNAME }}
    password: ${{ secrets.DOCKERHUB_TOKEN }}
The runner automatically reaches into the secure vault, grabs your username and token on the fly, logs into Docker Hub, pushes your compiled Python container, and vanishes, keeping your credentials entirely secure.
.github/workflows/ci.yml
name: CI Build and Manifest Update

on:
  push:
    branches:
      - main
    paths-ignore:
      - 'deployment.yml'      # <-- Updated from 'k8s/**'

jobs:
  build-and-patch:
    runs-on: ubuntu-latest
    permissions:
      contents: write         # Allows pushing the updated YAML tag back to Git

    steps:
      - name: Checkout Source Code
        uses: actions/checkout@v4
        with:
          fetch-depth: 0      # Fetches full history for proper Git tracking

      - name: Set up Docker Buildx
        uses: docker/setup-buildx-action@v3

      - name: Log in to Docker Hub
        uses: docker/login-action@v3
        with:
          username: ${{ secrets.DOCKERHUB_USERNAME }}
          password: ${{ secrets.DOCKERHUB_TOKEN }}

      - name: Build and Push Docker Image
        uses: docker/build-push-action@v5
        with:
          context: .
          push: true
          # Instructs Buildx to compile for both standard x86 and ARM servers
          platforms: linux/amd64,linux/arm64
          tags: |
            ${{ secrets.DOCKERHUB_USERNAME }}/python-fastapi-app:latest
            ${{ secrets.DOCKERHUB_USERNAME }}/python-fastapi-app:${{ github.sha }}
          cache-from: type=gha
          cache-to: type=gha,mode=max

      - name: Update Manifest Image Tag
        run: |
          # 1. Target the file inside your k8s/ folder matching your exact .yml extension
          sed -i -E "s|(image: ${{ secrets.DOCKERHUB_USERNAME }}/python-fastapi-app:).*|\1${{ github.sha }}|" k8s/deployment.yml

          # 2. Configure a Git Identity
          git config user.name "github-actions[bot]"
          git config user.email "github-actions[bot]@users.noreply.github.com"

          # 3. Track and commit the exact file from the k8s directory path
          git add k8s/deployment.yml
          git commit -m "chore: auto-update deployment image tag to ${{ github.sha }} [skip ci]"
          git push
Now that these secrets are saved, you are ready to commit and push your files from your local workstation to trigger the initial container build.
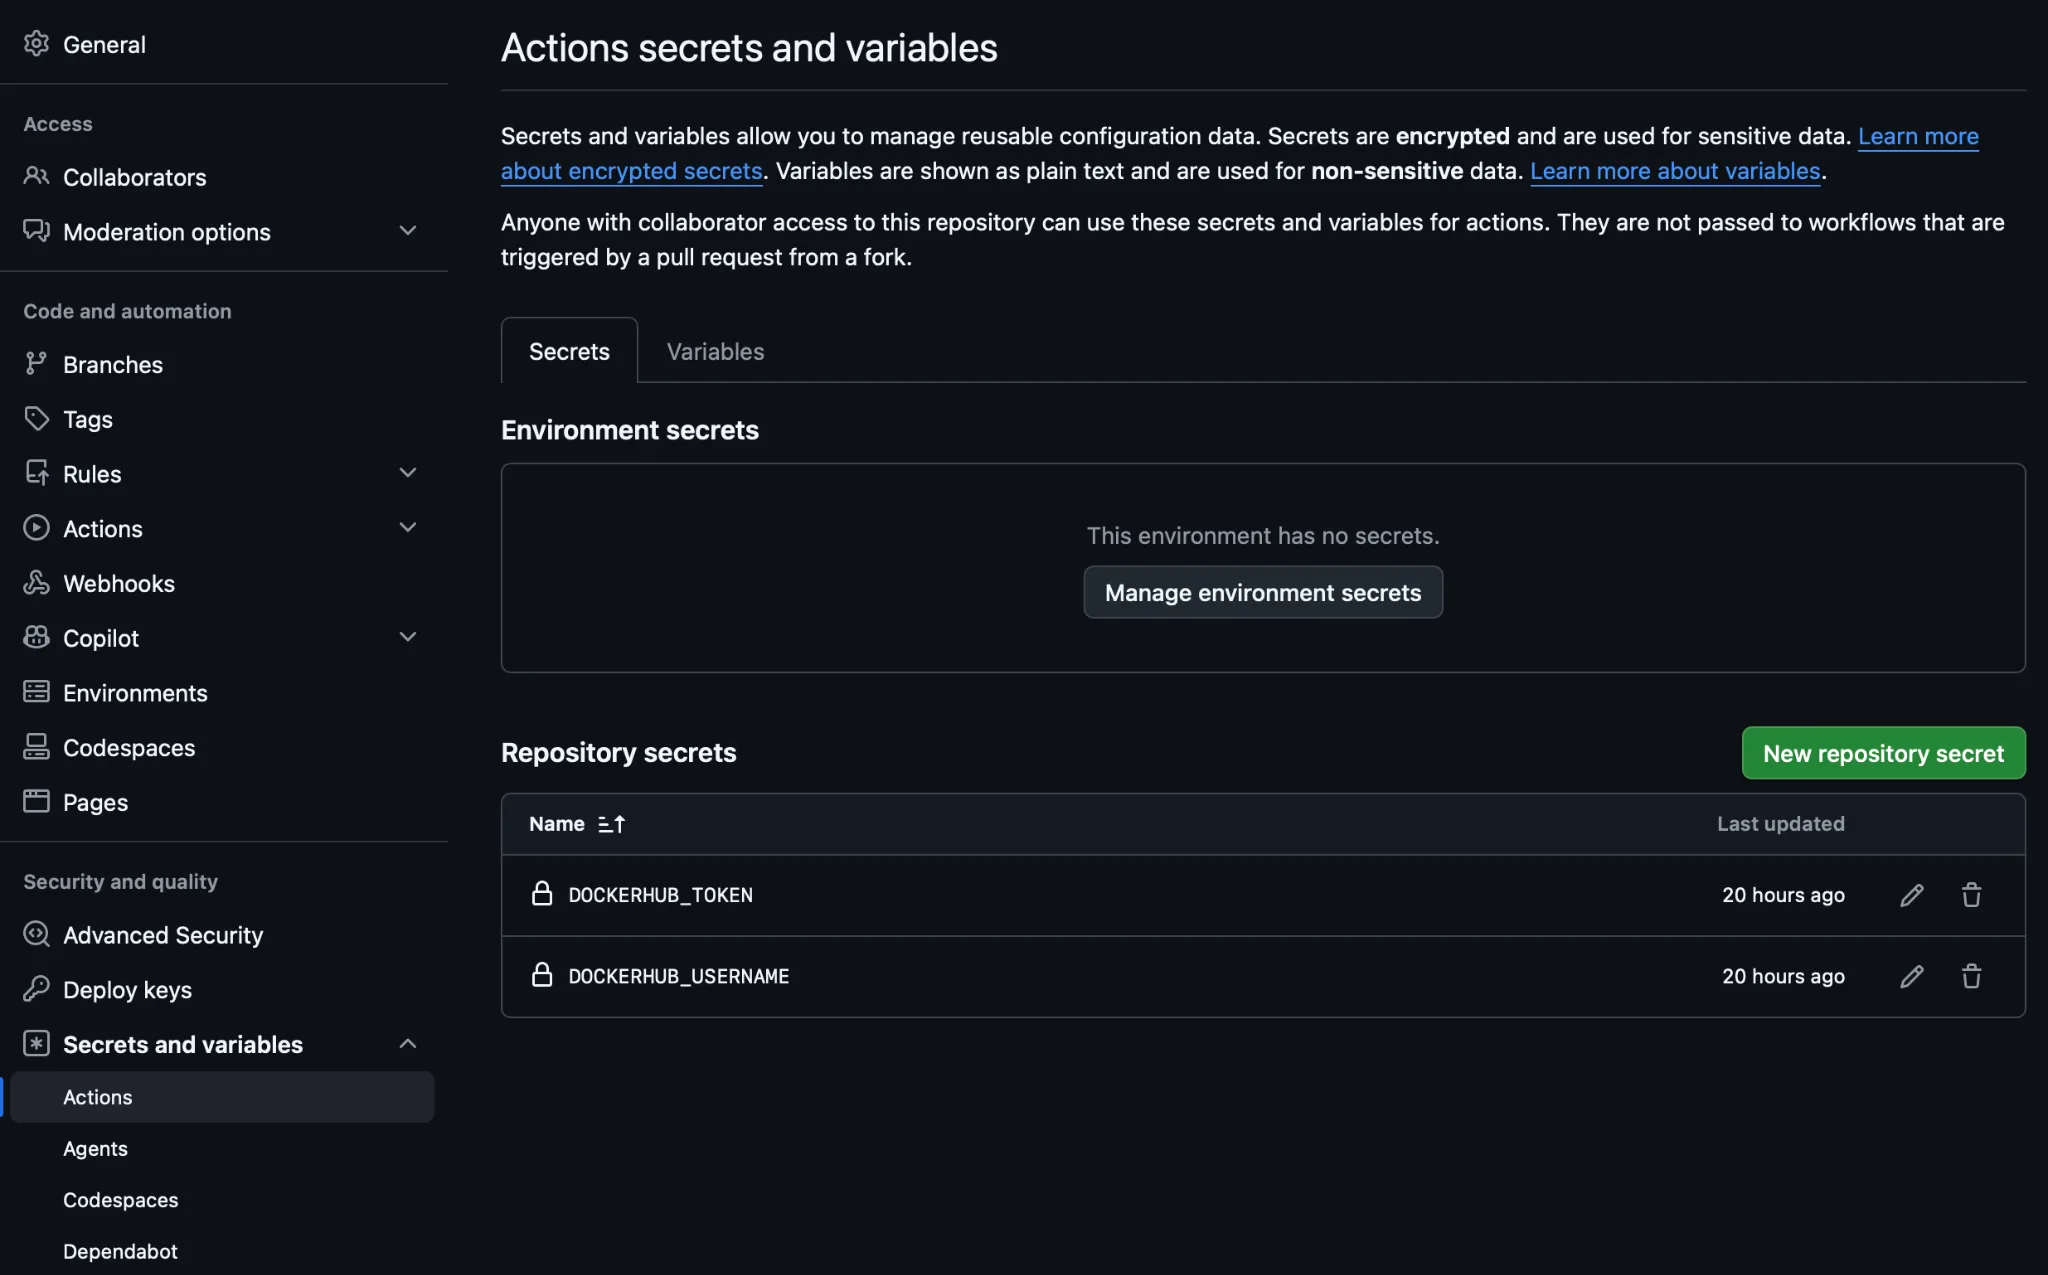
At this point we have completed all the prerequisites.
Provision the runner and push the baseline (from the workstation).
Now we are ready to push our local project/code to GitHub. This triggers the GitHub-hosted runner to provision its computing workspace, build the image, and output the tracking tag.
git add .
git commit -m "ci: establish core framework baseline"
git push origin main
Pause strategy: open your GitHub repository web browser interface and click on the Actions tab. Wait until the active runner job executes completely and displays a green checkmark. If you inspect your k8s/deployment.yml file in the GitHub UI, you will see that the text :placeholder has been updated to your long Git commit SHA string.
Wire the cluster to pull manifests (on the cluster control plane).
With the correct image tag committed back to your Git repository, we will now instruct Argo CD to monitor the repository and deploy the resources to our targeted namespace. You will notice we reference our project spec:source:repoURL. Also take note of the path tag.
Run this command on your cluster terminal:
kubectl apply -f argocd-app.yml
argocd-app.yml
apiVersion: argoproj.io/v1alpha1
kind: Application
metadata:
  name: python-gitops-pipeline
  namespace: argocd       # Directs the declaration to the ArgoCD controller space
spec:
  project: default
  source:
    repoURL: 'https://github.com/georgelza/gitops-pipeline.git'
    targetRevision: main
    path: k8s             # Instructs ArgoCD to track your manifests inside the k8s folder
  destination:
    server: 'https://kubernetes.default.svc'   # Instructs it to deploy to the local cluster
    namespace: app        # Directs deployment straight into your isolated 'app' namespace
  syncPolicy:
    automated:
      prune: true         # Automatically deletes K8s resources if you remove them from Git
      selfHeal: true      # Overwrites manual cluster overrides to keep Git as the single source of truth

Argo CD instantly reads the k8s/deployment.yml file from your GitHub repository, translates the requirements, handles the target definitions, and sets up our application inside the app namespace.
apiVersion: apps/v1
kind: Deployment
metadata:
  name: python-app-deployment
  namespace: app
  labels:
    app: python-fastapi
spec:
  replicas: 2
  selector:
    matchLabels:
      app: python-fastapi
  template:
    metadata:
      labels:
        app: python-fastapi
    spec:
      containers:
        - name: fastapi-app
          image: georgelza/python-fastapi-app:9d78760ac56e42d773290eee71769ed4a40c3d70
          imagePullPolicy: Always
          ports:
            - containerPort: 8000
          livenessProbe:
            httpGet:
              path: /healthz
              port: 8000
            initialDelaySeconds: 5
          readinessProbe:
            httpGet:
              path: /healthz
              port: 8000
            initialDelaySeconds: 5
---
apiVersion: v1
kind: Service
metadata:
  name: python-app-service
  namespace: app
spec:
  selector:
    app: python-fastapi
  ports:
    - protocol: TCP
      port: 80
      targetPort: 8000
  type: NodePort
Let's now verify that our application has been safely pulled and deployed within its designated workspace/namespace:
kubectl get deployments,services,pods -n app -o wide
Output:

Future redeploy action-trigger loop
For every future code alteration or deployment update, we do not need to repeat any of the steps above. The automated loops trigger natively when a commit lands. You push an update to app.py from your local workspace:
git add app.py
git commit -m "feat: upgrade runtime message block"
git push origin main
To access our newly deployed Python FastAPI application from our workstation, we have two options based on our NodePort configuration.
Option 1: access via NodePort (direct cluster routing)
Our python-app-service manifest correctly configured a NodePort service. Looking at our kubectl get output:
service/python-app-service NodePort 10.99.36.33 <none> 80:30449/TCP
Kubernetes has opened port 30449 across every single physical node in our cluster.
To access the app directly, find the host IP address of any of the cluster nodes (such as the machine hosting worker-2 or worker-3) and navigate to it in the browser of choice on the high port (to the left of /TCP at the end of the line).
http://<ANY_CLUSTER_NODE_IP>:30449/
Option 2: use a kubectl port-forward tunnel (recommended for testing)
If we want to map the cluster application specifically to our workstation's localhost interface for convenient local testing, we can instruct kubectl to open a secure, bidirectional network tunnel from our desktop straight to the service.
Run this command in a separate terminal window on our workstation:
kubectl port-forward svc/python-app-service -n app 8080:80
What this does:
This binds our workstation's local port 8080 directly to the cluster service's incoming port 80.
Now, you may ask, but our app is exposed on port 8000 in the container, see the Dockerfile, should we not be using this port?
Our configuration is actually completely correct as it stands, and we do not need to change the application's internal container port (8000).
In our Kubernetes manifest, we created a translation layer using the Service definition. Let's look at how the traffic flows:
ports:
  - protocol: TCP
    port: 80          # <-- The Service's entry port inside the cluster
    targetPort: 8000  # <-- The port the Service forwards to inside the container
Because of this mapping, the Service listens on port 80 inside the cluster network and automatically shifts the traffic to port 8000 inside our Python container.
Why option 2 (kubectl port-forward) works with our setup:
When we run a port-forward command, we specify LOCAL_PORT:CLUSTER_SERVICE_PORT. Since our service is listening on port 80, our command should target port 80 like this:
kubectl port-forward svc/python-app-service -n app 8080:80

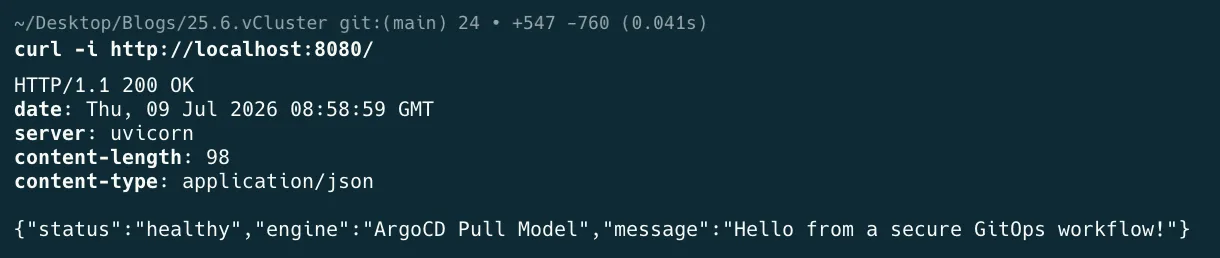
In a new terminal, execute the below.
curl -i http://localhost:8080/
We can now navigate with our browser to any of the below addresses:
What we built:
And like all projects, things change. You delivered an amazing piece of work and the client loved it, so the boss surprises you with additional requirements. We will just call it app2 (another simple little Python/FastAPI app).
Below are the artefacts that need to be modified/replaced, see \<project_root\>/app2.
Note: to be able to roll back, if required, I have placed backup copies of all the original files which we will modify as part of the app2 deployment in a backup folder.
app2.py
from fastapi import FastAPI

app = FastAPI(title="K8s-GitOps-App2-Helper")

@app.get("/")
def read_root():
    return {
        "status": "healthy",
        "component": "App 2 Helper Sub-System",
        "message": "Hello! I am running on port 9000 in my own namespace."
    }

@app.get("/healthz")
def health_check():
    return {"status": "OK"}
Dockerfile
FROM python:3.11-slim
WORKDIR /app
RUN pip install --no-cache-dir fastapi uvicorn
COPY app2.py .
EXPOSE 9000
USER 65534
CMD ["uvicorn", "app2:app", "--host", "0.0.0.0", "--port", "9000"]
Step 1: To deploy we will copy/replace the current file k8s/deployment.yml with the below (see the new app2 section three quarters of the way down).
new deployment.yml
apiVersion: apps/v1
kind: Deployment
metadata:
  name: python-app-deployment
  namespace: app
  labels:
    app: python-fastapi
spec:
  replicas: 2
  selector:
    matchLabels:
      app: python-fastapi
  template:
    metadata:
      labels:
        app: python-fastapi
    spec:
      containers:
        - name: fastapi-app
          image: georgelza/python-fastapi-app:c7770605464afad40e9d4fa8736768736d8beb90
          imagePullPolicy: Always
          ports:
            - containerPort: 8000
          livenessProbe:
            httpGet:
              path: /healthz
              port: 8000
            initialDelaySeconds: 5
          readinessProbe:
            httpGet:
              path: /healthz
              port: 8000
            initialDelaySeconds: 5
---
apiVersion: v1
kind: Service
metadata:
  name: python-app-service
  namespace: app
spec:
  selector:
    app: python-fastapi
  ports:
    - protocol: TCP
      port: 80
      targetPort: 8000
  type: NodePort
---
apiVersion: v1
kind: Namespace
metadata:
  name: app2-space
---
apiVersion: apps/v1
kind: Deployment
metadata:
  name: python-app2-deployment
  namespace: app2-space
  labels:
    app: python-fastapi-two
spec:
  replicas: 1
  selector:
    matchLabels:
      app: python-fastapi-two
  template:
    metadata:
      labels:
        app: python-fastapi-two
    spec:
      containers:
        - name: fastapi-app2
          # The runner will dynamically patch this placeholder just like App 1
          image: georgelza/python-fastapi-app2:placeholder
          imagePullPolicy: Always
          ports:
            - containerPort: 9000
          livenessProbe:
            httpGet:
              path: /healthz
              port: 9000
            initialDelaySeconds: 5
          readinessProbe:
            httpGet:
              path: /healthz
              port: 9000
            initialDelaySeconds: 5
---
apiVersion: v1
kind: Service
metadata:
  name: python-app2-service
  namespace: app2-space
spec:
  selector:
    app: python-fastapi-two
  ports:
    - protocol: TCP
      port: 80
      targetPort: 9000
  type: NodePort
Step 2: To deploy we will copy/replace the current file .github/workflows/ci.yml with the below (see the new Build App 2 section three quarters of the way down).
new .github/workflows/ci.yml
name: CI Build and Manifest Update

on:
  push:
    branches:
      - main
    paths-ignore:
      - 'k8s/**'

jobs:
  build-and-patch:
    runs-on: ubuntu-latest
    permissions:
      contents: write

    steps:
      - name: Checkout Source Code
        uses: actions/checkout@v4
        with:
          fetch-depth: 0

      - name: Set up Docker Buildx
        uses: docker/setup-buildx-action@v3

      - name: Log in to Docker Hub
        uses: docker/login-action@v3
        with:
          username: ${{ secrets.DOCKERHUB_USERNAME }}
          password: ${{ secrets.DOCKERHUB_TOKEN }}

      # BUILD APP 1 (Untouched)
      - name: Build and Push App 1
        uses: docker/build-push-action@v5
        with:
          context: .
          file: ./Dockerfile
          push: true
          platforms: linux/amd64,linux/arm64
          tags: |
            ${{ secrets.DOCKERHUB_USERNAME }}/python-fastapi-app:latest
            ${{ secrets.DOCKERHUB_USERNAME }}/python-fastapi-app:${{ github.sha }}
          cache-from: type=gha
          cache-to: type=gha,mode=max

      # BUILD APP 2 (Addition)
      - name: Build and Push App 2
        uses: docker/build-push-action@v5
        with:
          context: ./app2
          file: ./app2/Dockerfile
          push: true
          platforms: linux/amd64,linux/arm64
          tags: |
            ${{ secrets.DOCKERHUB_USERNAME }}/python-fastapi-app2:latest
            ${{ secrets.DOCKERHUB_USERNAME }}/python-fastapi-app2:${{ github.sha }}
          cache-from: type=gha
          cache-to: type=gha,mode=max

      # PATCH BOTH MANIFEST TAGS
      - name: Update Manifest Image Tags
        run: |
          # Patches both app images inside the same k8s/deployment.yml file
          sed -i -E "s|(image: ${{ secrets.DOCKERHUB_USERNAME }}/python-fastapi-app:).*|\1${{ github.sha }}|" k8s/deployment.yml
          sed -i -E "s|(image: ${{ secrets.DOCKERHUB_USERNAME }}/python-fastapi-app2:).*|\1${{ github.sha }}|" k8s/deployment.yml

          git config user.name "github-actions[bot]"
          git config user.email "github-actions[bot]@users.noreply.github.com"

          git add k8s/deployment.yml
          git commit -m "chore: auto-update image tags for app1 and app2 to ${{ github.sha }} [skip ci]"
          git push
Step 3: execution (the Git loop)
Since Argo CD is already tracking your k8s/ folder via our existing application setup, we don't even need to register a new file with Argo CD. The moment we commit these additions, Argo CD will notice the appended blocks at the bottom of the manifest and natively deploy them.
Execute the following commands locally after copying the new artefacts as per above:
# 1. Bring down the tracking tag changes from the last run
git pull origin main

# 2. Stage the new app2 folder and file updates
git add .

# 3. Commit the structural expansion non-invasively
git commit -m "feat: non-invasively introduce app2 helper sub-system"

# 4. Push to production
git push origin main
Once the pipeline goes green, we can verify that both components are happily coexisting in our cluster under their own namespaces.
New deployment.yml as updated by the GitHub Actions process. Take note that both :placeholder values on line 21 and 75 have been updated.
apiVersion: apps/v1
kind: Deployment
metadata:
  name: python-app-deployment
  namespace: app
  labels:
    app: python-fastapi
spec:
  replicas: 2
  selector:
    matchLabels:
      app: python-fastapi
  template:
    metadata:
      labels:
        app: python-fastapi
    spec:
      containers:
        - name: fastapi-app
          image: georgelza/python-fastapi-app:8847ab9c4a325412716080608e21e9745a29d759
          imagePullPolicy: Always
          ports:
            - containerPort: 8000
          livenessProbe:
            httpGet:
              path: /healthz
              port: 8000
            initialDelaySeconds: 5
          readinessProbe:
            httpGet:
              path: /healthz
              port: 8000
            initialDelaySeconds: 5
---
apiVersion: v1
kind: Service
metadata:
  name: python-app-service
  namespace: app
spec:
  selector:
    app: python-fastapi
  ports:
    - protocol: TCP
      port: 80
      targetPort: 8000
  type: NodePort
---
apiVersion: v1
kind: Namespace
metadata:
  name: app2-space
---
apiVersion: apps/v1
kind: Deployment
metadata:
  name: python-app2-deployment
  namespace: app2-space
  labels:
    app: python-fastapi-two
spec:
  replicas: 1
  selector:
    matchLabels:
      app: python-fastapi-two
  template:
    metadata:
      labels:
        app: python-fastapi-two
    spec:
      containers:
        - name: fastapi-app2
          # The runner will dynamically patch this placeholder just like App 1
          image: georgelza/python-fastapi-app2:8847ab9c4a325412716080608e21e9745a29d759
          imagePullPolicy: Always
          ports:
            - containerPort: 9000
          livenessProbe:
            httpGet:
              path: /healthz
              port: 9000
            initialDelaySeconds: 5
          readinessProbe:
            httpGet:
              path: /healthz
              port: 9000
            initialDelaySeconds: 5
---
apiVersion: v1
kind: Service
metadata:
  name: python-app2-service
  namespace: app2-space
spec:
  selector:
    app: python-fastapi-two
  ports:
    - protocol: TCP
      port: 80
      targetPort: 9000
  type: NodePort
NOTE: Our hub.docker.com personal access token allows GitHub Actions to create the new repository required for app2 which will contain the new image. We will also notice that both app and app2 tags are the same. This is due to the fact that the GitHub Actions runner compiled and built both images during the same execution process.
kubectl get pods,services,deployments -n app
kubectl get pods,services,deployments -n app2-space


Step 4: verify
We can now configure a new port-forward as per the previous section to reach our application.
kubectl port-forward svc/python-app2-service -n app2-space 9080:80
In a new terminal:
curl -i http://localhost:9080/

We can now also navigate using our browser to:
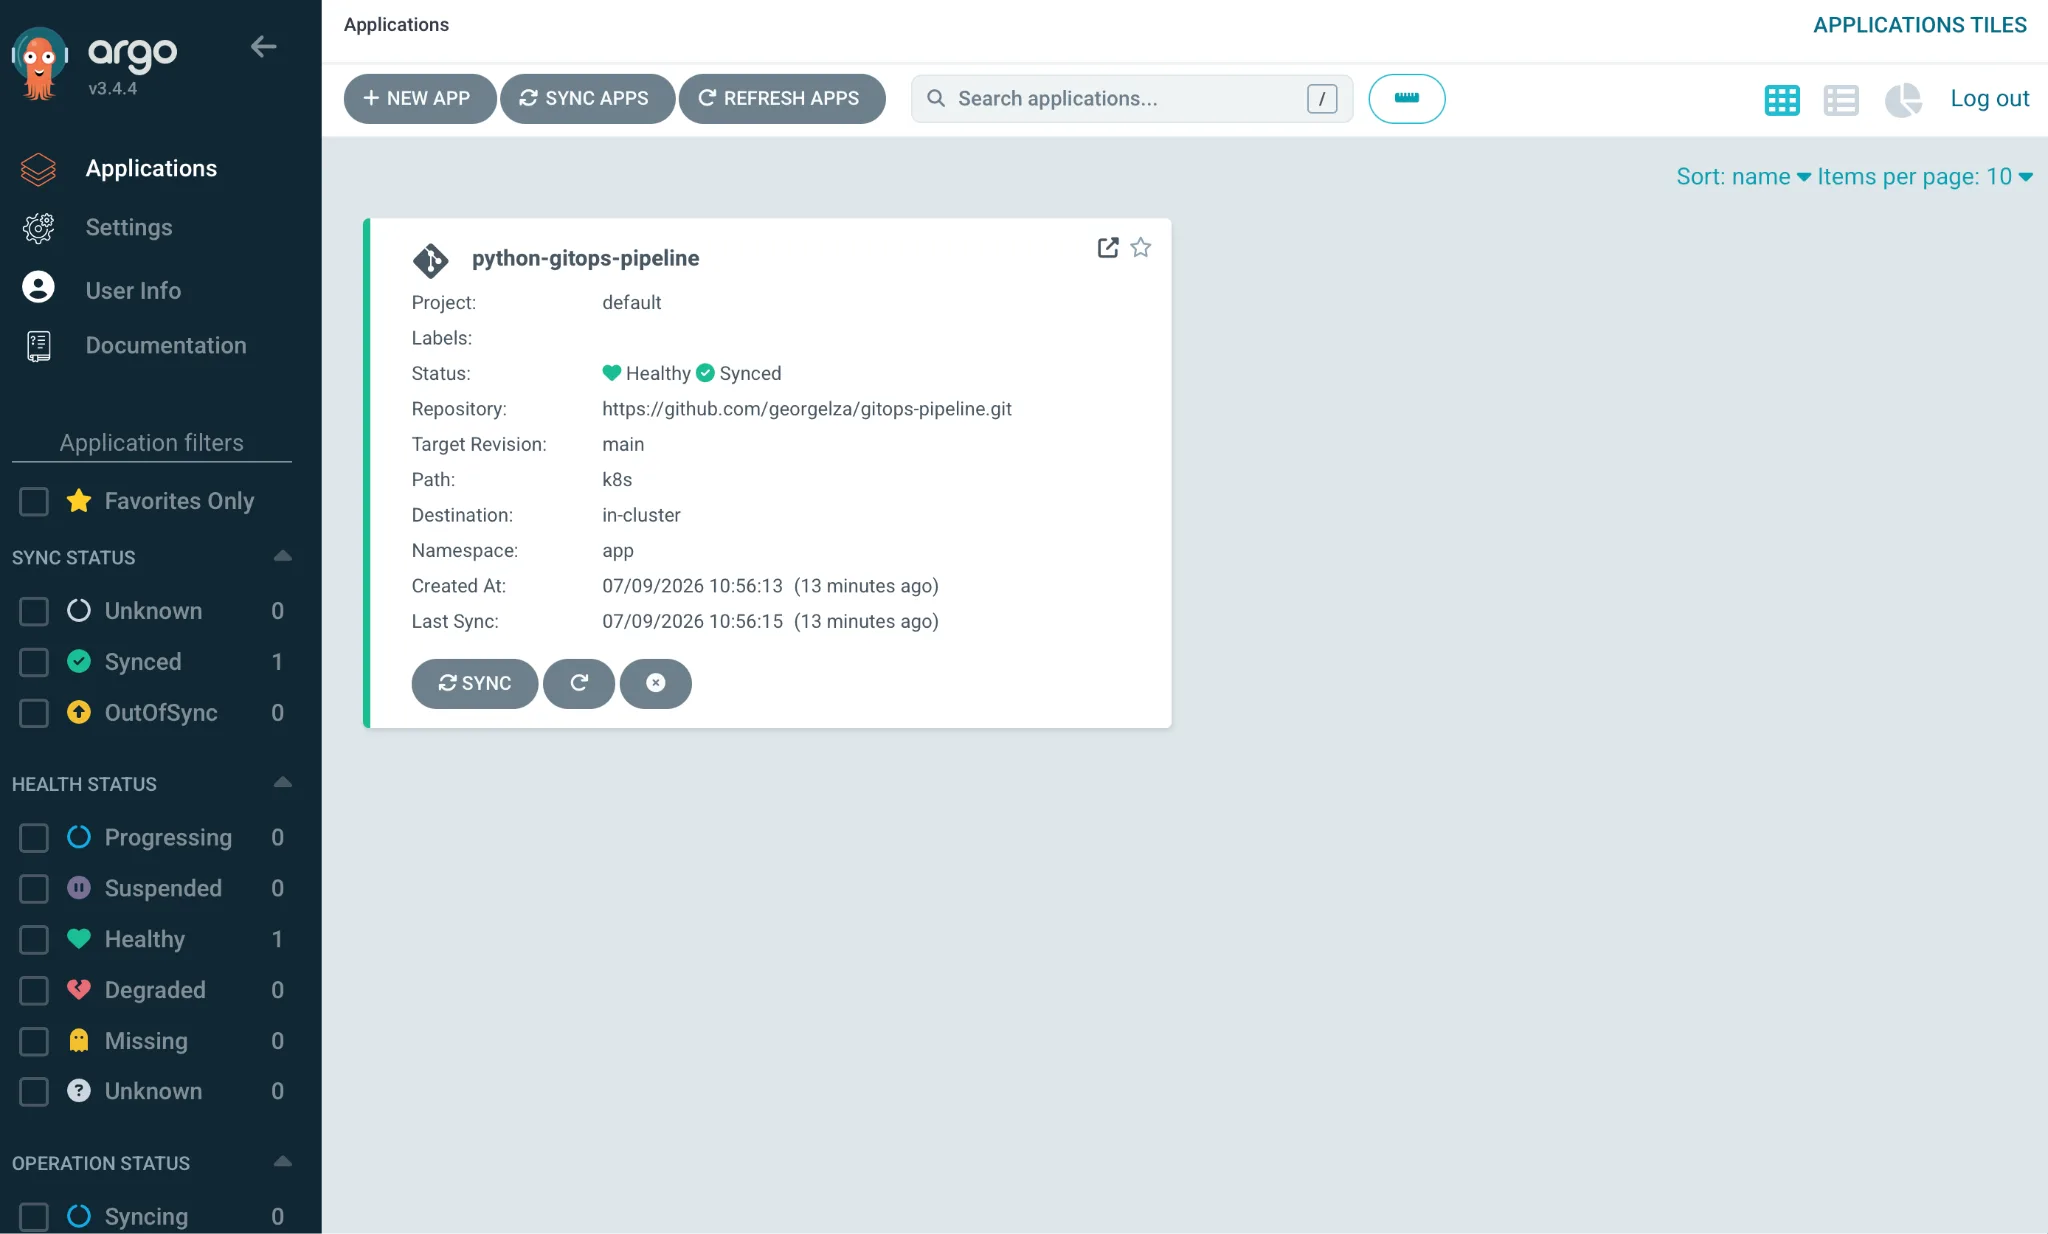
Argo CD itself comes with a fully functional console/UI. To access it, first note that the default username is admin.
Argo CD creates a random password during installation. This can be retrieved using the below command.
kubectl -n argocd get secret argocd-initial-admin-secret -o jsonpath="{.data.password}" | base64 -d

Now, to access the console we first need to configure another port-forward (note we're using 8081 for this, as we previously already utilised 8080):
kubectl port-forward svc/argocd-server -n argocd 8081:443

NOTE: Because we're working on our project locally and GitHub Actions is also modifying our k8s/deployment.yml, you will be getting the below error stack:
git add .
git commit -m "<comment>"
git push
Results in:
To https://github.com/georgelza/gitops-pipeline.git
 ! [rejected]        main -> main (fetch first)
error: failed to push some refs to 'https://github.com/georgelza/gitops-pipeline.git'
hint: Updates were rejected because the remote contains work that you do not
hint: have locally. This is usually caused by another repository pushing to
hint: the same ref. If you want to integrate the remote changes, use
hint: 'git pull' before pushing again.
hint: See the 'Note about fast-forwards' in 'git push --help' for details.
Quick fix:
# git add <specify specific file>
git add GITOPS_README.md
git commit -m "<comment>"
git pull origin main
git config pull.rebase false
git push origin main
Well, I could try and write a long summary here, but that was it, really very simple. All enabled on our local desktop/laptop by running a Kubernetes cluster inside vCluster. The above and previous blogs provide us with a complete framework, allowing for a real world development environment, with minimal to no changes when we deploy to a production Kubernetes cluster.
Deploy your first virtual cluster today.
