Standing Up NVIDIA Run:ai as a Repeatable Stack: Introducing vCluster Stacks

Oct 6, 2026
|
12
min Read

Getting a Kubernetes cluster running is only the beginning of an AI platform. Before a team can submit its first GPU workload, somebody still has to connect the registry credentials, ingress, certificates, GPU components, control plane, and cluster registration. Each piece has its own configuration, and several depend on values that do not exist until an earlier step finishes.
That is where installation guides start turning into platform engineering work. Which component needs to be healthy first? Where does its output go? What should we inspect when the next installation is waiting? And how do we repeat the same setup for another team without rediscovering those answers?
vCluster Platform 4.12 includes Stacks for describing that workflow. In this walkthrough, we will use the NVIDIA Run:ai Stack to create a tenant cluster, follow its deployment, and open NVIDIA Run:ai. We will then look at how to adapt the Stack and use the resulting platform to create projects and run workloads.
A StackTemplate describes a group of applications, their dependencies, configuration parameters, and outputs. A StackInstance applies that template to a particular tenant cluster or control plane cluster. Individual tasks create AppInstances or ArgoCDApplications.
The useful part is the relationship between the tasks. A task with dependsOn waits until its dependencies report healthy. Tasks without dependencies can proceed concurrently. A task can also capture an output, such as an ingress address or a value from a Secret, for a later task to consume.
For NVIDIA Run:ai, this means the deployment can obtain the ingress address before configuring the endpoint, wait for the control plane before registering the cluster, and pass the registration credentials into the cluster components. These relationships live in a reusable definition. See the Stack template documentation for the resource model and task syntax.
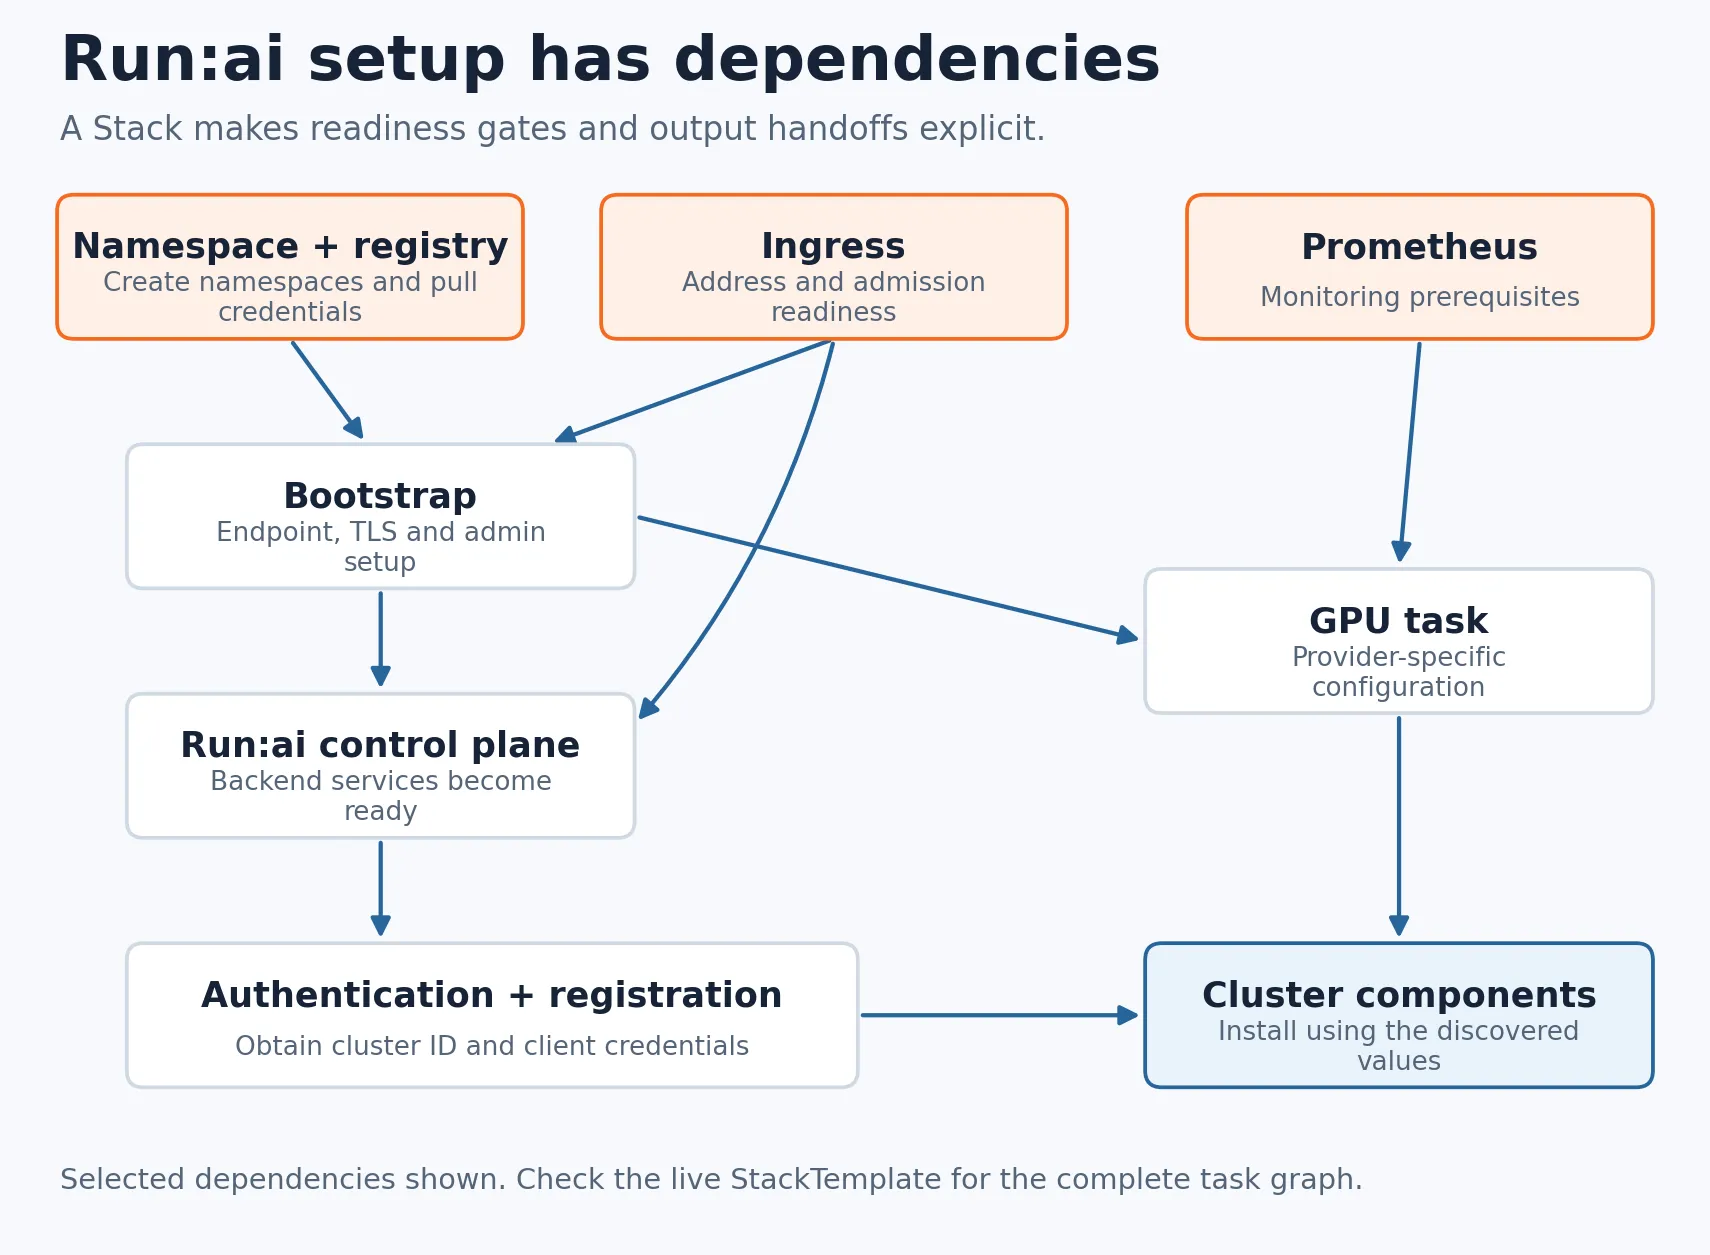
Figure 1: Selected dependencies in the dedicated NVIDIA Run:ai Stack. Registration follows the control plane, and cluster components wait for both registration credentials and the GPU task. The live template contains the complete graph.
Deploying NVIDIA Run:ai involves several kinds of work: creating Kubernetes resources, installing charts, waiting for infrastructure, and calling the NVIDIA Run:ai API. A successful Helm command only covers part of that sequence.
Without a shared workflow, an engineer has to keep track of those dependencies across commands and values files. With a Stack, the platform team defines the sequence once and supplies environment-specific inputs for each deployment. When something waits or fails, the task status gives us a place to start investigating.
This is most useful when several teams need the same platform components, or when the setup includes generated values and readiness dependencies. A single independent chart may not need that extra structure. Stacks also do not supply missing GPU capacity, registry access, storage, or a production certificate. We still need to make those choices.
The NVIDIA Run:ai integration supports dedicated and central control-plane models. We will follow the dedicated model used in the screenshots: each tenant gets its own NVIDIA Run:ai control-plane lifecycle. The central model shares that control plane and manages tenant registration separately.
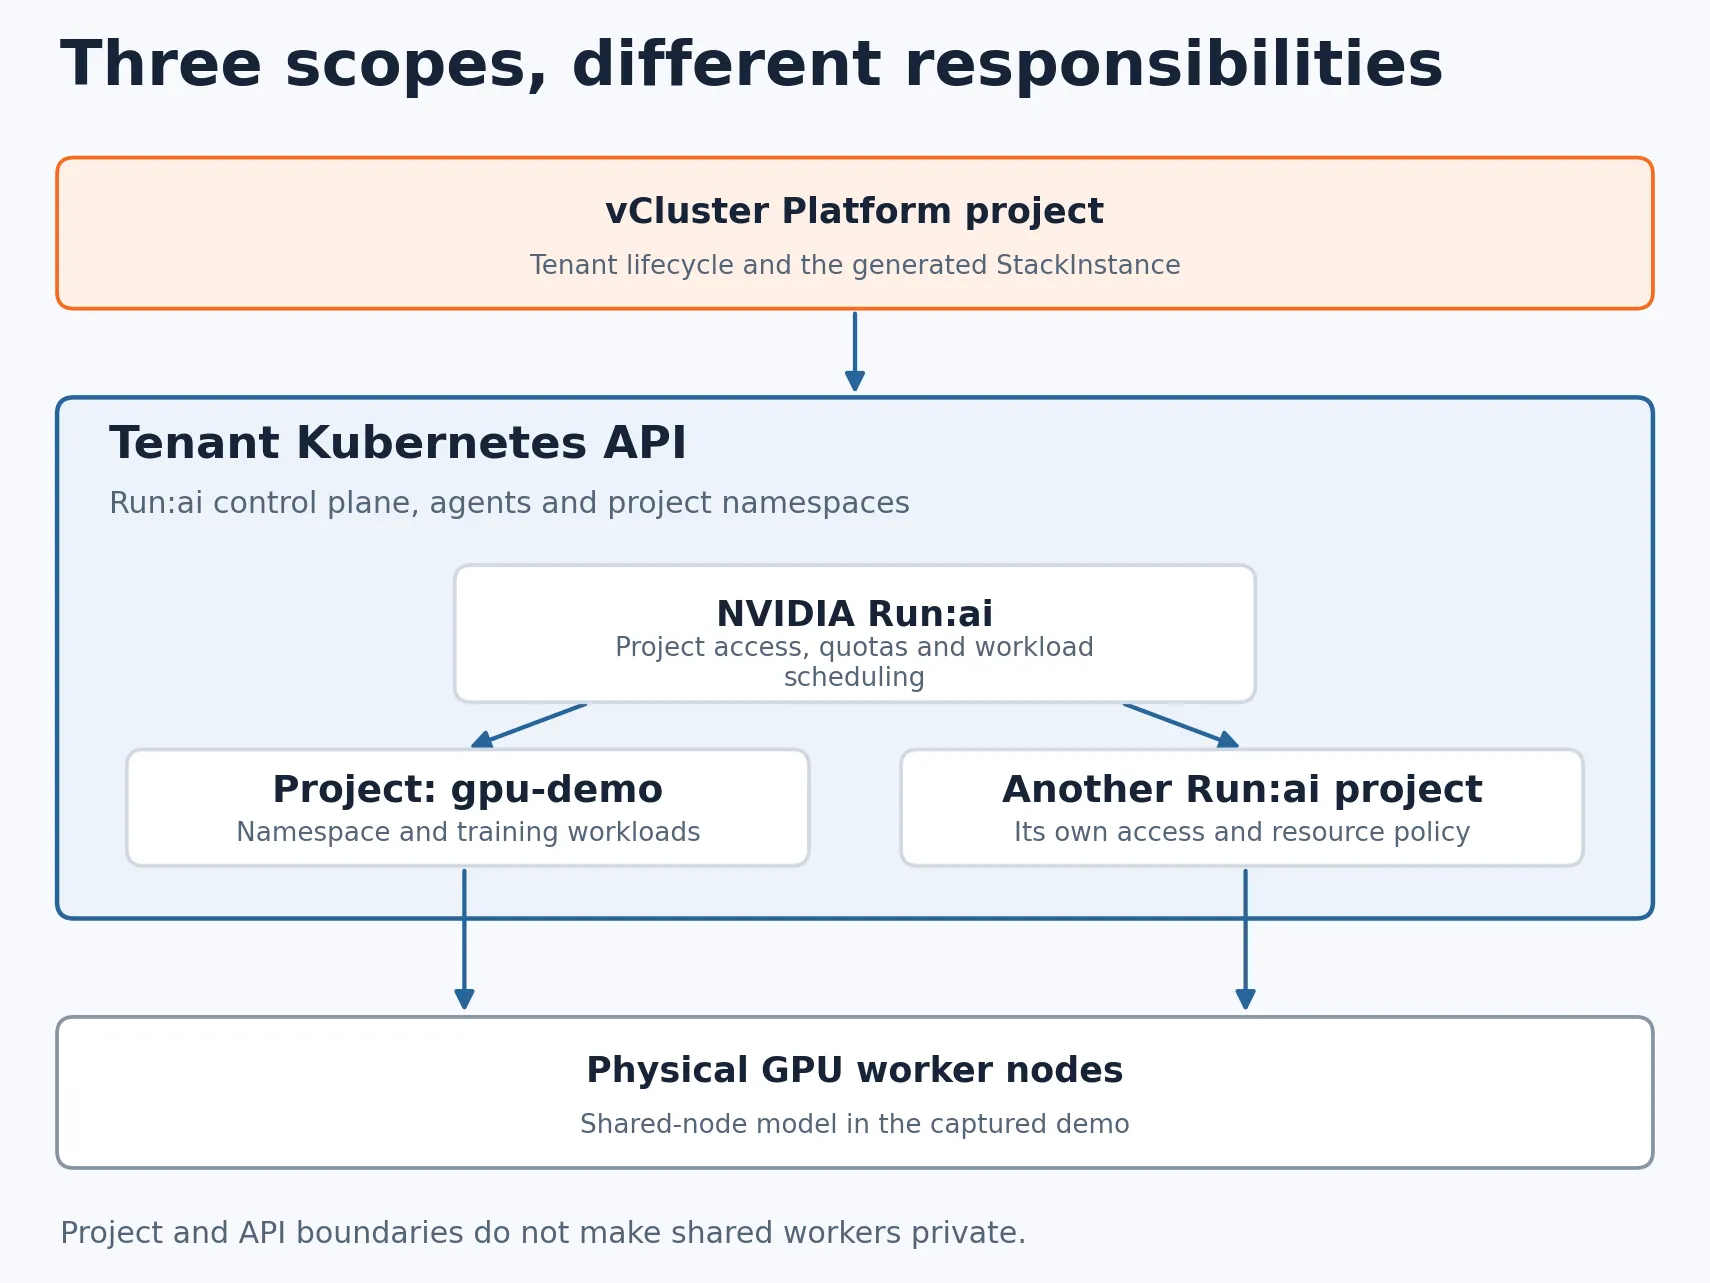
Figure 2: The demo uses a tenant Kubernetes API with NVIDIA Run:ai inside it. NVIDIA Run:ai projects organize workloads within that tenant. Physical GPU workers are shared in this configuration; creating a dedicated NVIDIA Run:ai control plane does not create private worker nodes.
To note: Shared nodes suit trusted internal tenants. Workloads still share the underlying nodes and kernel. Use a deployment designed around private nodes when the required tenant boundary includes dedicated workers. Review the shared-node security guidance before choosing this model.
Have the following available:
Begin in the context of the Kubernetes cluster that will host Platform. Confirm that context and inspect the available storage before installing anything:
kubectl get storageclass
Then install Platform:
vcluster platform start
The captured installation completed and printed a Platform URL, along with the initial administrator credentials. Open the URL returned by your own installation and sign in. Those credentials belong to vCluster Platform; the NVIDIA Run:ai administrator account is configured later:
vCluster Platform was successfully installed and can now be reached at: https://4h8a3nz.loft.host

Thanks for using vCluster Platform!

23:28:49 done You are successfully logged into vCluster Platform!
- Use `vcluster platform create vcluster` to create a new virtual cluster
- Use `vcluster platform add vcluster` to add an existing virtual cluster to a vCluster platform instance
The successful startup confirms that Platform is reachable. It does not yet tell us anything about NVIDIA Run:ai or GPU scheduling. If Platform is already installed, use that installation and move on to the bundled templates.
Note the StorageClass name from the first command. You will need it in Step 3.
Open Management > Stacks & Apps and select Stacks. The catalog includes the dedicated NVIDIA Run:ai Stack and the components used by the central model.
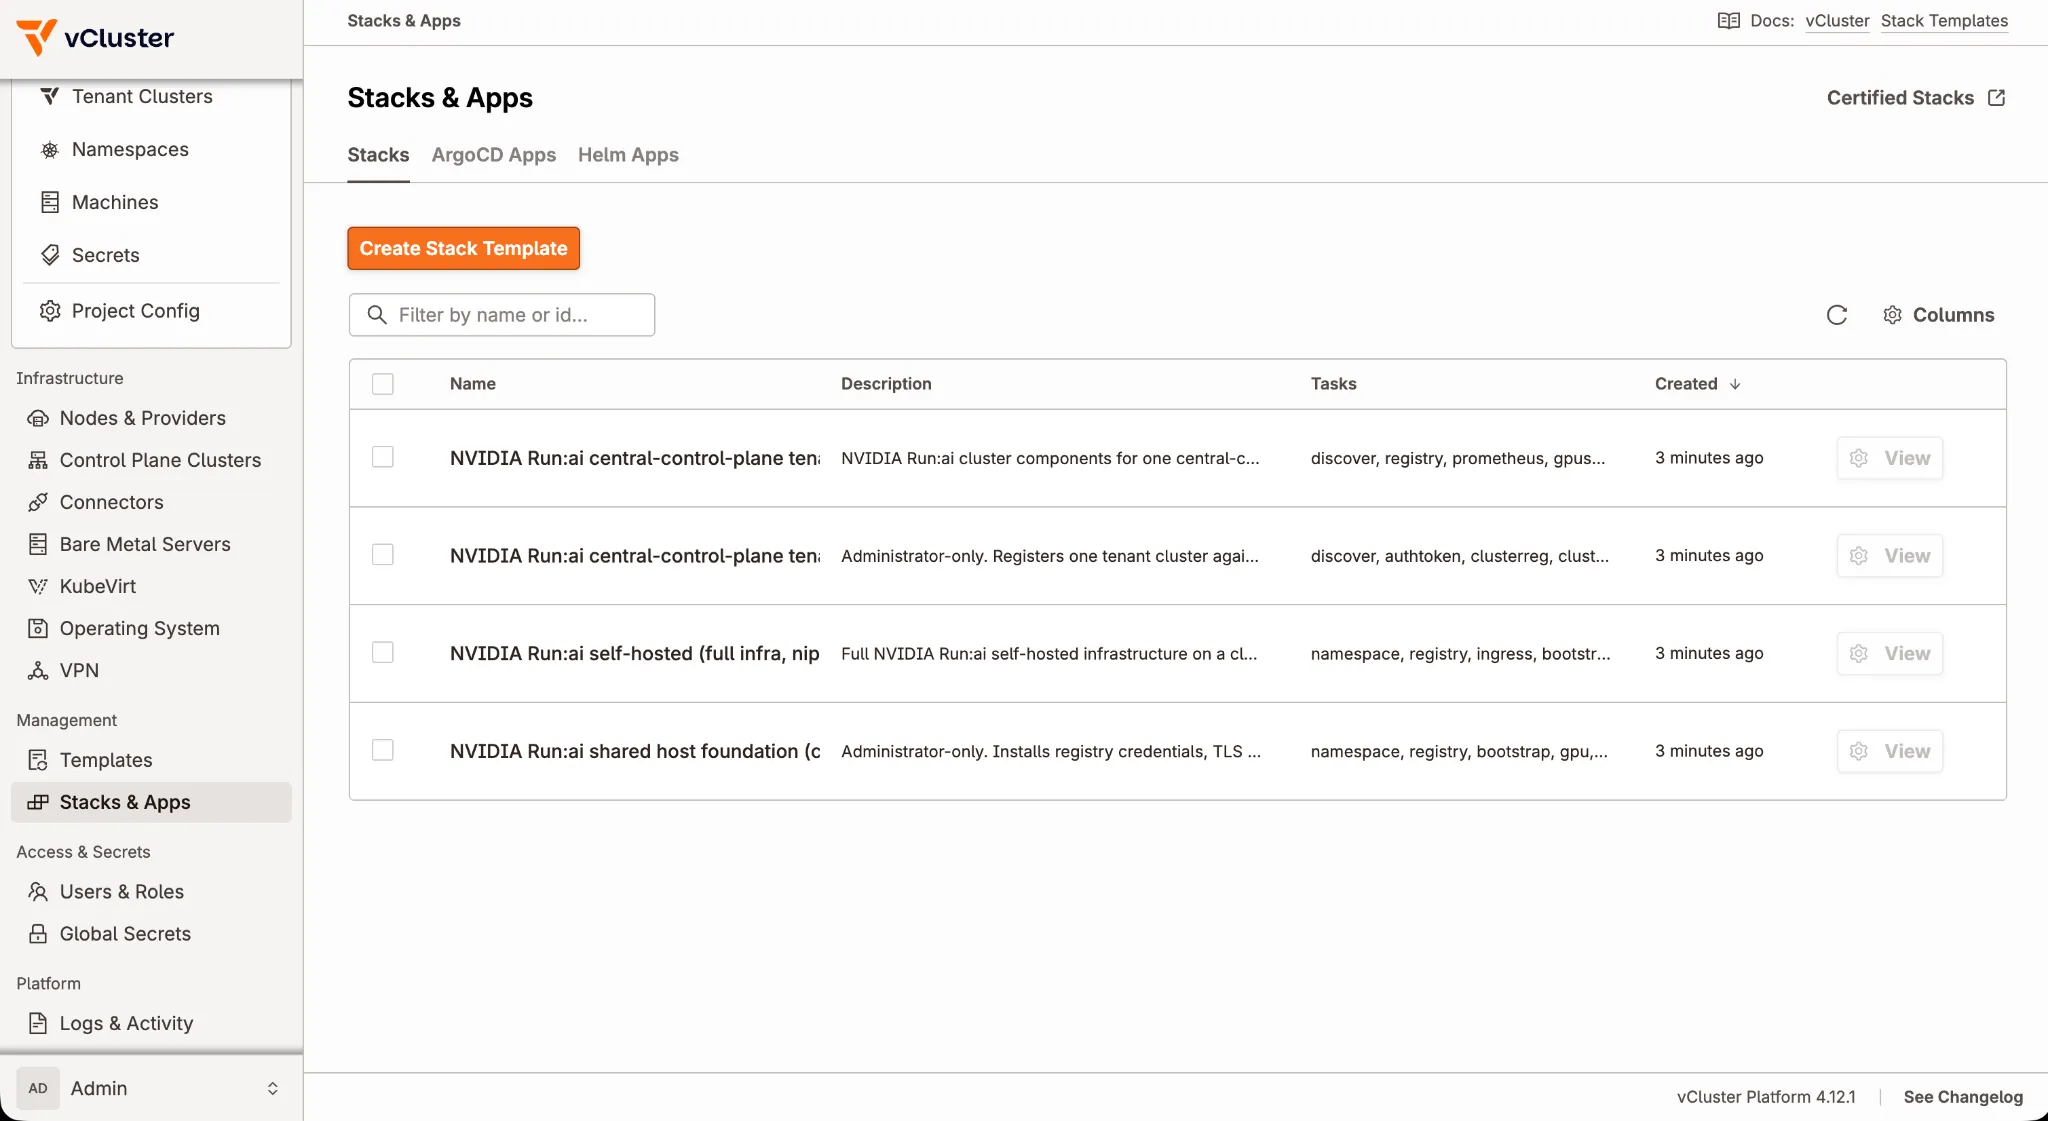
Figure 3: The Stacks catalog exposes the available NVIDIA Run:ai deployment models. The demo continues with the dedicated control-plane Stack.
Open run-ai-dedicated-control-plane and inspect its graph. The captured view shows tasks for namespaces, registry credentials, ingress, bootstrap, Prometheus, GPU components, and the NVIDIA Run:ai backend. Registration and cluster installation continue further along the graph.
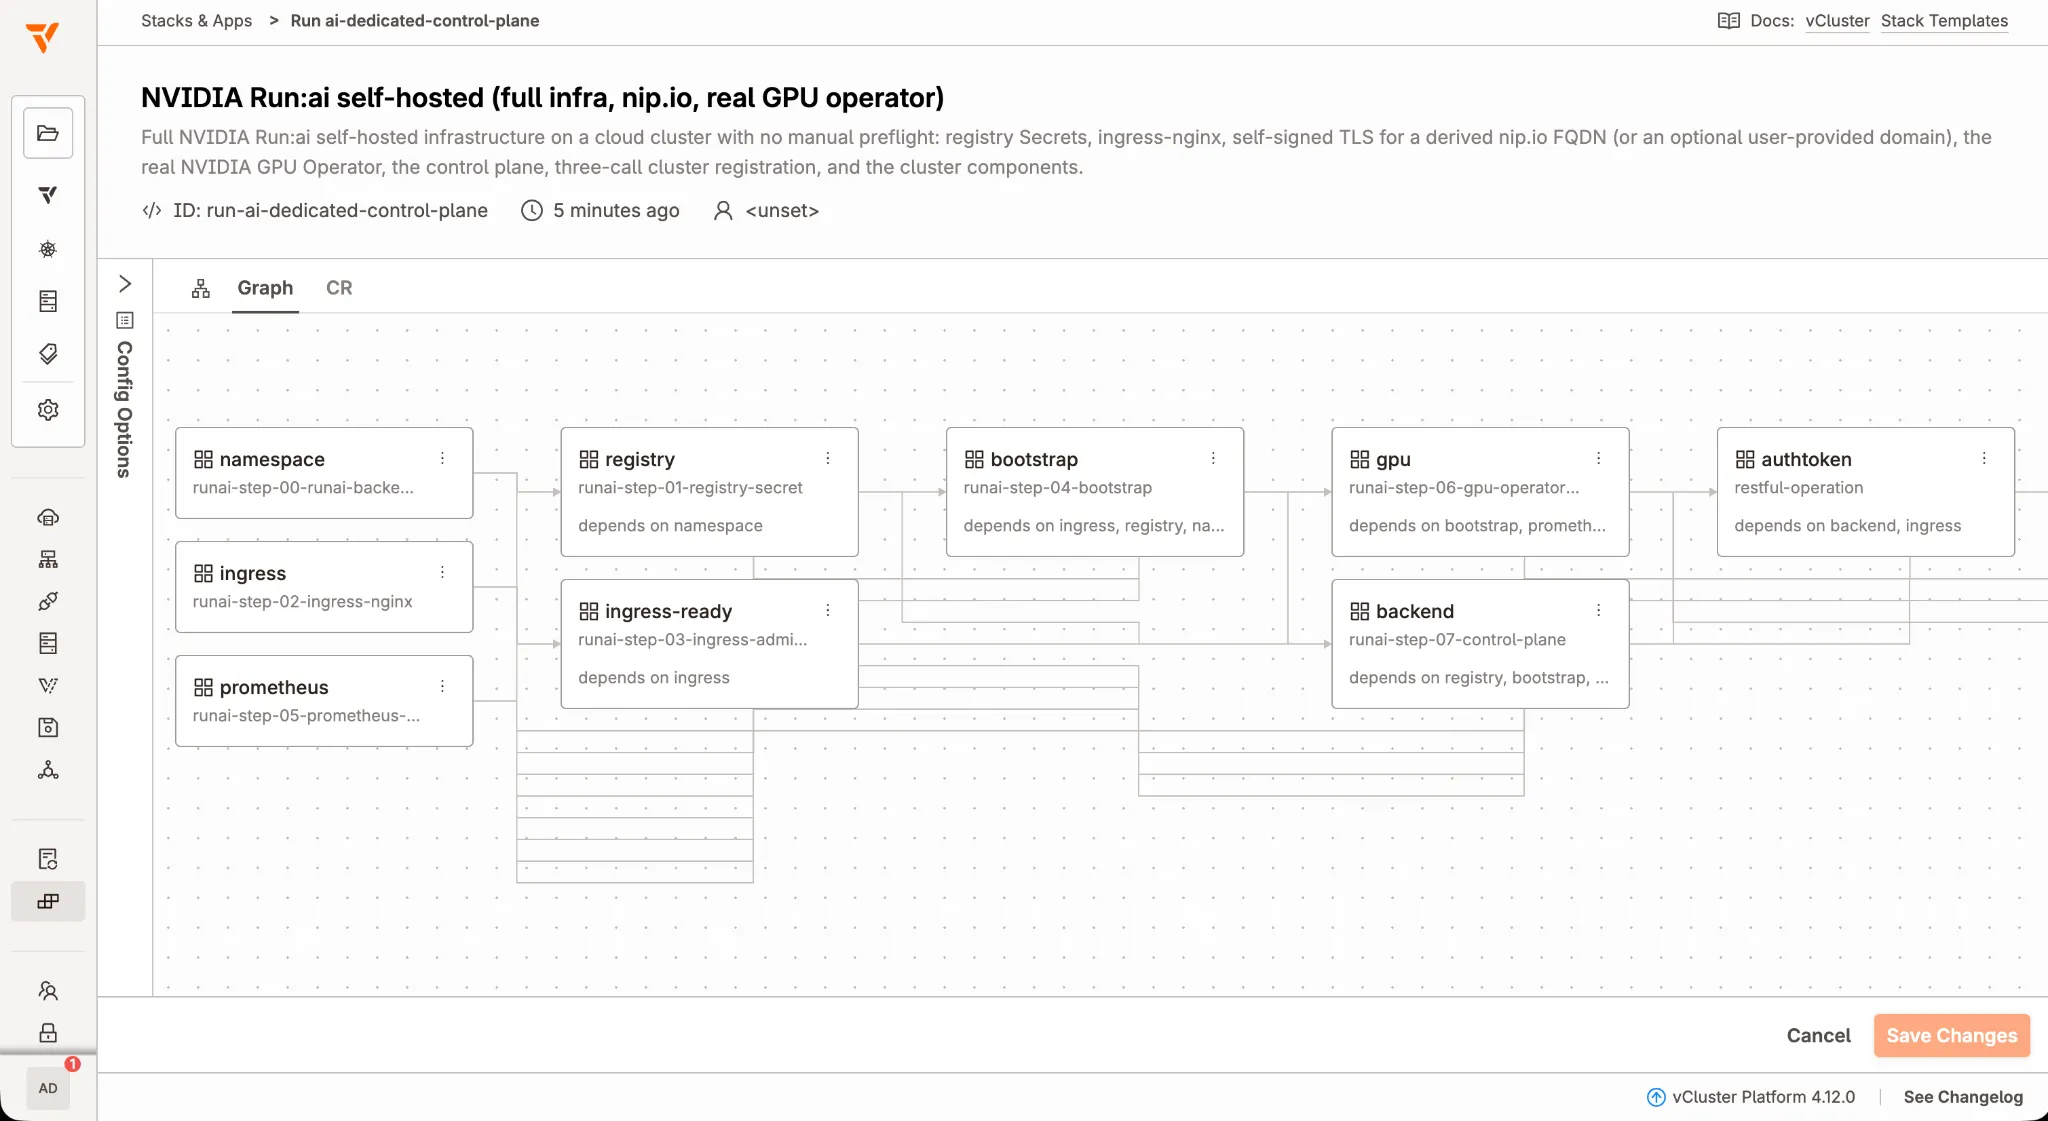
Figure 4: The graph shows which tasks depend on earlier work. For example, the backend needs registry and bootstrap configuration, while authentication waits for the backend.
It is worth looking at this before creating the tenant. If a task later stops progressing, we can trace what it is waiting for instead of treating the whole installation as one failed command. The bundled NVIDIA Run:ai Stacks use App tasks, so this demo does not require an Argo CD integration.
Next, open Management > Templates > Tenant Clusters. Find NVIDIA Run:ai tenant, whose resource name is runai-tenant. This VirtualClusterTemplate creates the tenant and attaches the dedicated Stack through deploy.stacks.
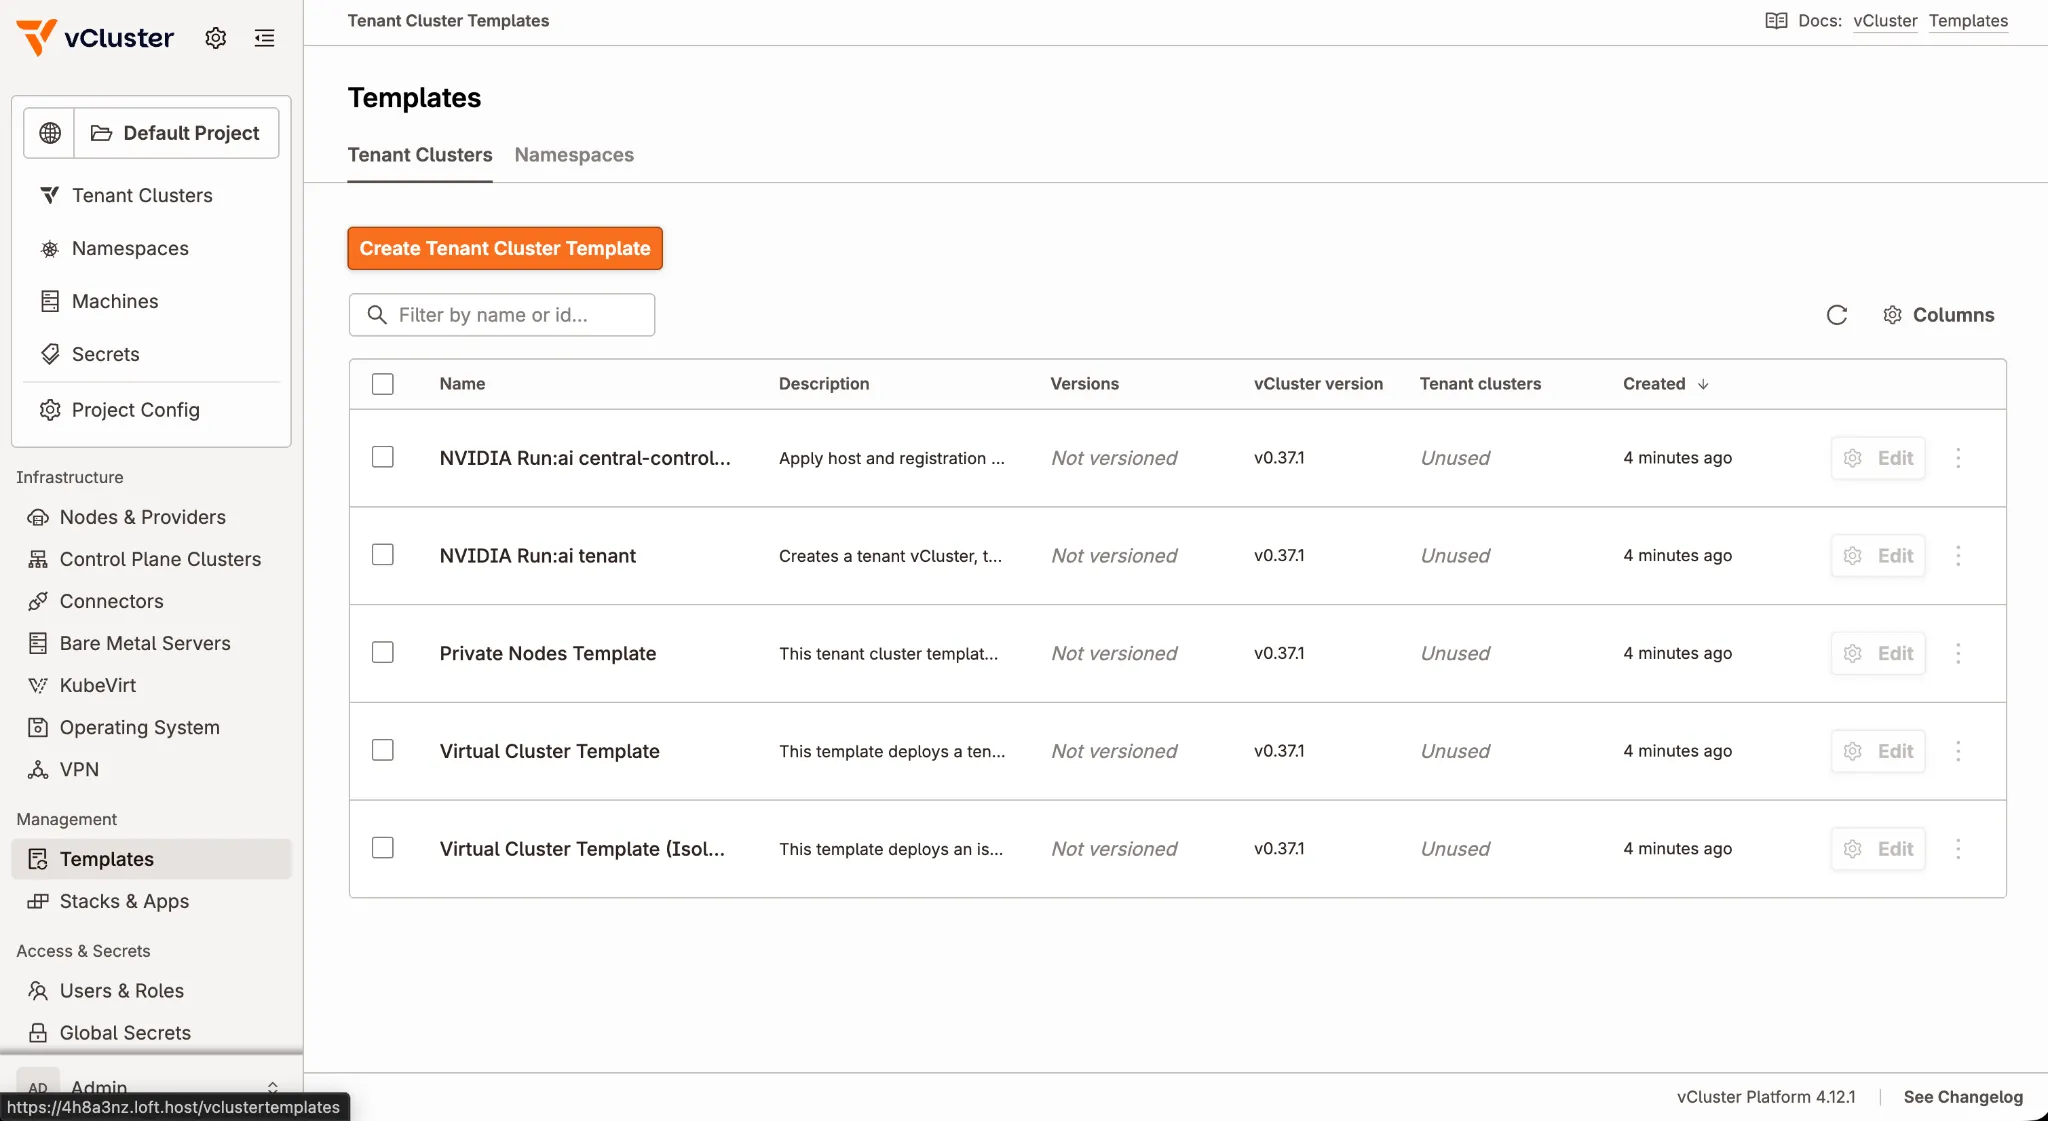
Figure 5: NVIDIA Run:ai tenant is the tenant-cluster entry point. The StackTemplate describes the applications; this template creates the cluster that will receive them.
In the intended Platform project, create a tenant cluster and select the NVIDIA Run:ai tenant template. Use runai as the tenant-cluster ID for this example, choose an owner with access to the destination, and select the control plane host.
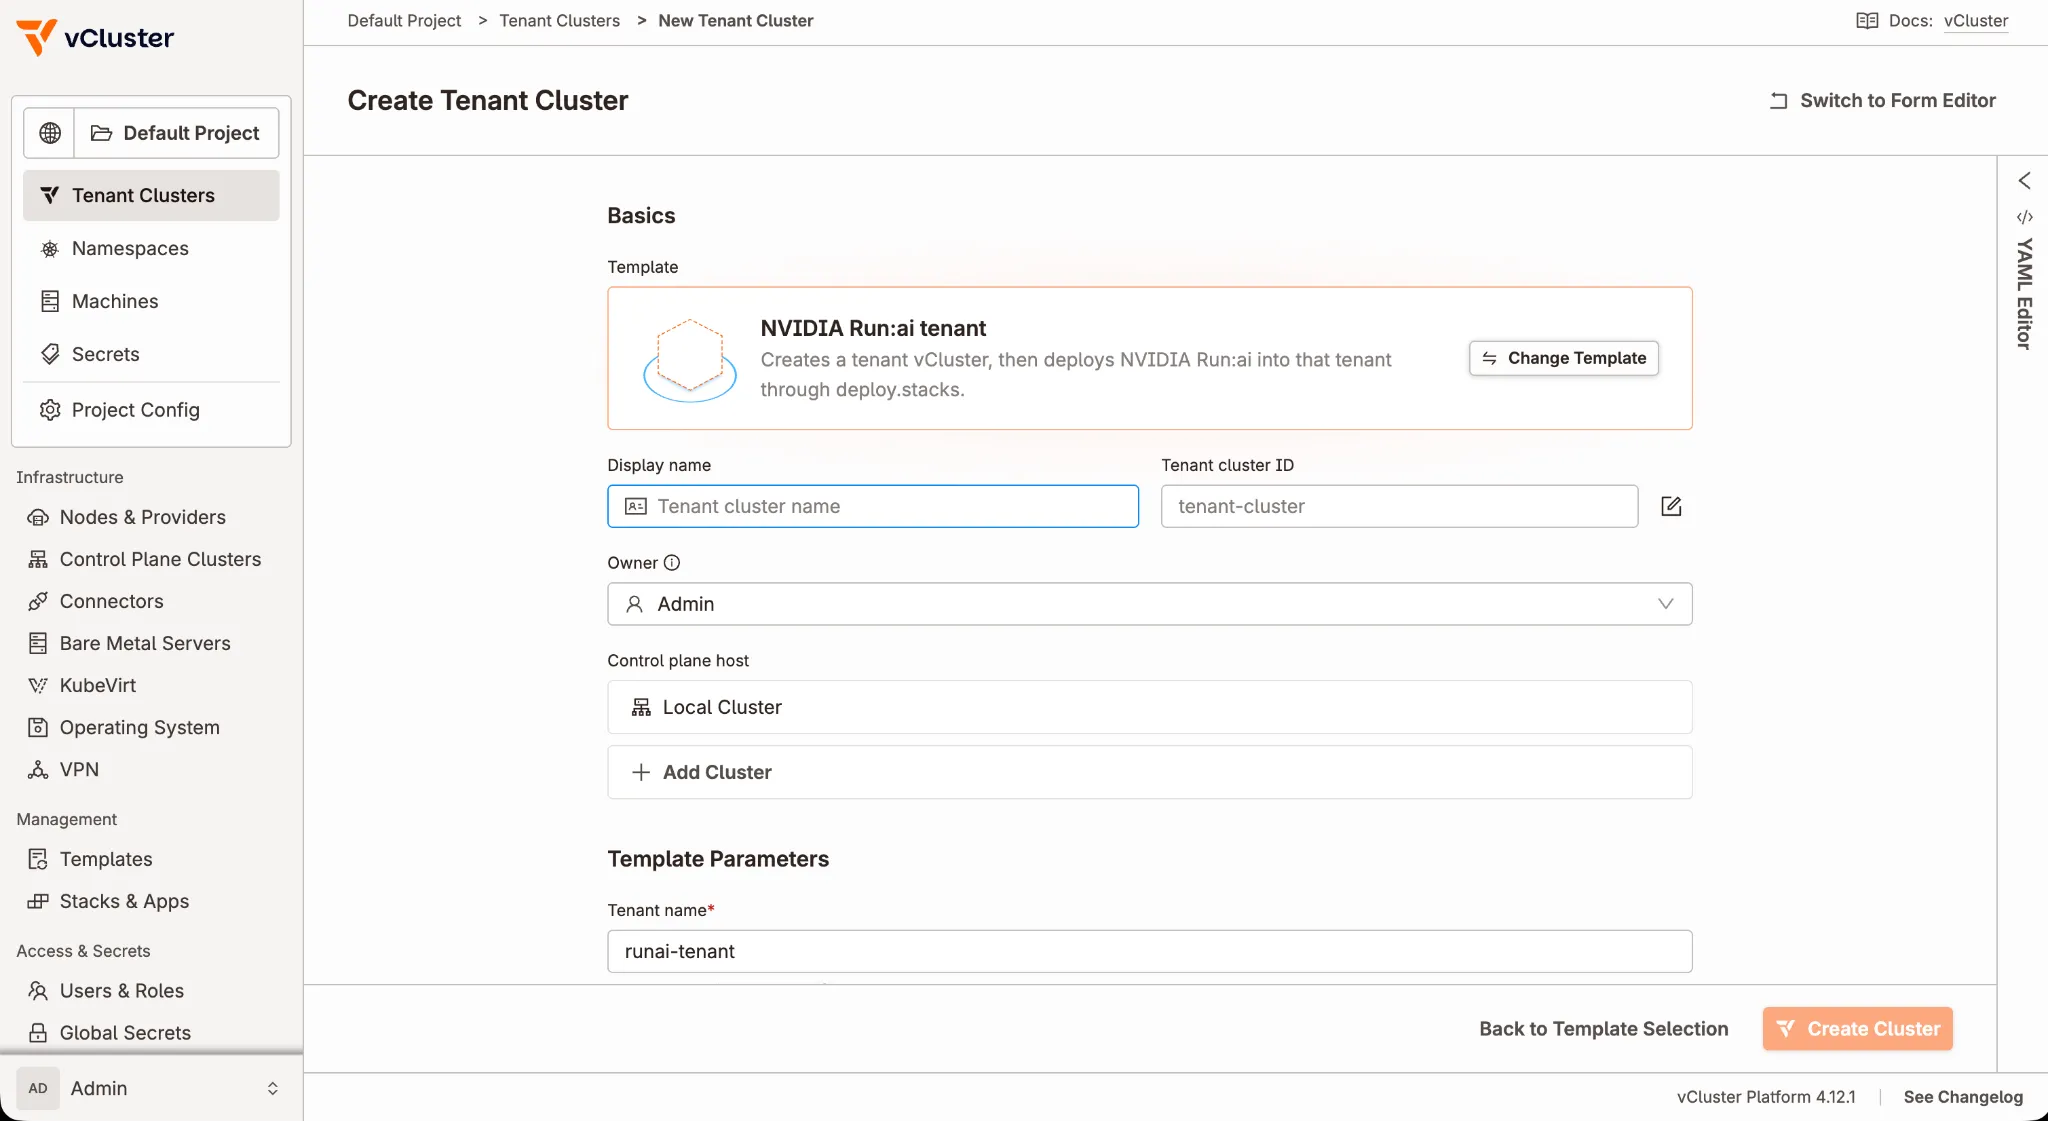
Figure 6: The creation form connects a tenant cluster to the selected template and host. Keep the distinction between the tenant-cluster ID and the NVIDIA Run:ai tenant-name parameter visible.
Fill in the template parameters using values from your environment:
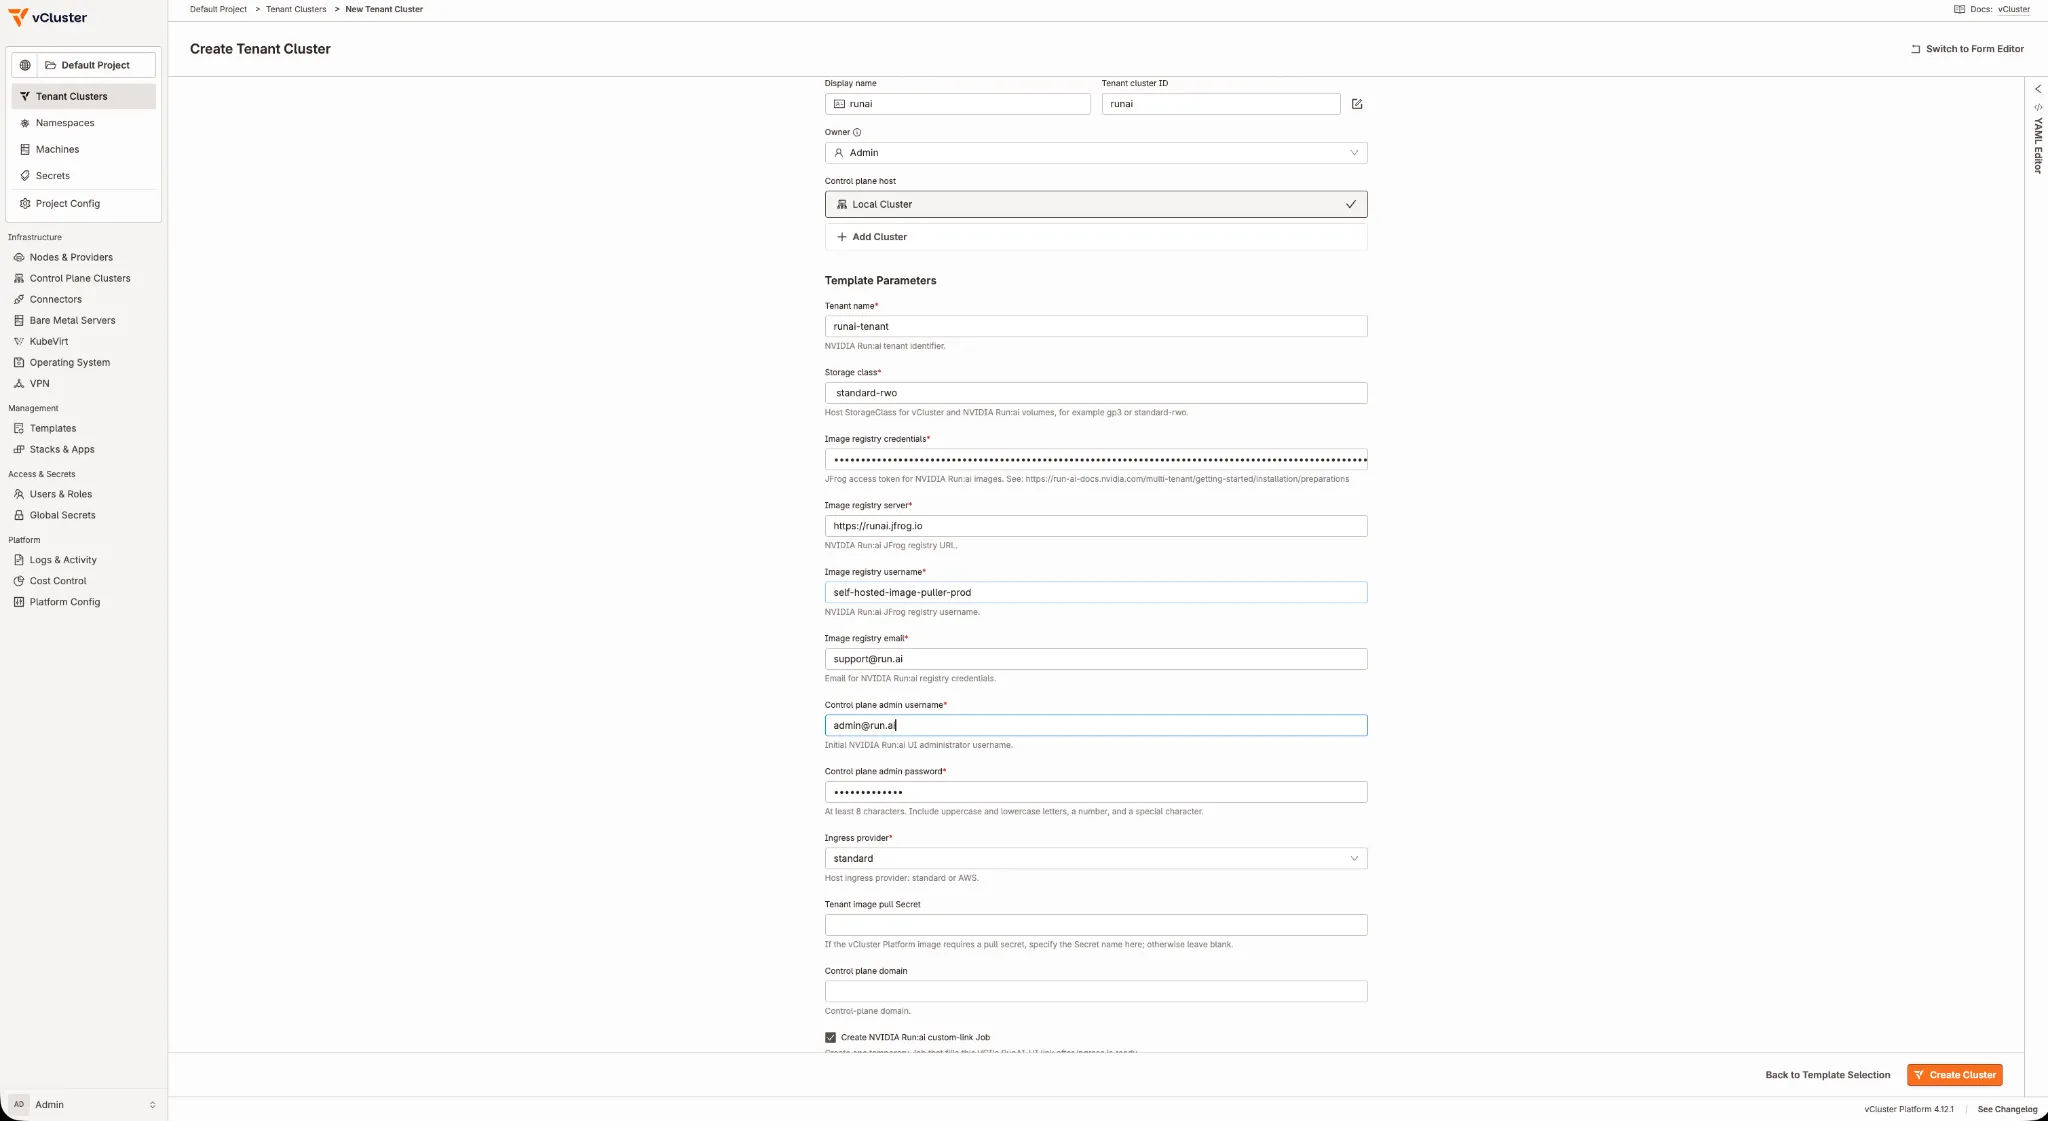
Figure 7: The demo form collects storage, registry access, administrator credentials, and ingress settings. Use your own values; the masked fields are required deployment inputs.
Platform creates the StackInstance for the tenant. Start with its task status through the Platform management API:
vcluster platform connect management
kubectl get stackinstances -A
The tenant status page provides another view:
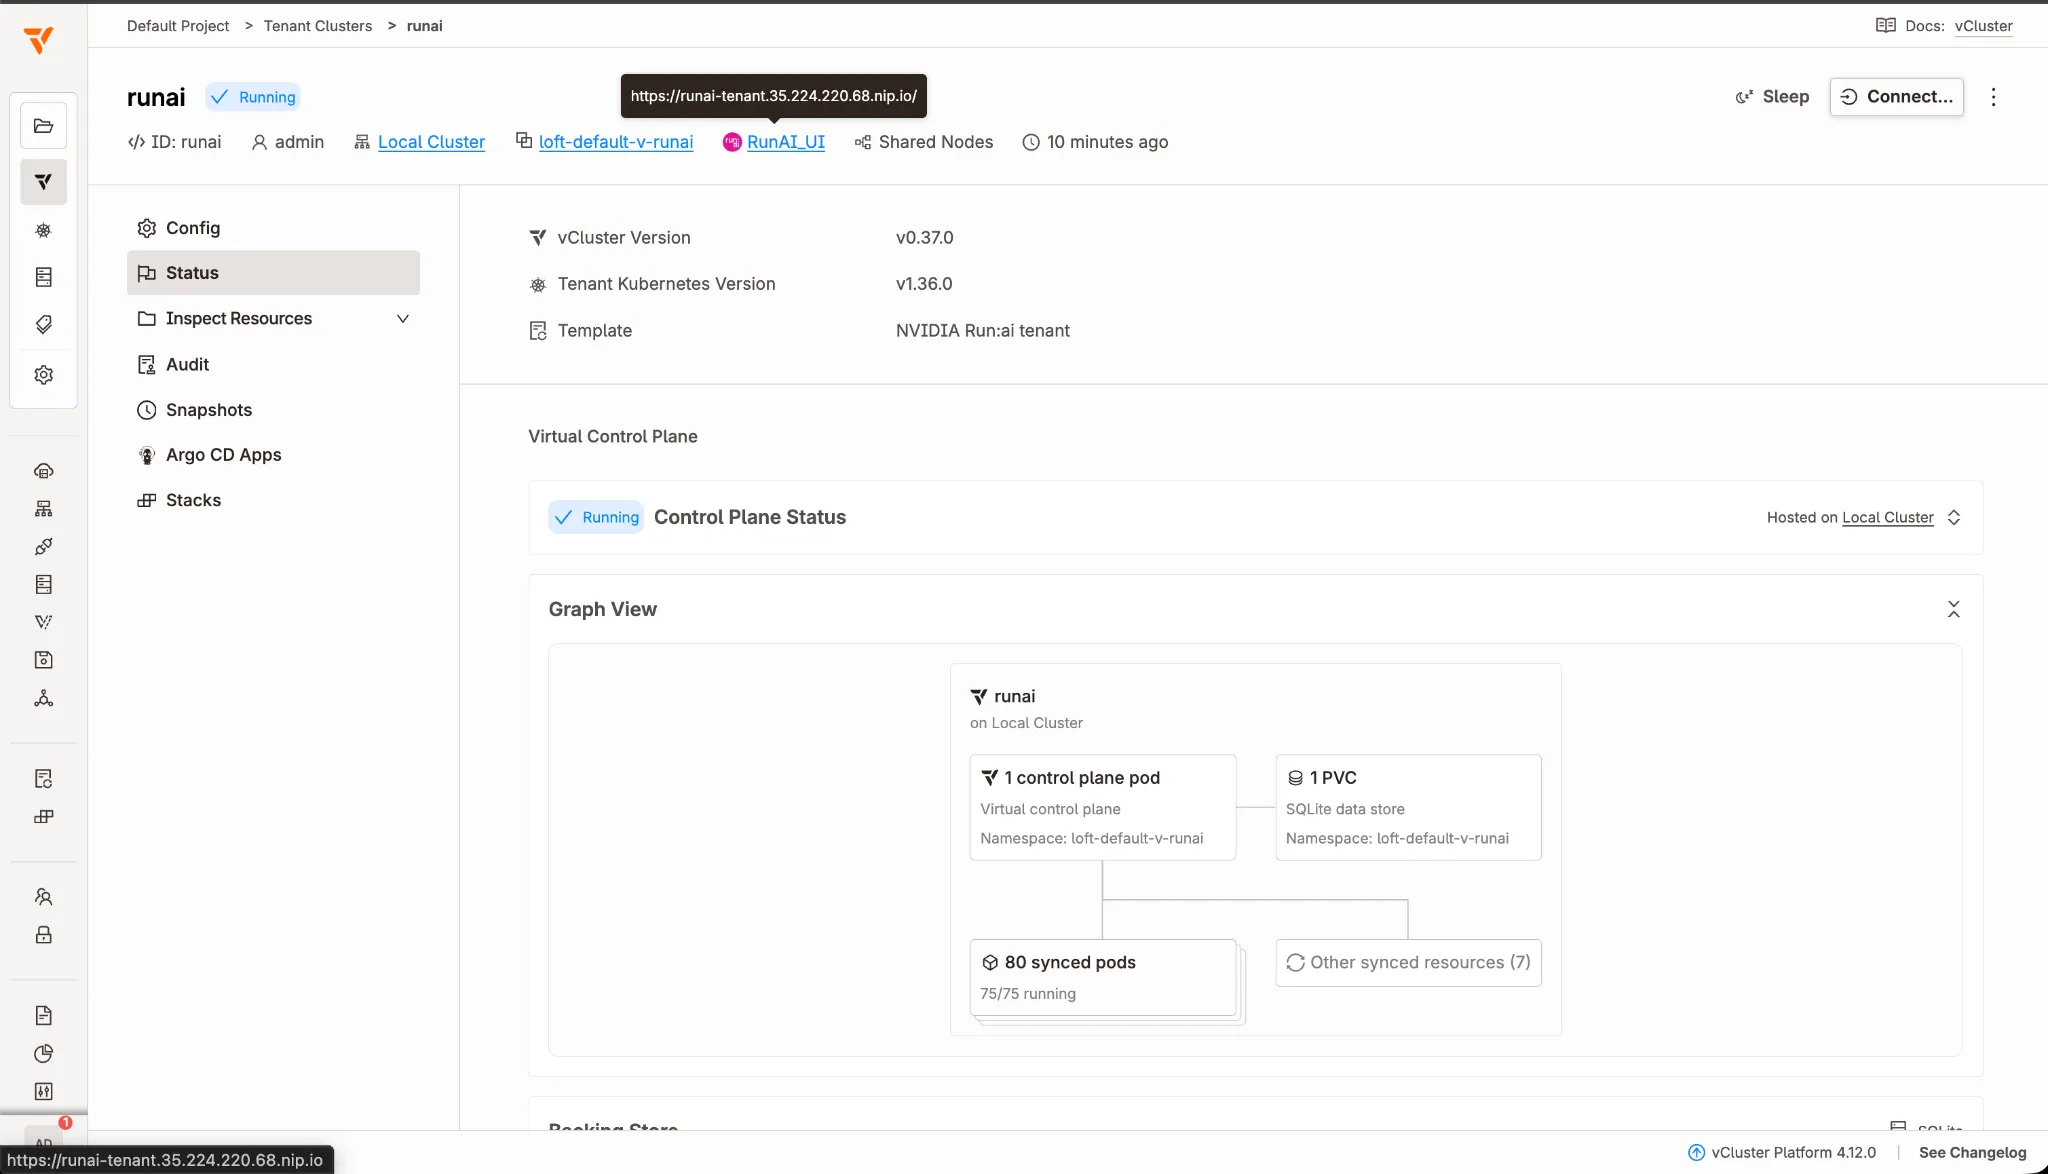
Figure 8: The captured tenant is Running and has a RunAI_UI link. The graph reports synced pods and a running count, but this page alone does not establish that every application is ready or that a GPU workload has executed.
Use the RunAI_UI link on the tenant page, if present, or the endpoint published by your deployment. Sign in with the NVIDIA Run:ai administrator account configured in Step 3.
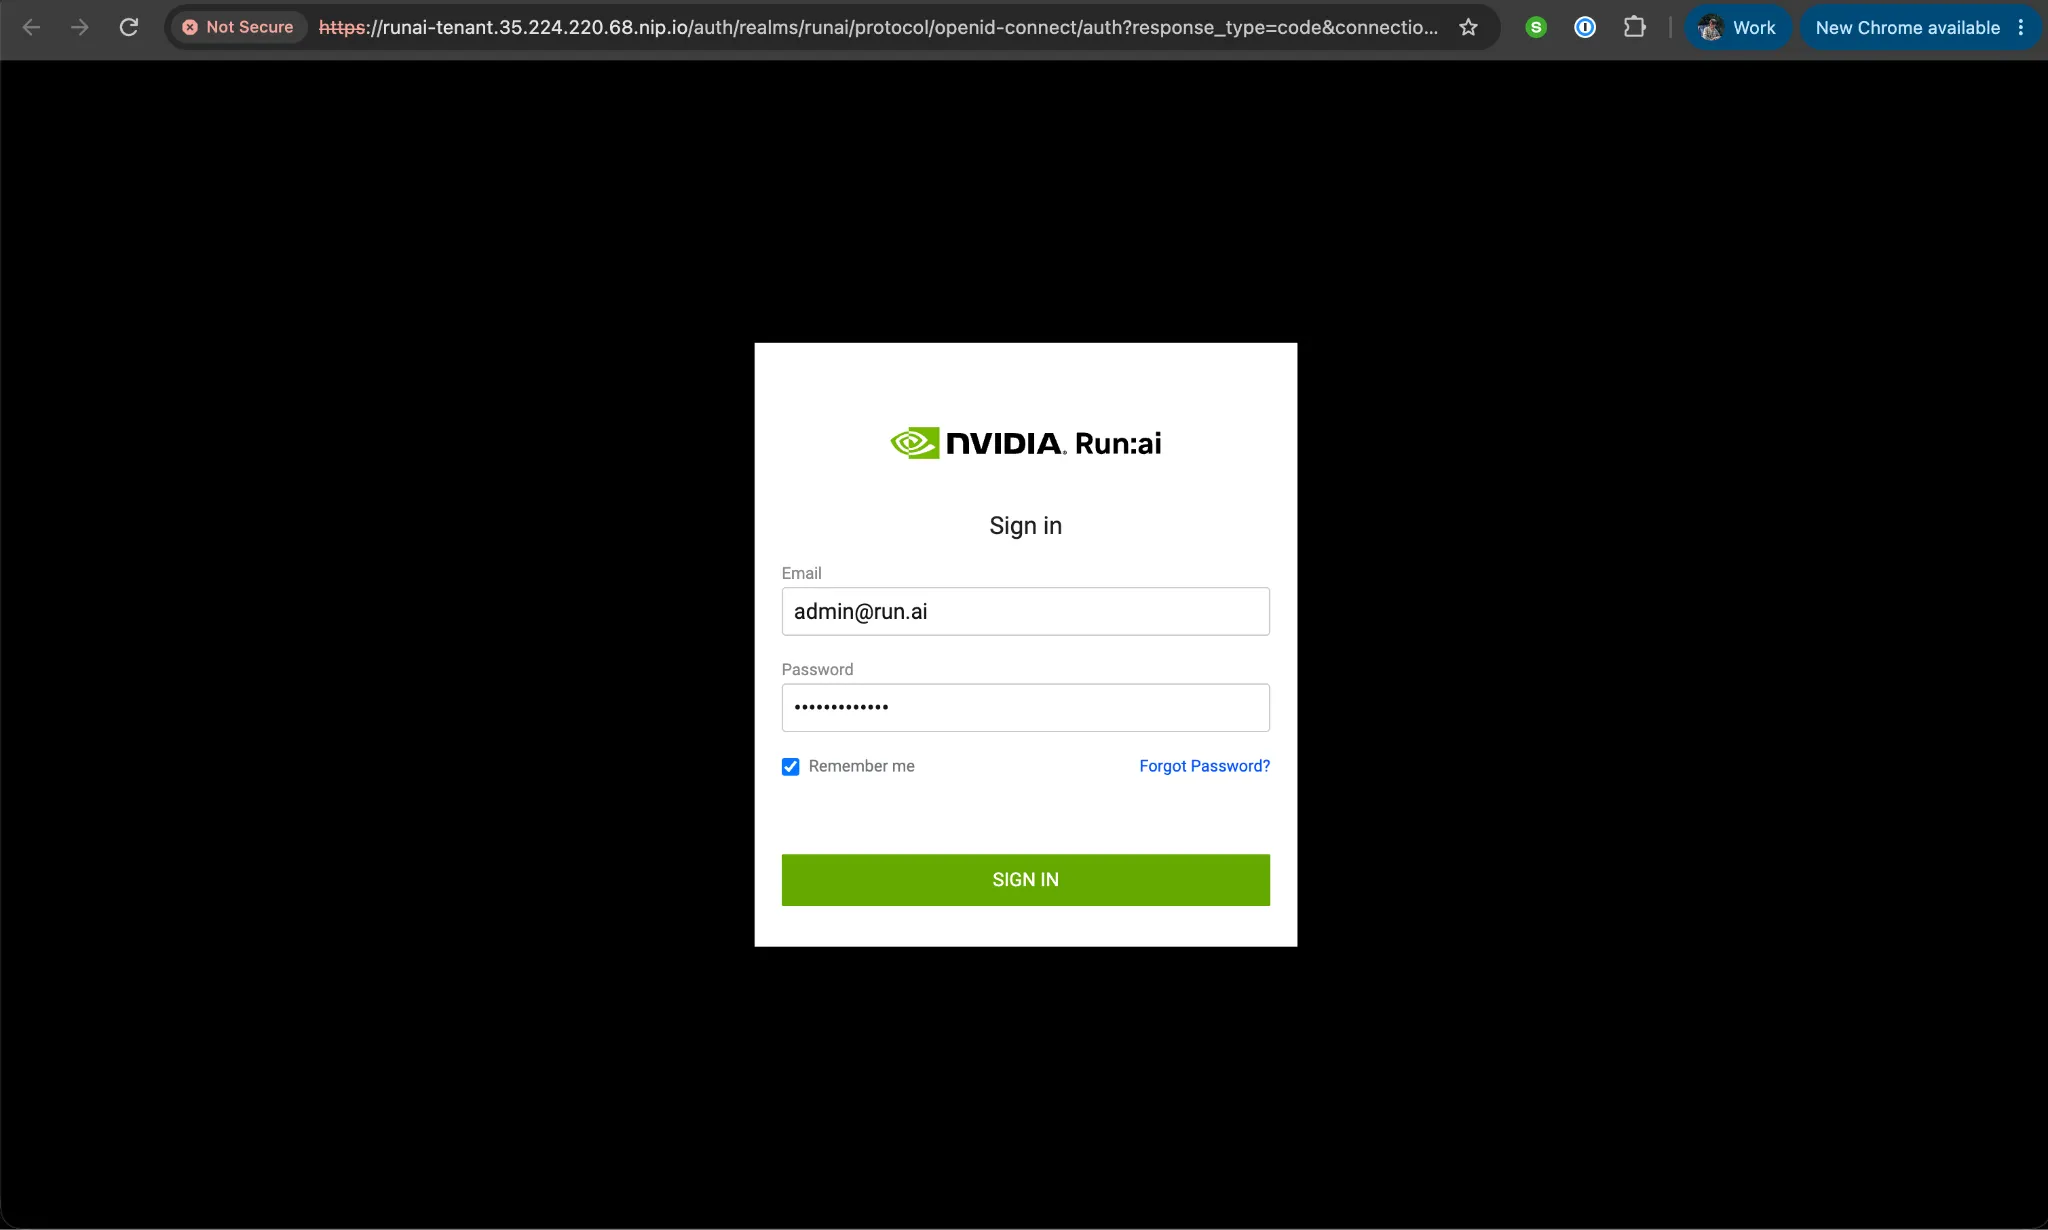
Figure 9: The NVIDIA Run:ai sign-in screen is reachable through the deployed ingress. It uses the NVIDIA Run:ai account, separate from the Platform login.
Note: The captured demo uses a self-signed certificate, which explains the browser's certificate warning. For a shared or production endpoint, configure a domain you control and an appropriate trusted certificate. Do not carry a demo certificate bypass into the production instructions.
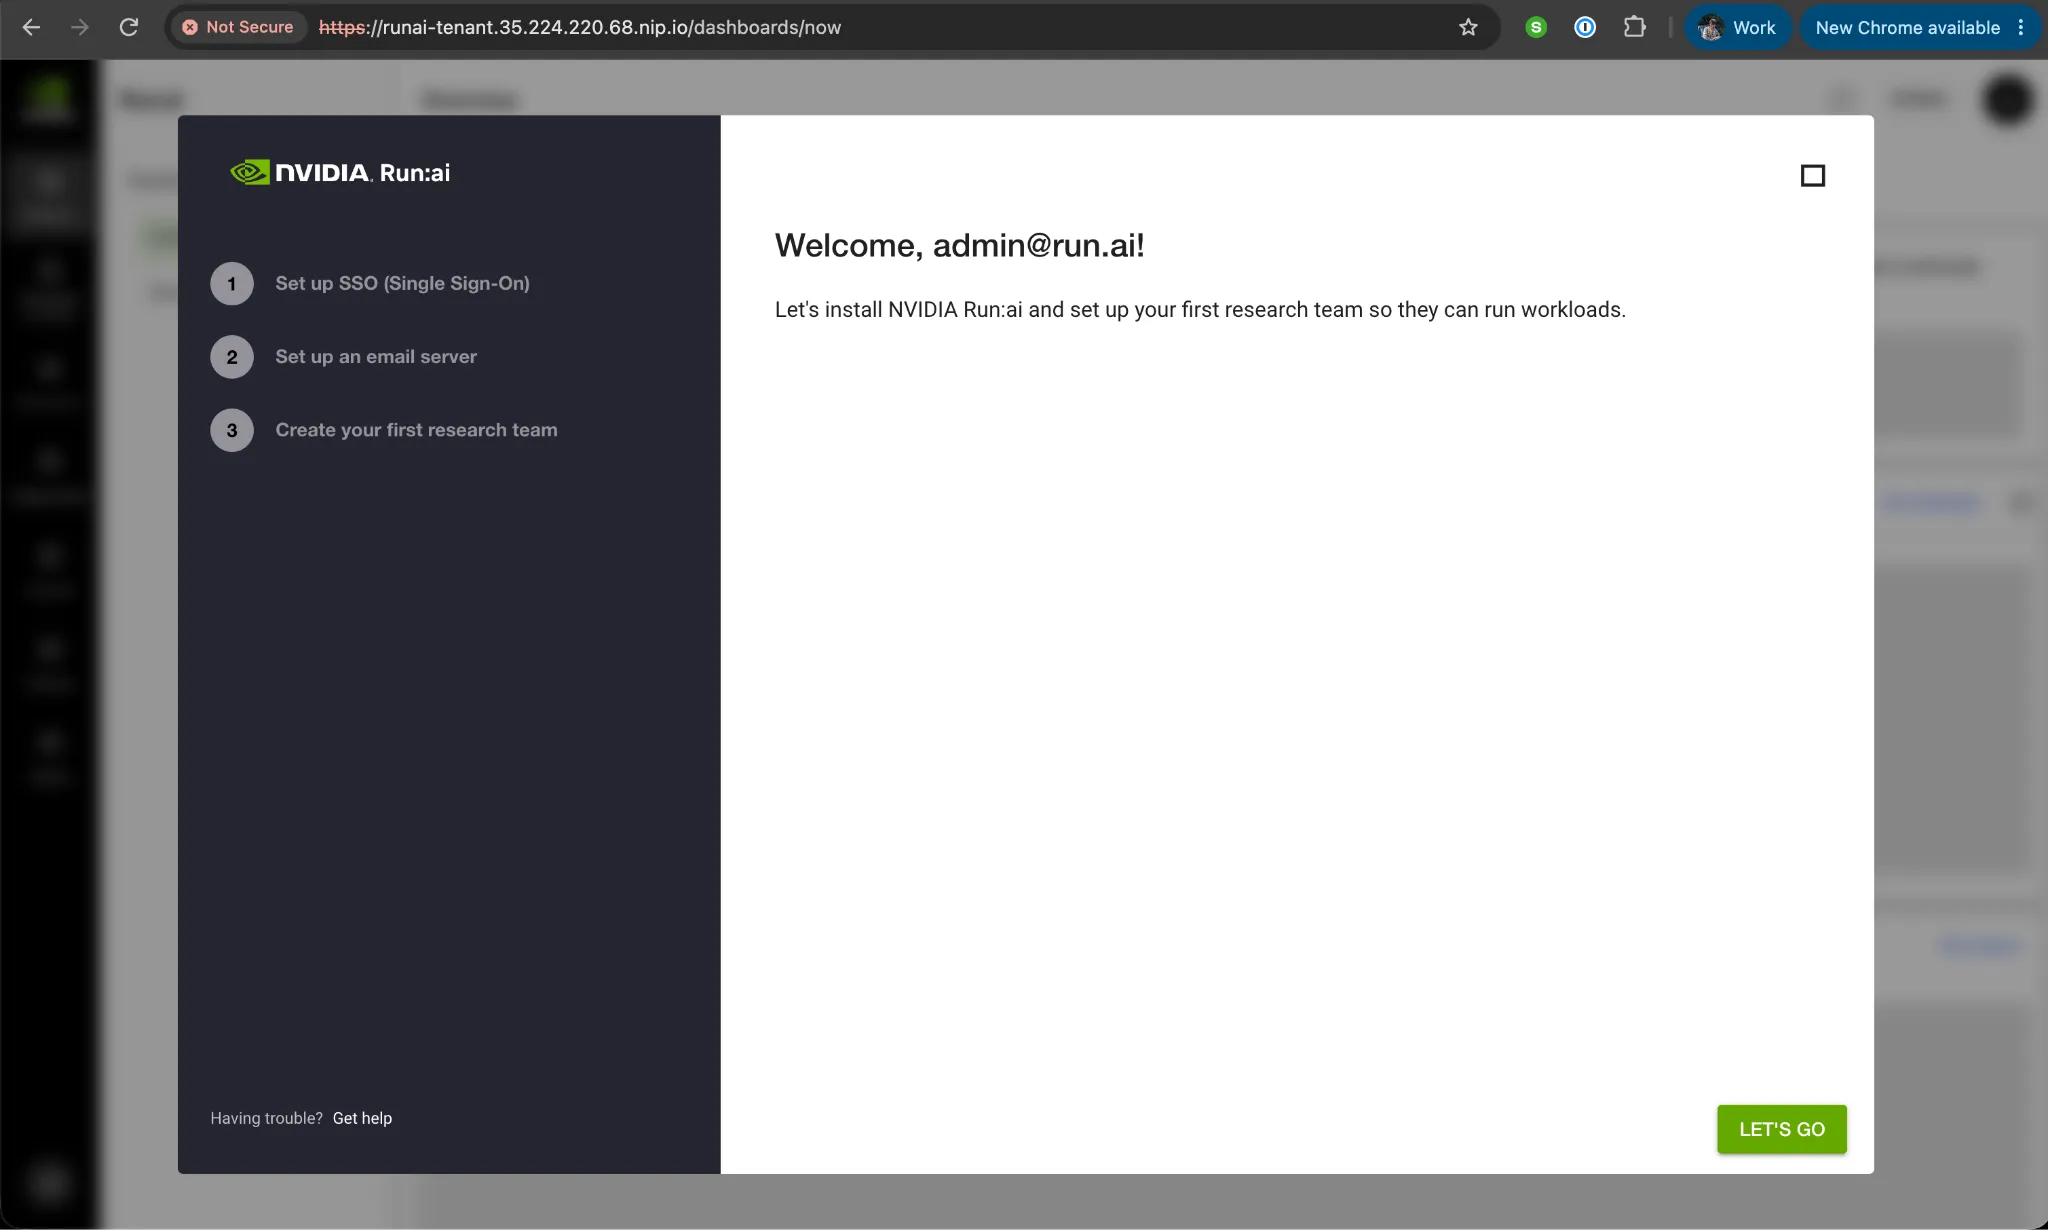
Figure 10: The welcome screen confirms that the captured demo reached authenticated NVIDIA Run:ai onboarding. It does not show a completed project setup, a submitted workload, or GPU performance results.
Complete the onboarding appropriate to your environment, then check that the registered cluster appears in NVIDIA Run:ai and that its GPU resources are visible. At this point, we have moved from installing components to checking whether the platform can be used.
The same pattern works when your platform needs a different storage default, another application, or an additional configuration task. Start with the dependencies: what must exist first, what indicates readiness, and what value does the next component need?
Certified templates are read-only and can be replaced by a Platform upgrade. Create a separate template for your changes. In Management > Stacks & Apps, open the certified Stack's CR view, copy its YAML, and choose Create Stack Template. Give it a new metadata.name, remove the vcluster.com/certified annotation and server-managed metadata, and remove status if present in the export.
For the CLI route, reconnect to the Platform management API before exporting:
vcluster platform connect management
kubectl get stacktemplates.management.loft.sh \
  run-ai-dedicated-control-plane -o yaml > my-runai-stack.yaml
Edit the exported file as described above, then apply it:
kubectl apply -f my-runai-stack.yaml
To use it through tenant creation, also copy the runai-tenant VirtualClusterTemplate and change the StackTemplate reference in its deploy.stacks entry to your new template. Expose or pass the parameters your environment needs, then create a fresh test tenant from that copied template. Updating a StackTemplate without connecting it to a StackInstance or tenant template does not deploy it anywhere.
When adding tasks, use dependsOn for actual readiness dependencies. Use declared parameters for values supplied by the user, and outputs for values discovered during deployment. If a task consumes another task's output, it must also declare that dependency. Keep credentials in the sensitive Secret-output path.
To note: StackTemplates are resolved during reconciliation and do not have Stack revisions. A change can affect existing instances. Test your copy with a fresh tenant, review pruning behavior, and retain the tested NVIDIA Run:ai chart versions and task names unless you have validated the resulting changes. Changing runaiVersion alone does not update the pinned charts. Your custom copy also becomes your responsibility to maintain when the certified bundle changes.
Once NVIDIA Run:ai is available, create a project for the team or experiment that will use it. An NVIDIA Run:ai project maps workloads to a Kubernetes namespace and controls access and resource allocation. It is separate from the vCluster Platform project that contains the tenant cluster.
In NVIDIA Run:ai, open Organization > Projects, select the registered cluster, and choose +NEW PROJECT. For this example:
Use the NVIDIA Run:ai project guide for the fields in your release. Creating a project without resource assignment can leave it with zero guaranteed GPU quota.
The value of a Stack is not that it installs NVIDIA Run:ai. It is that the second tenant costs almost nothing. Dependency order, readiness gates, and the values passed between tasks are written down once, so adding the tenth team looks like adding the first: pick the template, supply the environment-specific inputs, watch the task graph. Start with one project and one workload, verify the result, and use that working configuration as the foundation for the next team.
Authoring your own is also a simple step. A StackTemplate is a list of tasks with dependsOn edges, a few declared parameters, and the outputs later tasks read. Start from the certified NVIDIA Run:ai template or the starter example, change one thing, test it on a fresh tenant cluster, and keep going. Your copy is a separate resource, so you own its upgrade path in exchange for controlling what it deploys.
Stuck, or want to compare notes with others building on this? Join us in the vCluster Slack.
Deploy your first virtual cluster today.
